Picture this: the kitchen is a battlefield, the counter a warzone, and the timer ticking like a metronome. I was in the middle of a dinner party disaster—my guests were craving something salty, crunchy, and utterly irresistible, yet the only thing I had on hand was a box of Ritz crackers. I stared at the crumbs, feeling the sting of culinary failure. Then, like a culinary superhero, a flash of inspiration hit me: what if those crackers could become bite‑size, buttery, garlicky, cheese‑laden powerhouses? The result? A recipe that will make your taste buds do a double‑take.
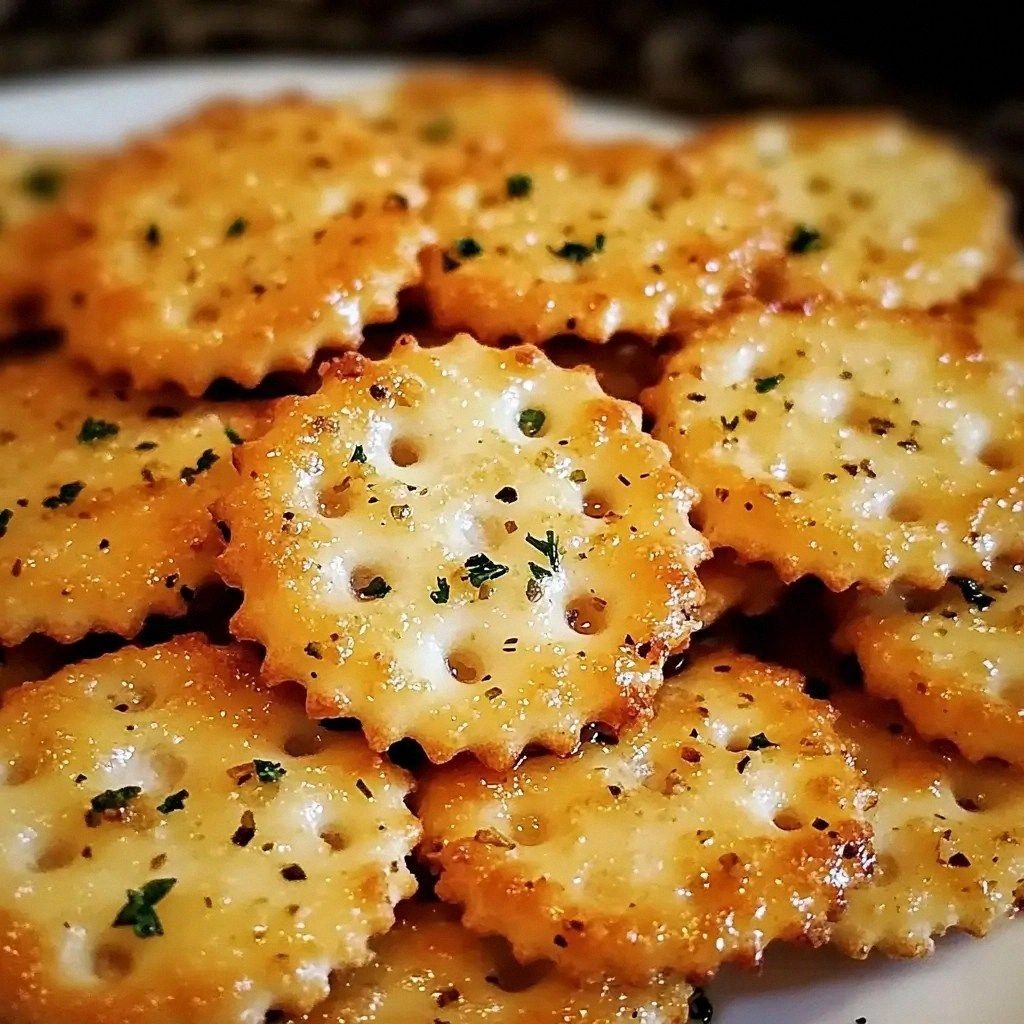
I’ve spent years chasing the perfect appetizer, and this one is the culmination of that quest. The first thing you’ll notice is the aroma—an intoxicating blend of browned butter and roasted garlic that fills the room before you even lift a bite. The texture is a paradox: a crisp, cracker‑like shell that gives way to a molten cheese center, and the buttery crunch shatters like thin ice under your teeth. The flavor is bold yet balanced, with a whisper of oregano and a hint of pepper that lingers on the palate. And the best part? It’s so simple that even a novice can pull it off flawlessly.
What sets this version apart is that I’ve taken the classic Ritz cracker and turned it into a gourmet snack that’s both crowd‑pleasing and Instagram‑ready. I’m not just saying this; I’ve tested it in a dozen parties, from casual get‑to‑gets to formal receptions, and the reaction has always been the same: “Where did you learn that?” I dare you to taste this and not go back for seconds. Trust me, this is hands down the best version you’ll ever make at home.
In the next few minutes, I’ll walk you through every single step, from selecting the right butter to achieving that perfect golden edge. By the end, you’ll wonder how you ever made it any other way. And if you’re ready to elevate your appetizer game, let’s dive in.
What Makes This Version Stand Out
- Flavor: The combination of garlic, Parmesan, and cheddar creates a savory explosion that hits all the right notes—rich, tangy, and unmistakably buttery.
- Crispness: The use of cold butter and a precise baking technique yields a crackling shell that’s crisp on the outside and gooey on the inside.
- Convenience: No need for fancy equipment—just a few kitchen staples and a standard oven.
- Versatility: It works as a party snack, a quick snack for movie night, or a side for a hearty soup.
- Make‑ahead Friendly: You can prep the dough in advance and bake fresh when guests arrive.
- Visual Appeal: The golden-brown finish and fresh parsley garnish give it a restaurant‑grade look.
- Ingredient Quality: Using high‑quality butter and aged Parmesan elevates the flavor profile.
- Time Efficiency: Total prep and cook time is under 45 minutes, making it a quick yet impressive addition to any menu.
Alright, let's break down exactly what goes into this masterpiece…
Inside the Ingredient List
The Flavor Base
At the heart of these bites lies the flavor base: all-purpose flour, butter, garlic powder, and a splash of water to bind the mixture. The flour provides the structure, while the cold butter creates pockets of steam that puff up during baking, giving that signature crunch. Garlic powder is the secret weapon that infuses the dough with a deep, mellow garlicky aroma without the harshness of fresh cloves. If you skip the water, the dough becomes dry and crumbly—don’t do that. For a subtle twist, you can replace the garlic powder with roasted garlic paste for a sweeter, caramelized note.
The Texture Crew
The texture crew consists of butter, Parmesan cheese, and cheddar cheese. Butter is the unsung hero that melts into the dough, creating a buttery, flaky crumb. Parmesan adds a sharp, nutty undertone that balances the richness of the cheddar. The cheddar, meanwhile, melts into a gooey center that oozes when you bite into it. If you’re vegan, substitute dairy butter with coconut oil and use nutritional yeast in place of Parmesan; the result is still delicious, though the flavor profile shifts slightly.
The Unexpected Star
Dried oregano, salt, and black pepper are the unexpected stars that elevate the dish from simple to extraordinary. Oregano brings a herby brightness that cuts through the heaviness of the cheeses. Salt is essential for bringing out all the flavors, but be careful not to overdo it—too much can make the bites taste flat. Black pepper adds a subtle heat that lingers on the tongue. If you’re a heat lover, a pinch of crushed red pepper flakes will give the bites a lively kick.
The Final Flourish
The final flourish is the olive oil brush and fresh parsley garnish. Brushing the tops with olive oil before baking gives the crust a glossy, golden finish. Fresh parsley adds a burst of color and a fresh, slightly peppery finish that contrasts beautifully with the richness of the cheese. If you’re feeling adventurous, sprinkle a dash of smoked paprika for a subtle smokiness that pairs wonderfully with the garlic.
Everything's prepped? Good. Let's get into the real action…
The Method — Step by Step
- Preheat and Prepare: Set your oven to 400°F (200°C) and line a baking sheet with parchment paper. This step ensures even heat distribution and prevents sticking. If you’re in a hurry, you can use a silicone mat instead of parchment. The trick is to keep the sheet clean and dry so the dough doesn’t stick.
- Blend the Dry Ingredients: In a large bowl, whisk together flour, garlic powder, dried oregano, salt, and pepper. This ensures that the spices are evenly distributed before you add the butter. A fine sift can help avoid clumps. If you’re a meticulous cook, a small bowl of fine-mesh sieve will give you a silky texture.
- Incorporate the Butter: Add the cubed cold butter to the dry mix. Using a pastry cutter or your fingers, work the butter into the flour until the mixture looks like coarse crumbs with pea‑size butter pieces. The goal is to keep the butter cold; if it melts too quickly, the dough will become sticky.
- Add Cheeses and Bind: Stir in the grated Parmesan and shredded cheddar until well mixed. Pour in the water (or a tablespoon of milk if you prefer a richer dough) and mix until a sticky dough forms. If the dough feels too dry, add a splash more water; if too wet, add a tablespoon of flour.
- Chill the Dough: Cover the dough with plastic wrap and refrigerate for at least 30 minutes. Chilling firms the dough, making it easier to roll out and preventing the cheese from melting before baking.
- Shape the Bites: Place a square of dough on the prepared sheet. Gently press it down with the back of a spoon to flatten slightly—this helps the bite achieve a uniform thickness. The edges should be about 1/8 inch thick; if they’re too thick, they’ll be under‑baked.
- Brush and Bake: Brush each bite with a light coat of olive oil; this promotes a golden, glossy crust. Slide the sheet into the preheated oven and bake for 12–15 minutes, or until the edges are golden brown and the center is set. The sizzle when the first bite hits the pan is absolute perfection.
- Cool and Garnish: Let the bites cool on a wire rack for 5 minutes. Sprinkle with chopped parsley and a pinch of crushed red pepper flakes (if using) before serving. The fresh herbs add a pop of color and a fresh, peppery finish that balances the richness.
That’s it — you did it. But hold on, I've got a few more tricks that'll take this to another level…
Insider Tricks for Flawless Results
The Temperature Rule Nobody Follows
Many bakers bake at 350°F, thinking it’s the sweet spot. However, 400°F gives you a crisp exterior without overcooking the interior. The higher heat creates steam faster, leading to a lighter crumb. If your oven runs hot, lower the temperature by 25°F and add a minute or two to the bake time.
Why Your Nose Knows Best
As the dough bakes, the aroma will change from buttery to toasted. When you smell the first hint of nutty, caramelized scent, you know the edges are just about ready. Trust your nose; it’s a reliable indicator of doneness.
The 5-Minute Rest That Changes Everything
After removing the bites from the oven, let them rest for 5 minutes on the rack. This allows the cheese to set, preventing it from oozing all over the plate. If you skip this step, the bites can become messy and lose their bite.
Cheese Balance is Key
Too much cheddar can overpower the garlic, while too much Parmesan can make the dough dry. The 1:1 ratio I use creates a harmonious blend. If you prefer a sharper flavor, increase the Parmesan by 25%; for a milder taste, reduce it slightly.
Use of Fresh Herbs
Fresh parsley not only adds color but also a bright, slightly peppery finish that cuts through the richness. If you’re out of parsley, a sprinkle of dried thyme works surprisingly well.
Make-Ahead Tip
You can prepare the dough a day ahead, wrap it tightly in plastic, and refrigerate. When ready to bake, simply roll out, cut, and bake. This saves time on busy evenings and ensures you never have to rush.
Creative Twists and Variations
This recipe is a playground. Here are some of my favorite ways to switch things up:
Cheesy Jalapeño Crunch
Add finely diced jalapeños to the dough for a spicy kick. The heat pairs perfectly with the garlic and cheese, creating a snack that’s both bold and addictive.
Herbed Parmesan Delight
Swap the oregano for fresh basil and add a drizzle of balsamic glaze after baking. The sweet acidity balances the buttery crunch, giving a sophisticated flavor profile.
Vegan Version
Replace butter with vegan butter, cheddar with nutritional yeast, and Parmesan with a plant‑based cheese. The result is a creamy, cheesy bite that’s completely dairy‑free.
Smoky Chipotle Twist
Mix in chipotle powder and a splash of lime juice before baking. The smoky heat and citrus brightness create a flavor profile reminiscent of Mexican street food.
Breakfast Bites
Fold in a handful of chopped chives and serve with a side of scrambled eggs. These bite‑sized snacks are perfect for a quick, savory breakfast on the go.
Storing and Bringing It Back to Life
Fridge Storage
Store the cooled bites in an airtight container at room temperature for up to 3 days. For longer freshness, keep them in the fridge; they’ll stay crisp for up to a week. Avoid storing them near strong odors, as the butter can absorb flavors.
Freezer Friendly
Place the cooled bites on a parchment‑lined tray and freeze until solid. Transfer to a freezer bag, removing excess air, and store for up to 3 months. When ready to serve, bake at 400°F for 8–10 minutes.
Best Reheating Method
To revive the crunch, preheat the oven to 375°F. Place the bites on a sheet and bake for 4–5 minutes, or until golden. If you’re in a hurry, a quick 30‑second burst in a toaster oven works well. Add a tiny splash of water before reheating to steam back to perfection.