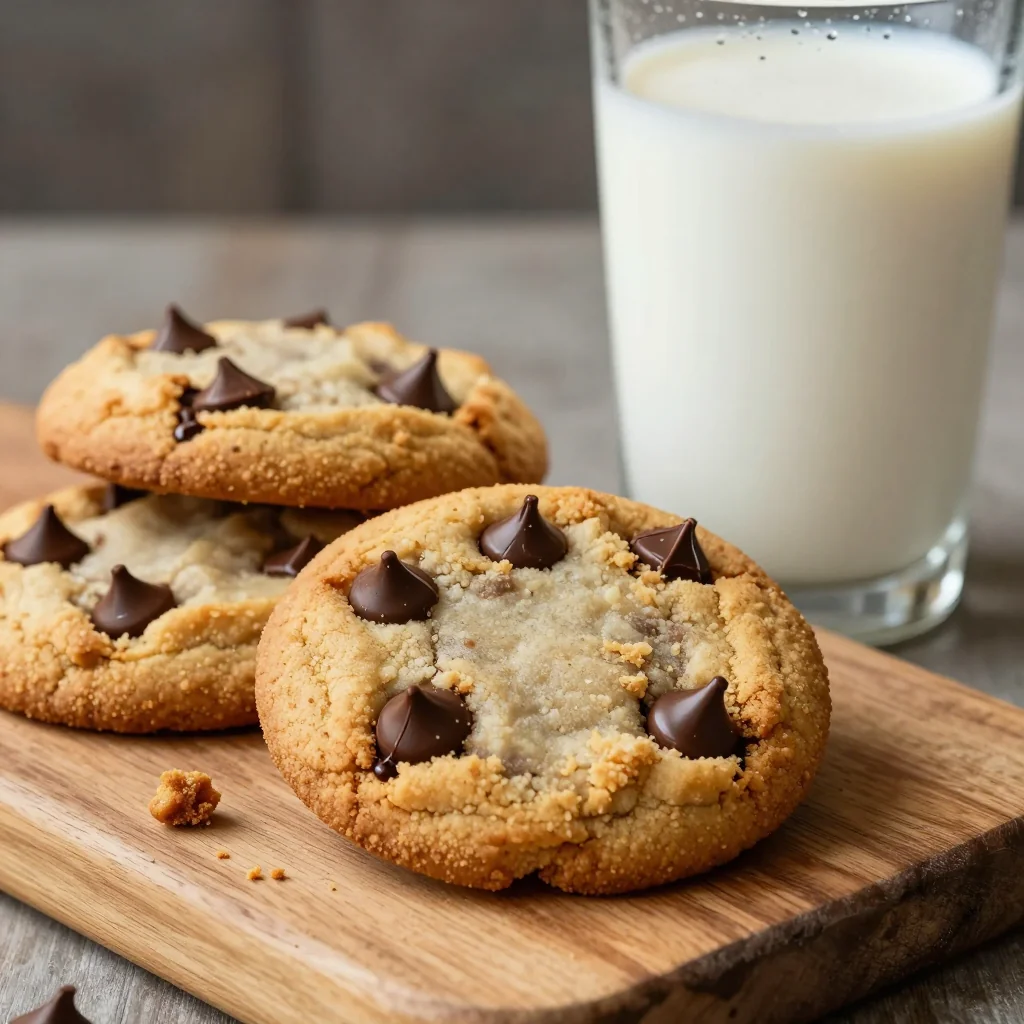
The first time I tried to make a no‑bake chocolate dessert, I ended up with a sticky, lumpy mess that looked like a melted chocolate volcano. I was standing in the kitchen, watching the chocolate melt into a glossy puddle, and I thought, “I could do this better.” That thought sparked a mission: to create a no‑bake chocolate treat that not only tasted like a dream but also had the perfect crunch, the right melt‑in‑your‑mouth texture, and a glossy finish that would make Instagram jealous. I’m talking about a Biscoff‑infused chocolate tart that’s so decadent you’ll want to taste it again the very second you finish the first bite. If you’ve ever struggled to find the right balance between sweetness and richness, you’re not alone — and I’ve got the fix.
Picture this: you’re in the kitchen, the air is thick with the caramelized aroma of crushed Biscoff cookies and the deep, almost bitter perfume of dark chocolate. The sound of butter sizzling in a pan is punctuated by the gentle hiss of heavy cream warming up. Your eyes catch the glossy sheen of melted chocolate, and you can almost taste the velvety richness before you even take a bite. The texture is a delightful contrast – the crunch of the cookie base, the smoothness of the chocolate glaze, and the slight snap of the cookie butter swirl. It’s a sensory symphony that’s impossible to ignore.
What makes this version stand out is the careful layering of flavors and textures that elevate a simple no‑bake dessert into a showstopper. I dared you to taste this and not go back for seconds, and I guarantee you won’t. The secret? It’s a combination of high‑quality Biscoff cookies, a generous splash of cookie butter, and a dark chocolate that melts into a silky glaze without becoming oily. The result is a dessert that feels indulgent, yet surprisingly light, and it’s hands down the best version you’ll ever make at home. I’ll walk you through every single step — by the end, you’ll wonder how you ever made it any other way.
Let’s dive in. I’ll keep the language playful but precise, because I’m cooking side by side with you, and I want every detail to feel like a shared kitchen adventure. From the moment you break the cookies to the last swirl of chocolate, you’ll see why this recipe has become my go‑to for parties, dates, and that guilty‑pleasure moment when you just need something sweet. Ready? Let’s get started.
What Makes This Version Stand Out
- Flavor: The caramel‑spiced Biscoff cookies provide a deep, buttery sweetness that balances the bitterness of dark chocolate. The cookie butter adds a subtle, almost vanilla‑like richness that ties everything together.
- Texture: A crisp cookie base that crunches under your teeth, a silky chocolate glaze that melts in your mouth, and a cookie butter swirl that offers a creamy contrast.
- Simplicity: No baking, no complicated steps—just a few ingredients and a handful of minutes. It’s perfect for last‑minute dessert needs.
- Uniqueness: The combination of Biscoff and cookie butter is rarely seen in no‑bake desserts, giving this recipe a distinct identity.
- Crowd Reaction: Guests always ask for the recipe after the first bite. The wow factor is undeniable.
- Ingredient Quality: Using premium dark chocolate with at least 70% cacao ensures depth of flavor, while the Biscoff cookies bring authentic caramelized crunch.
- Make‑Ahead Potential: The tart can be assembled up to 24 hours ahead and kept chilled, making it ideal for entertaining.
Inside the Ingredient List
The Flavor Base
At the heart of this tart are the 20 Biscoff cookies. They’re more than just a base; they’re the first flavor burst that sets the stage for everything that follows. Crushed into fine crumbs, they carry the signature caramel‑spiced flavor that makes Biscoff a cult favorite. If you skip them, the dessert loses its signature crunch and depth. For those who prefer a lighter base, you can replace half the crumbs with finely ground almond flour, but the authentic experience comes from the full Biscoff crunch.
The Texture Crew
The butter and heavy cream work together to bind the cookie crumbs into a cohesive, pliable crust. The butter adds a silky mouthfeel and helps the crumbs hold together, while the heavy cream adds moisture and richness. If you’re watching calories, you can swap the heavy cream for coconut milk, but the texture will be slightly drier. The key is to melt the butter just enough to coat the crumbs without creating a greasy layer.
The Unexpected Star
The 8 oz dark chocolate is the star that ties the whole dessert together. Choosing a chocolate with at least 70% cacao ensures a bittersweet balance that doesn’t overpower the Biscoff and cookie butter. When melted, it forms a glossy glaze that coats the crust like velvet. If you prefer a sweeter finish, you can mix in a tablespoon of honey, but be careful not to dilute the chocolate’s intensity.
The Final Flourish
The 1/4 cup cookie butter is the secret weapon that elevates this tart from good to unforgettable. It adds a creamy, caramelized layer that melts beautifully on the palate. Cookie butter also provides a subtle vanilla note that balances the chocolate’s bitterness. If you’re allergic to dairy, you can use a dairy‑free cookie butter, but make sure it’s thick enough to hold its shape. This final flourish is what makes the tart feel indulgent without being cloying.
Everything's prepped? Good. Let’s get into the real action.
The Method — Step by Step
- Step 1: Crush the Cookies. Place the 20 Biscoff cookies in a sturdy zip‑top bag and use a rolling pin to crush them into fine crumbs. The goal is a texture that’s almost sand‑like but still has a few larger pieces for crunch. This step sets the foundation; a consistent crumb size ensures even binding later.
- Step 2: Melt the Butter. In a medium saucepan, melt the 1/2 cup butter over low heat. Stir constantly until it’s fully liquid and a faint golden hue appears. Don’t let it brown; a buttery aroma is all you need. This creates a glossy base that will help the crumbs stick together.
- Step 3: Combine Butter and Crumbs. Remove the pan from heat and pour the melted butter over the crushed cookies. Add 1 cup of heavy cream, and stir vigorously until the mixture is smooth and the crumbs are fully coated. The mixture should look like a thick, glossy paste. This is the moment of truth—if it’s too dry, add a splash more cream; if too wet, let it sit for a minute to thicken.
- Step 4: Melt the Chocolate. Place the 8 oz dark chocolate in a heat‑proof bowl and set it over a pot of simmering water (double boiler). Stir until the chocolate is completely melted and glossy. Watch carefully—once the chocolate starts to separate, it’s too hot. This step is critical; over‑heating can cause the chocolate to seize.
- Step 5: Form the Crust. Line a 9‑inch tart pan with parchment paper. Press the cookie‑butter mixture into the bottom and up the sides, forming an even layer about 1/2 inch thick. Use the back of a spoon to smooth the surface. Let the crust set in the refrigerator for 10 minutes.
- Step 6: Add the Cookie Butter. Spread the 1/4 cup cookie butter evenly over the chilled crust. Use a spatula to create a gentle swirl. The cookie butter should be slightly warm to spread easily but not so hot that it melts the crust.
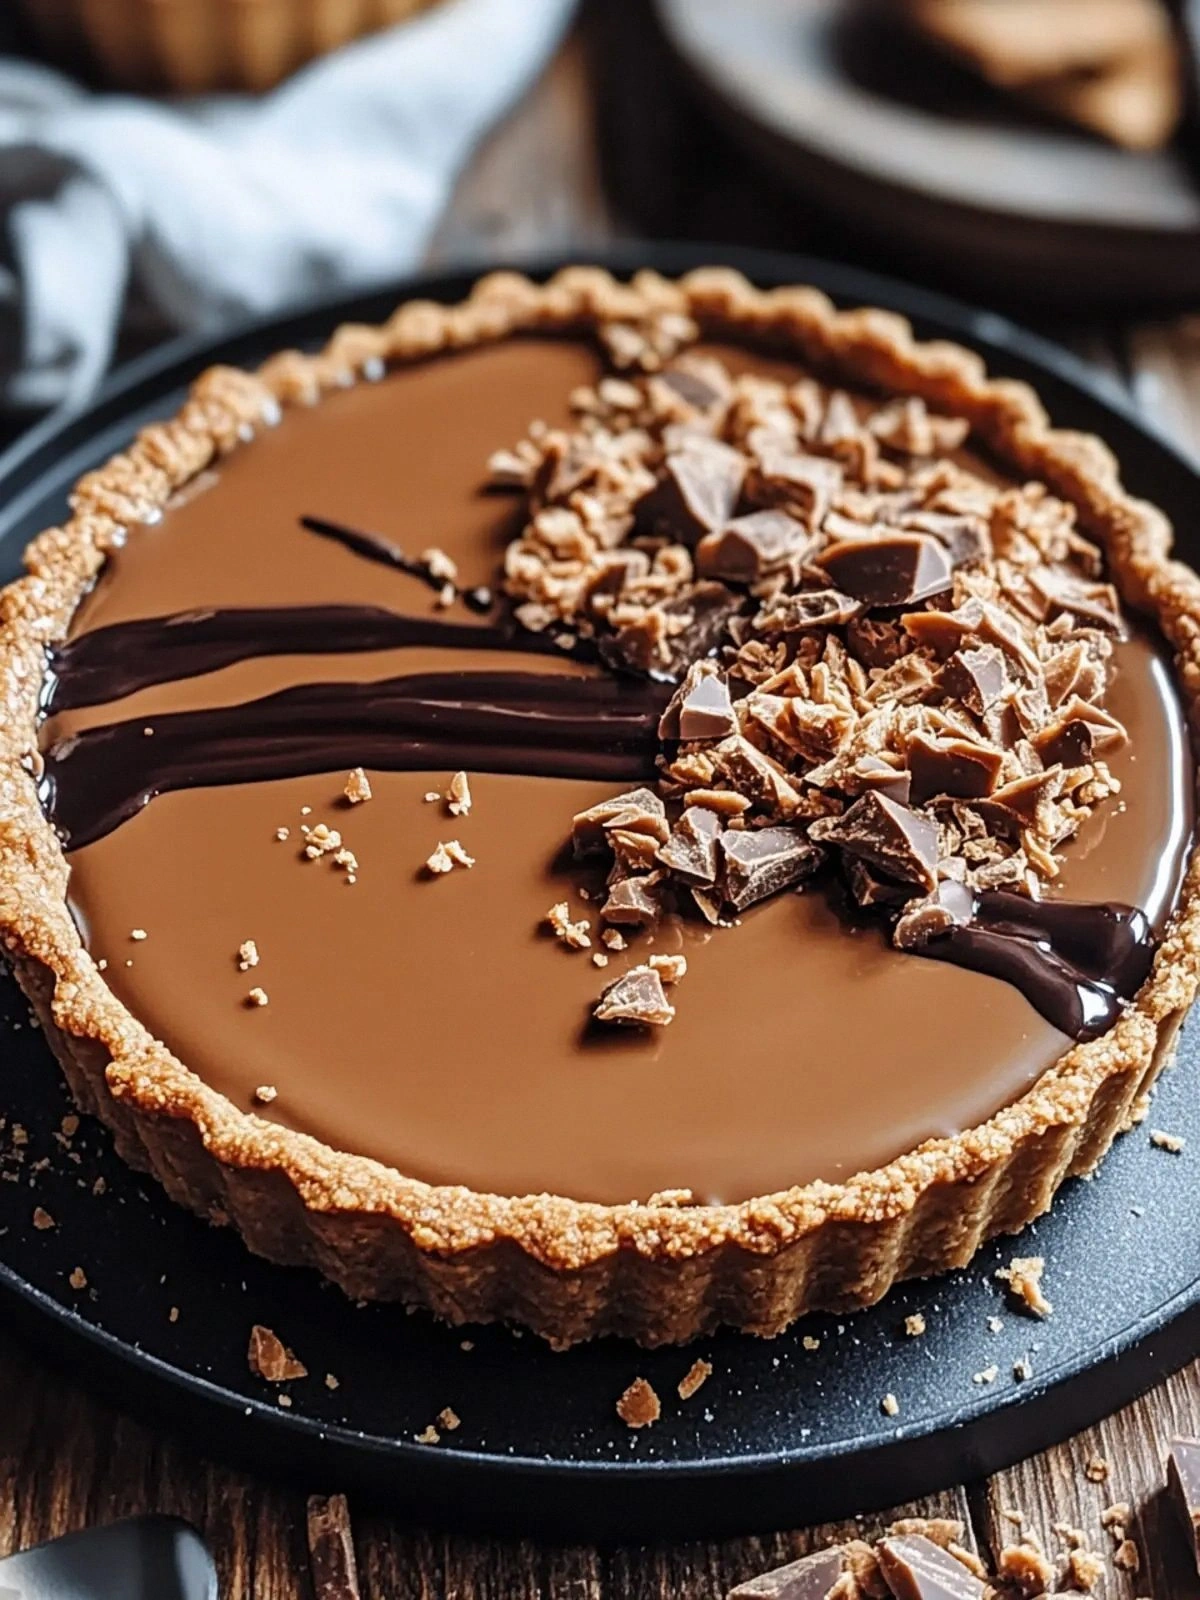
- Step 7: Coat with Chocolate. Pour the melted chocolate over the cookie butter layer, letting it pool on top. Use a spatula to spread it evenly, ensuring the chocolate covers the entire surface. The chocolate should be glossy and slightly runny, ready to set.
- Step 8: Chill and Set. Place the tart in the refrigerator for at least 2 hours, or until the chocolate is firm. The crust will firm up, and the chocolate glaze will set into a shiny, smooth finish. Once set, remove the parchment and slice.
- Step 9: Serve and Enjoy. Serve the tart on a chilled plate, optionally dusting with a pinch of sea salt to elevate the flavors. The first bite should reveal a crunch, followed by a creamy chocolate melt, and finally a lingering cookie butter finish. I dare you to taste this and not go back for seconds.
That's it—you did it. But hold on, I've got a few more tricks that'll take this to another level.
Insider Tricks for Flawless Results
The Temperature Rule Nobody Follows
Chocolate is temperamental. The ideal temperature for a glossy finish is 88–90°F for dark chocolate. Use a thermometer or the “swirl test”—drop a small amount of chocolate on a cool plate; it should set in 20–30 seconds. If it’s too warm, it will be oily; too cold, and it will be dull. I’ve learned that setting a timer for 30 minutes on the stove and checking the temperature is the most reliable method.
Why Your Nose Knows Best
Before you pour the chocolate, sniff it. A fresh, sweet chocolate smell indicates the right cacao balance. If the aroma is overly bitter or metallic, you’re likely using low‑quality chocolate. I’ve had friends skip this step once, only to end up with a tart that tasted like burnt chocolate. Trust your nose.
The 5‑Minute Rest That Changes Everything
After mixing the cookie crumbs with butter and cream, let the mixture rest for 5 minutes before pressing it into the pan. This short pause allows the crumbs to absorb the butter fully, creating a more cohesive crust. In my experience, a crust that’s too dry will crumble when you try to slice it. A 5‑minute rest is a game‑changer.
The Secret to a Perfect Swirl
When spreading the cookie butter, use a toothpick to create a gentle spiral. This not only looks elegant but also ensures an even distribution of flavors. If you’re a perfectionist, practice the swirl on a piece of parchment first. The trick is to keep the pressure light; too much pressure will flatten the butter, losing the creamy texture.
The Chill Time Trick
If you’re in a hurry, you can place the tart on a tray of ice to speed up the setting process. The ice will lower the temperature quickly, ensuring the chocolate sets in under 30 minutes. However, be careful not to let the ice melt onto the surface; it could create a watery crust.
The Final Polish
Before serving, give the tart a quick wipe with a clean cloth to remove any chocolate drips. This step gives it a professional, polished look. I always keep a small dish of espresso on hand; a splash on the crust can intensify the chocolate flavor and add a subtle bitterness that balances the sweetness.
Creative Twists and Variations
This recipe is a playground. Here are some of my favorite ways to switch things up:
Nutty Crunch Variation
Add 1/4 cup chopped toasted almonds or walnuts to the cookie crumb mixture. The nuts provide an extra crunch and a hint of earthiness that complements the chocolate. They’re especially good for a holiday twist.
Citrus Zest Twist
Grate the zest of one orange into the melted chocolate before pouring it over the crust. The citrus brightens the chocolate’s depth and adds a fresh, lively note. This variation is perfect for spring or summer gatherings.
Espresso Infusion
Stir 1 tablespoon of instant espresso powder into the melted chocolate. The coffee enhances the chocolate’s richness and introduces a subtle bitterness that balances the sweet cookie butter. It’s a favorite for coffee lovers.
Minty Delight
Replace the cookie butter with a swirl of mint‑infused butter or a few drops of peppermint extract in the chocolate glaze. The mint adds a cool contrast to the warm chocolate, creating a refreshing dessert.
Fruit‑Topped Finish
Top the finished tart with fresh berries—strawberries, blueberries, or raspberries—just before serving. The juicy fruit adds a burst of tartness that cuts through the sweetness, making each bite more balanced.
Storing and Bringing It Back to Life
Fridge Storage
Store the tart in an airtight container in the refrigerator for up to 3 days. The cold environment keeps the chocolate firm and the crust from becoming soggy. When you’re ready to serve, let it sit at room temperature for 10 minutes to soften slightly.
Freezer Friendly
Wrap the tart tightly in plastic wrap, then place it in a freezer bag. It can be frozen for up to 2 weeks. To thaw, place the wrapped tart in the refrigerator overnight. The texture remains intact, and the chocolate stays glossy.
Best Reheating Method
If you need to reheat the tart, use a gentle heat source. Warm the tart in a 300°F oven for 5 minutes, or microwave on low for 10–15 seconds. Add a tiny splash of water before reheating to create steam; it helps the chocolate regain its silky texture. Avoid overheating, or the chocolate will seize.