Ever had a kitchen moment that felt like a culinary catastrophe and then, out of sheer desperation, you stumbled into a recipe that turned the mess into a masterpiece? That was me last spring, when a batch of over‑fried pancakes collapsed into a sad, flat pancake stack that could only be described as a pancake failure. The kitchen smelled of burnt sugar, and I was staring at a pile of half‑cooked batter, wondering if I should just call it a day. But then I remembered the promise of Japanese souffle pancakes—light, airy, and the kind of breakfast that feels like a hug from the inside. I dared myself to give it a try, and what happened next was nothing short of a revelation.
Picture this: you’re whisking the eggs, and the beaters whir like a tiny storm. The batter swells, airy ribbons forming, and you can almost hear the soft pop of bubbles as they rise. The moment the batter hits the pan, a faint sizzle sings a quiet lullaby. You watch the edges lift, forming a golden crust that crackles like a quiet sunrise, while the center stays cloud‑like, tender and warm. The aroma that unfurls is a sweet, buttery whisper, reminiscent of a bakery on a quiet street, and you know—this is going to be special.
What makes this version of Japanese souffle pancakes stand out is not just the fluffiness—it’s the precision, the subtle balance of flavors, and the fact that each bite feels like a delicate, cloud‑like cloud of sweetness. I’ve experimented with dozens of variations, but this particular method keeps the batter light yet rich, the edges crisp without burning, and the finish buttery and utterly satisfying. It’s the kind of recipe that, once mastered, becomes a staple for lazy brunches and special occasions alike. I dare you to taste this and not go back for seconds.
I’ll be honest—when I first made these, I ate half the batch before anyone else got a chance to try them. The fluffiness was so irresistible that I almost didn’t finish the recipe. But the real magic? The way the batter rises like a gentle puff of steam, and how each pancake feels like a bite of pure, unadulterated joy. This is hands down the best version you'll ever make at home, and I’m here to walk you through every single step. By the end, you’ll wonder how you ever made them any other way.
What Makes This Version Stand Out
- Fluffiness: The secret lies in the egg separation technique and the gentle folding of the batter, ensuring maximum air incorporation without deflating the mixture. The result is a pancake that rises like a cloud and stays airy even after cooling.
- Texture: The contrast between the crisp, golden edges and the pillowy interior is achieved by precise heat control and the use of a non-stick skillet that retains just enough heat to set the edges without burning.
- Flavor: A subtle vanilla note balances the natural sweetness of the eggs and sugar, creating a complex yet harmonious taste that isn’t overpowering.
- Ingredient Quality: Fresh, organic eggs and whole milk make a noticeable difference in flavor and texture, giving each pancake a richer, more authentic Japanese feel.
- Versatility: Whether you’re topping them with fresh fruit, maple syrup, or whipped cream, the base remains light and adaptable to any sweet or savory garnish you desire.
- Make‑Ahead Friendly: The batter can be prepared up to an hour in advance, allowing you to focus on the final cooking steps when guests arrive.
- Ease of Execution: Despite its delicate outcome, the recipe requires only a few basic kitchen tools—a whisk, a mixing bowl, and a non-stick skillet.
- Crowd Reaction: Friends who’ve tasted these often say they “don’t want to try any other pancakes again,” which is a testament to the recipe’s impact.
Alright, let's break down exactly what goes into this masterpiece...
Inside the Ingredient List
The Flavor Base
The eggs are the backbone of any souffle pancake, and separating the yolks from the whites is essential for that airy lift. The yolks provide richness and body, while the whites bring volume. If you skip the separation, the batter will be dense and heavy, losing that signature puff. For best results, use room‑temperature eggs, as they incorporate more easily.
The Texture Crew
All-purpose flour gives structure without over‑baking the batter. Baking powder is the leavening agent that creates those lovely air pockets, but it must be fresh—expired powder will produce flat pancakes. Milk, whether dairy or a plant‑based alternative, hydrates the flour and balances the sweetness. A pinch of salt is added to heighten the flavors, but keep it subtle so the sweetness remains front and center.
The Unexpected Star
Vanilla extract is more than a flavoring; it acts as a flavor enhancer, making the batter taste fuller. A small splash of vanilla can transform the entire dish from ordinary to extraordinary. If you’re in a hurry, a vanilla bean or vanilla powder can be used, but pure vanilla extract is the gold standard.
The Final Flourish
Butter is essential for a golden crust and a rich flavor profile. Use unsalted butter so you can control the salt level. Fresh fruits, maple syrup, and whipped cream are optional toppings that elevate the pancakes to a dessert‑level experience. Each topping offers a different sensory profile—fruit adds brightness, syrup adds caramel sweetness, and whipped cream adds a velvety finish.
Everything's prepped? Good. Let's get into the real action...
The Method — Step by Step
- Step 1: Separate the eggs. Carefully crack the eggs and let the yolks sit in one bowl while the whites go into another. Make sure no yolk gets into the whites, as any yolk will reduce the fluffiness. This step is the foundation of the airy texture.
- Step 2: Whip the whites. Using a clean whisk or hand mixer, beat the egg whites on medium speed until they form soft peaks. When you lift the whisk, the peaks should hold their shape without drooping. This creates the lift that makes the pancakes rise.
- Step 3: Combine yolks, sugar, milk, vanilla, and salt. In a separate bowl, whisk the yolks with sugar until the mixture turns pale and thick. Stir in the milk, vanilla, and a pinch of salt until everything is smooth. The mixture should feel silky and free of lumps.
- Step 4: Fold the dry ingredients. Sift the flour and baking powder together to avoid clumps. Gently fold them into the yolk mixture using a spatula. The goal is to keep the batter light; over‑mixing will deflate the whites. Watch the batter change color as the flour is incorporated.
- Step 5: Fold in the whites. Gently fold the beaten whites into the batter using a folding motion from the bottom to the top. The batter should look slightly thicker and have a glossy sheen. This step keeps the batter airy.
- Step 6: Let the batter rest. Cover the bowl with plastic wrap and let it sit at room temperature for 10–15 minutes. This rest allows the gluten to relax and the batter to thicken slightly, which helps the pancakes rise evenly. Watch Out: Don’t let the batter sit too long—over‑resting can cause the eggs to separate and the batter to become too thick.
- Step 7: Prepare the skillet. Heat a non‑stick skillet over medium heat and add a small knob of butter. Once the butter melts and begins to foam, it's ready. The skillet should feel hot but not smoking; this temperature ensures a crisp edge without burning.
- Step 8: Cook the pancakes. Pour about 1/4 cup of batter per pancake onto the skillet. Let the batter sit undisturbed for 2–3 minutes until the edges lift and the surface has small bubbles. Flip carefully and cook for another 1–2 minutes until golden. The pancakes should feel firm to the touch but still soft inside.
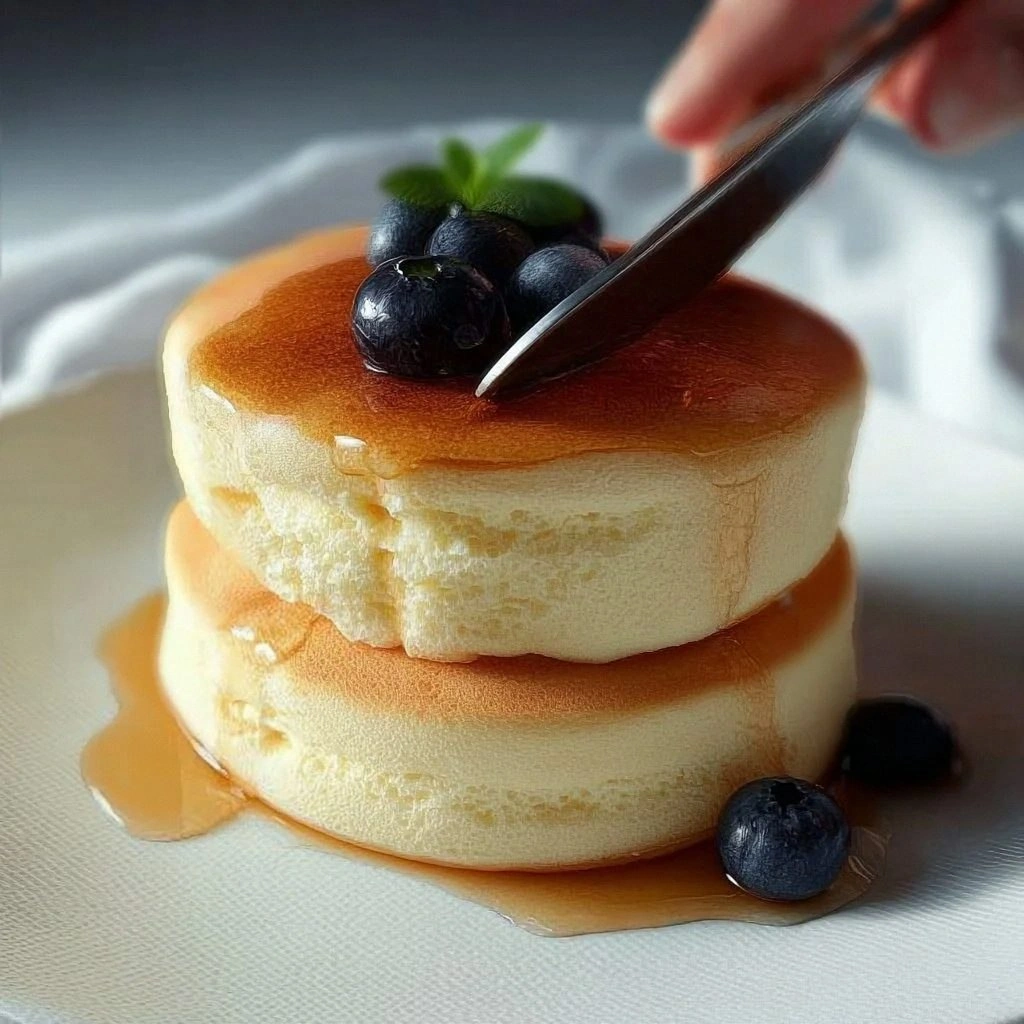
- Step 9: Serve and enjoy. Stack the pancakes on a plate and top with fresh fruit, maple syrup, and a dollop of whipped cream. The final touch is a drizzle of syrup that glistens like liquid gold. Serve immediately for the best texture.
That's it—you did it. But hold on, I've got a few more tricks that'll take this to another level...
Insider Tricks for Flawless Results
The Temperature Rule Nobody Follows
Many cooks start the skillet on high heat, which leads to burnt edges and a raw center. The trick is to pre‑heat the skillet over medium, then reduce to low once you pour the batter. This gradual heat change allows the pancakes to rise slowly, creating a perfect golden crust.
Why Your Nose Knows Best
A subtle, buttery aroma is a sign that the butter is just right—neither burnt nor under‑cooked. If you hear a faint caramel scent, you’re in the sweet spot. A burnt smell means the heat is too high, and the pancakes will taste bitter.
The 5‑Minute Rest That Changes Everything
After folding the whites into the batter, let the mixture sit for exactly five minutes before cooking. This short rest allows the proteins to relax, giving the batter more lift. I once skipped this step and the pancakes were flat—lesson learned.
The Perfect Flip
Flip the pancake only when you see small bubbles forming and the edges lifting. Use a thin spatula and flip gently—think of it as flipping a delicate pancake like a pancake. Over‑flipping can collapse the airy interior.
Storing the Batter
If you’re making the batter ahead of time, store it in an airtight container in the fridge for up to 24 hours. Before cooking, let it sit at room temperature for 10 minutes to regain its airy quality. This trick saves time on busy mornings.
Creative Twists and Variations
Matcha Magic
Add a teaspoon of matcha powder to the dry ingredients for a subtle earthy flavor and a vibrant green color. This variation pairs wonderfully with a drizzle of honey and a sprinkle of toasted sesame seeds.
Coconut Cream Delight
Swap the milk for coconut milk and top with toasted coconut flakes. The tropical notes complement the fluffy texture, creating a beach‑inspired breakfast.
Berry Burst
Fold fresh blueberries into the batter just before cooking for a burst of sweetness. Serve with a lemon‑infused whipped cream for a zesty contrast.
Chocolate Surprise
Add a tablespoon of cocoa powder to the dry mix for a chocolatey version. Finish with a drizzle of dark chocolate sauce and a few chocolate chips for an indulgent treat.
Savory Spin
Reduce the sugar to a tablespoon and add a pinch of smoked paprika to the batter. Top with sautéed spinach and a fried egg for a breakfast that feels both light and hearty.
Storing and Bringing It Back to Life
Fridge Storage
Store cooked pancakes in a single layer on a plate, cover with plastic wrap, and refrigerate for up to 3 days. The pancakes will stay moist if you keep them in a sealed container. They’re best served within 48 hours for maximum fluffiness.
Freezer Friendly
Freeze the pancakes in a single layer on a baking sheet, then transfer to a freezer bag once solid. They can be kept for up to 2 weeks. Reheat in a toaster or oven for a crisp exterior.
Best Reheating Method
Reheat frozen pancakes in a preheated oven at 350°F for 10 minutes. Add a splash of water before reheating to create steam that restores the interior softness. A quick microwave can work, but the oven preserves the texture better.