Introduction
It started with a burnt toast disaster that turned my living room into a smoky mess. I stared at the charred bread, wondering how I could salvage anything from it. Then, a friend dared me to turn that failure into a triumph, saying, “I dare you to taste this and not go back for seconds.” That challenge lit a spark in my kitchen, and I set out to create a version of the humble grilled cheese that would make every bite feel like a secret indulgence.
Picture the moment: the golden edges of the rolls crisp up in a hot pan, releasing a buttery aroma that dances with hints of garlic and herbs. The sound of the butter sizzling is a comforting crackle that signals something delicious is about to happen. As the cheese melts, the steam curls like a warm cloud, filling the air with a savory promise. My eyes light up, the kitchen smells like comfort, and my taste buds are already tingling with anticipation.
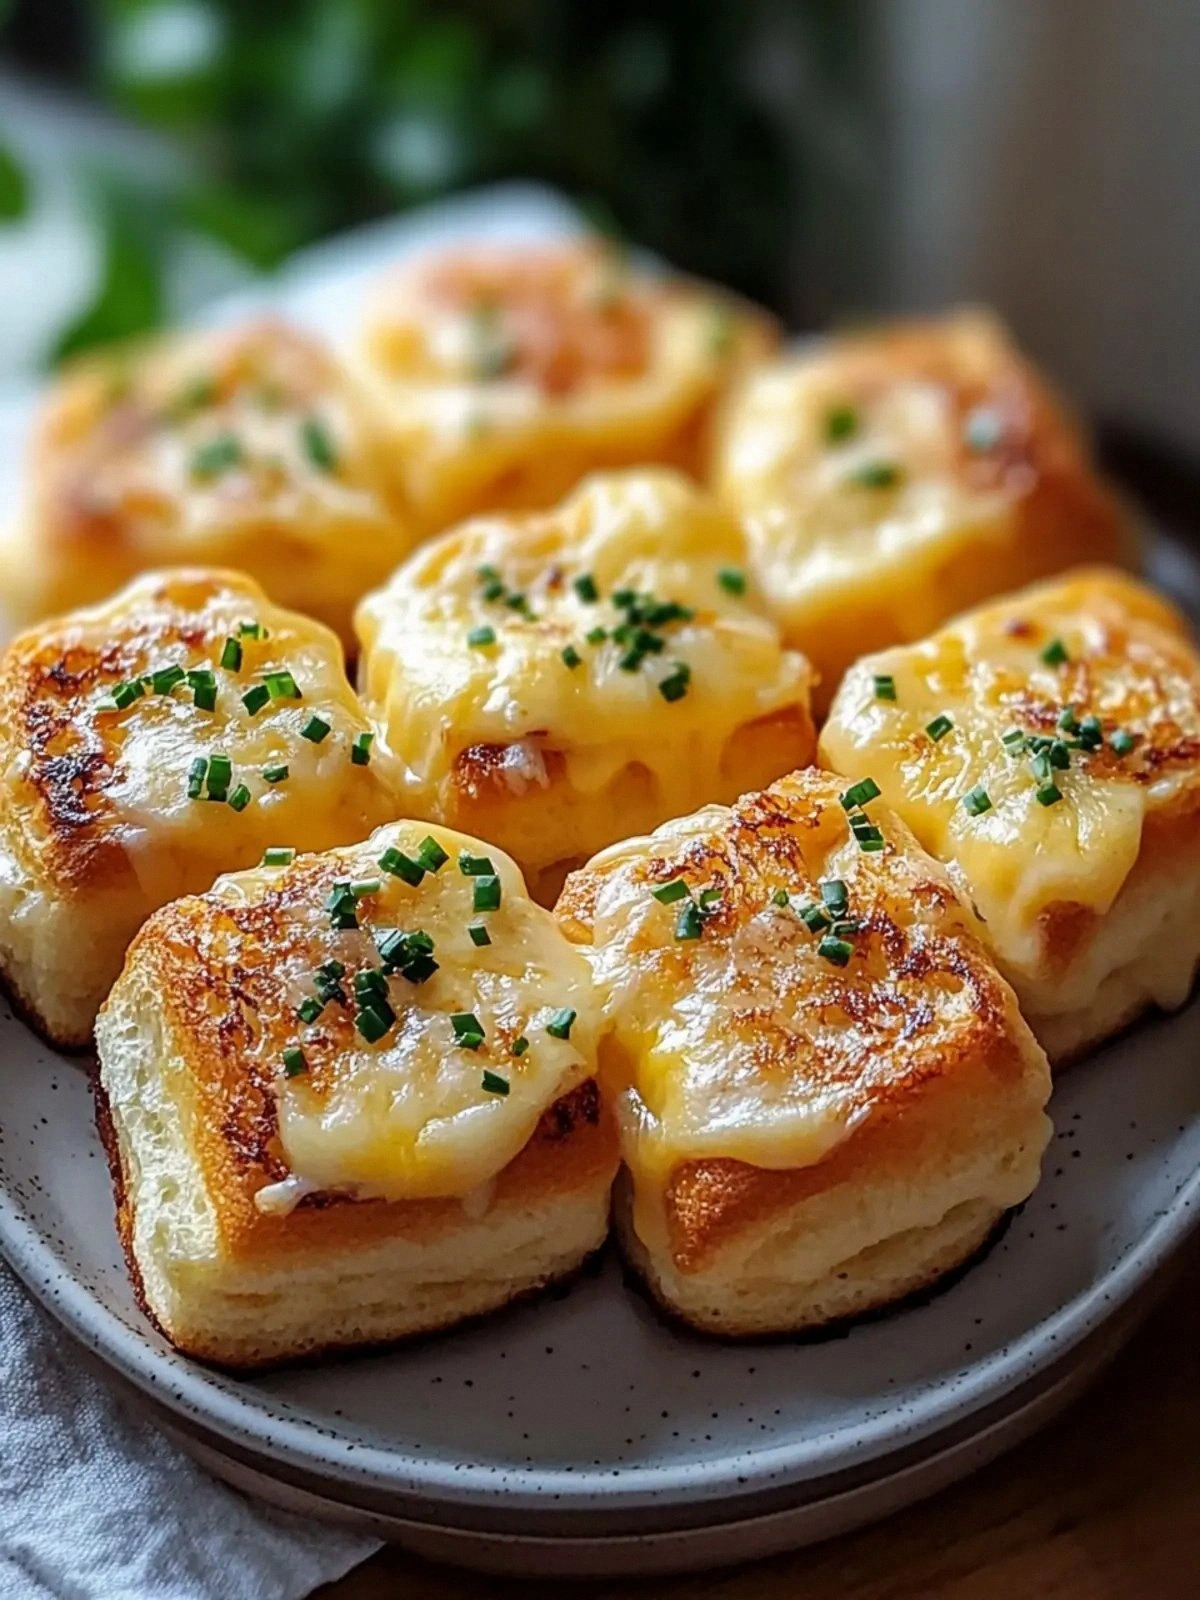
This isn’t just another grilled cheese recipe. The secret is in the layers: a buttery, herb-infused coating that turns each roll into a melty, gooey pocket of cheese heaven. The combination of cheddar and mozzarella creates a tangy yet smooth melt that refuses to stay on the plate. The Hawaiian rolls provide a subtle sweetness and a soft, pillowy interior that balances the richness of the cheese. The result is a bite that feels like a warm hug, yet is crisp on the outside—hands down the best version you’ll ever make at home.
Hold on, because there’s a twist you won’t expect: a subtle hint of dried herbs that elevates the flavor profile without overpowering the cheese. The next step is pure magic, and by the end, you’ll wonder how you ever made grilled cheese any other way. Let me walk you through every single step—by the end, you’ll wonder how you ever made it any other way.
What Makes This Version Stand Out
- Flavor: The buttery herb crust delivers a savory depth that sets this apart from plain grilled cheese. The garlic powder and dried herbs infuse the rolls with a subtle complexity that lingers on the palate. The combination of cheddar’s sharpness and mozzarella’s creaminess creates a balanced, melt-in-your-mouth experience.
- Texture: The rolls develop a crisp, golden exterior while the interior remains soft and pillowy. The cheese layers melt into silky ribbons that cling to every bite. The result is a satisfying contrast that keeps you coming back for more.
- Convenience: Using pre-sliced Hawaiian rolls means you can assemble the dish in minutes. The recipe requires only a handful of ingredients, making it ideal for a quick lunch or a crowd-pleasing appetizer. No fancy equipment, just a skillet and a bit of butter.
- Uniqueness: The herb butter coating is the secret weapon that elevates this recipe. It turns a classic comfort food into a gourmet experience. The subtle herb notes add a fresh dimension that isn’t found in typical grilled cheese.
- Crowd Reaction: Friends who have tasted these mini grilles often remark that the cheese pulls apart like silk. They rave about the crispy edges that shatter like thin ice, and the warm, gooey center that keeps them reaching for more. I’ve seen the look on their faces—pure delight.
- Ingredient Quality: Using high-quality cheddar and mozzarella makes a world of difference. Fresh, well-aged cheddar adds depth, while mozzarella’s meltability ensures a smooth texture. The Hawaiian rolls should be fresh, but they also hold up well when toasted.
- Cooking Method: The simple pan‑toasting technique ensures even browning and prevents the cheese from burning. The butter creates a protective layer that keeps the rolls from drying out. This method is foolproof, even for novice cooks.
Alright, let's break down exactly what goes into this masterpiece...
Inside the Ingredient List
The Flavor Base
Butter is the foundation of this recipe. It not only provides a rich, velvety mouthfeel but also carries the garlic and herb flavors deep into the rolls. If you skip butter, the rolls will turn out dry and lack the signature buttery crunch. A good tip: use unsalted butter so you can control the salt level precisely. For an extra touch, melt the butter with a splash of milk to create a silky glaze that coats the rolls evenly.
The Texture Crew
Hawaiian rolls bring a soft, slightly sweet interior that contrasts beautifully with the cheese. Their fluffy crumb holds the melted cheese without becoming soggy. If you’re on a gluten-free diet, you can swap them for a gluten-free roll of similar size. When selecting rolls, choose ones that are fresh and not stale—freshness ensures a better bite and prevents the rolls from falling apart when toasted.
The Unexpected Star
Cheddar cheese adds a sharp, tangy bite that cuts through the richness of the butter and mozzarella. It also provides a deep, savory flavor that lingers on the tongue. If you prefer a milder taste, you can use a combination of cheddar and Gouda. Remember, the sharper the cheddar, the more pronounced the flavor profile.
The Final Flourish
Mozzarella cheese is the glue that keeps the whole thing together. Its high moisture content allows it to melt smoothly, creating silky ribbons that mingle with the cheddar. If you’re craving a different melt, try a blend of mozzarella and provolone. A small note: let the mozzarella sit at room temperature for 10 minutes before using it to ensure it melts evenly.
Everything's prepped? Good. Let's get into the real action...
The Method — Step by Step
- Begin by heating a large skillet over medium heat. Let the skillet warm up until it reaches a steady, medium temperature—no too hot, no too cool. This ensures even browning without scorching the butter. The skillet should be hot enough that a drop of water sizzles and evaporates almost instantly.
- Melt the butter in a small saucepan, then stir in the garlic powder and dried herbs. The mixture should become fragrant within a minute, releasing the aromatic oils. Keep the heat low to prevent the butter from browning too quickly. This herb butter will coat the rolls and create a subtle depth of flavor.
- Brush each Hawaiian roll half with the herb butter, making sure the coating is even. The butter should cling to the surface like a glossy glaze. Don’t over‑brush—too much butter will cause the rolls to become soggy. Let the butter sit for a few seconds to soak into the bread.
- Lay the buttered side down in the hot skillet. The first contact should produce a gentle hiss, a signal that the pan is ready. Cook the rolls for 2 minutes, or until the underside is golden brown and the edges start pulling away. Flip carefully with a spatula to avoid tearing.
- Spread a generous layer of shredded cheddar on one half of the roll. The cheddar should be spread evenly, covering the surface without piling up. This layer adds a sharp, tangy kick that balances the mild mozzarella.
- Add a second layer of shredded mozzarella over the cheddar. The mozzarella’s meltability will create silky ribbons as it melts. Press the cheese lightly into the roll to ensure it adheres during cooking.
- Place the other half of the roll on top, buttered side up, to form a sandwich. Press gently with a spatula to keep the cheese from spilling out. This step locks in the flavors and ensures even toasting.
- Cover the skillet with a lid for 3 minutes to allow the cheese to melt fully. The lid traps heat, creating a mini oven that melts the cheese evenly. Check the cheese at the 2‑minute mark—if it’s starting to bubble, you’re on track.
- Remove the lid and flip the sandwich again to toast the other side. The second side should also reach a golden brown, giving you a crisp exterior on both sides. Keep an eye on the heat; if the pan gets too hot, the cheese may burn before the bread finishes.
- Once both sides are golden and the cheese has melted into a glossy sheen, transfer the sandwich to a cutting board. Let it rest for 30 seconds before slicing—it’s hot and the cheese will still be flowing.
That's it — you did it. But hold on, I've got a few more tricks that'll take this to another level...
Insider Tricks for Flawless Results
The Temperature Rule Nobody Follows
Many cooks think the pan should be as hot as possible, but that leads to uneven browning. Instead, aim for a medium heat that keeps the butter from smoking but still cooks the bread quickly. I’ve found that a temperature of about 350°F (175°C) works best on most stovetops. If you’re unsure, test with a small bread slice; it should sizzle but not burn.
Why Your Nose Knows Best
Before flipping the sandwich, pause to inhale the aroma. The scent of melted cheese and garlic should fill the room—this is the moment of truth. If the cheese isn’t bubbling, give it another minute; the smell will intensify. Your nose is a reliable indicator of doneness, so trust it.
The 5-Minute Rest That Changes Everything
After cooking, let the sandwich rest for 5 minutes. This short pause allows the cheese to set slightly, preventing it from oozing out when you cut. It also lets the flavors meld together, giving you a more cohesive bite. I’ve seen people skip this step, and the result is a gooey mess that’s hard to handle.
Use a Cast Iron for Even Heat
Cast iron retains heat better than stainless steel, giving you a more consistent cooking surface. If you have one, it’s the best choice for this recipe. The even heat ensures the edges crisp up while the center stays perfectly melted.
Keep the Cheese at Room Temperature
Cheese that’s been chilled directly from the fridge will melt unevenly, creating pockets of raw cheese. Let it sit at room temperature for about 10 minutes before assembling. This small step makes a big difference in the melt quality.
Serve with a Tangy Dip
Pair the mini grilles with a quick yogurt dip seasoned with lemon zest and dill. The tanginess cuts through the richness and adds a fresh contrast. This dip also doubles as a sauce for dipping, making it a versatile addition.
Creative Twists and Variations
This recipe is a playground. Here are some of my favorite ways to switch things up:
Smoky Chipotle Grille
Swap the dried herbs for smoked paprika and add a dash of chipotle powder. The smoky heat pairs beautifully with the sweet Hawaiian roll. It’s a bold twist that’s sure to impress.
Spinach and Feta Upgrade
Introduce sautéed spinach and crumbled feta between the cheese layers. The spinach adds a green pop, while the feta brings a salty tang. This variation is great for a Mediterranean vibe.
Truffle Oil Finish
Drizzle a small amount of truffle oil over the finished sandwich before serving. The earthy aroma elevates the dish to a gourmet level. Use sparingly to avoid overpowering the cheese.
Breakfast Edition
Replace the cheese with scrambled eggs and sprinkle with chives. Add a slice of bacon on top for a hearty breakfast. The Hawaiian roll’s sweetness balances the savory eggs.
Vegan Version
Use vegan cheddar and mozzarella blends, and replace butter with coconut oil. The flavor profile stays similar, but the dish remains plant‑based. It’s a great option for guests who avoid dairy.
Chocolate‑Cheese Surprise
For a sweet twist, add a thin layer of dark chocolate before the cheese. The chocolate melts into the cheese, creating a decadent, unexpected bite. This is perfect for dessert lovers.
Storing and Bringing It Back to Life
Fridge Storage
Store leftovers in an airtight container for up to 3 days. The rolls stay soft, and the cheese retains its meltiness. When reheating, a quick microwave burst of 20 seconds works, but you’ll want to finish in a skillet for crispness.
Freezer Friendly
Wrap each sandwich individually in parchment paper and place in a freezer bag. Freeze for up to 2 months. Thaw overnight in the fridge before reheating. The texture remains surprisingly good after freezing.
Best Reheating Method
Reheat in a preheated skillet over medium heat for 3 minutes on each side. The butter coating re‑creates the original crispness. Add a splash of water to the pan before reheating; it steams the sandwich back to perfection and prevents the cheese from drying out.