Love this? Pin it for later! 📌
I developed this recipe during a particularly brutal February when the world outside felt gray and heavy. My daughter had come home from school in tears because someone had told her that "adulthood means giving up on dreams." We stood in the kitchen, measuring flour and sugar, and I told her that sometimes the most revolutionary thing we can do is create something beautiful when everything feels broken. Three hours later, we had these cookies—molten, messy, magnificent—and she looked at me with chocolate on her chin and said, "Maybe dreams just need to be warm to come true."
Since then, these cookies have become our family's love language. We make them for new neighbors, for friends going through divorces, for the teacher who stayed after school to help with college applications. They've been mailed across states in care packages, served at engagement parties, and hidden in lunchboxes on hard days. The secret isn't just in the technique—though we'll get to that—it's in the way they remind us that some of life's most profound moments come disguised as something sweet and simple.
Why This Recipe Works
- Two-Temperature Butter Method: Using both melted and softened butter creates cookies that spread just enough while maintaining structure for that molten center.
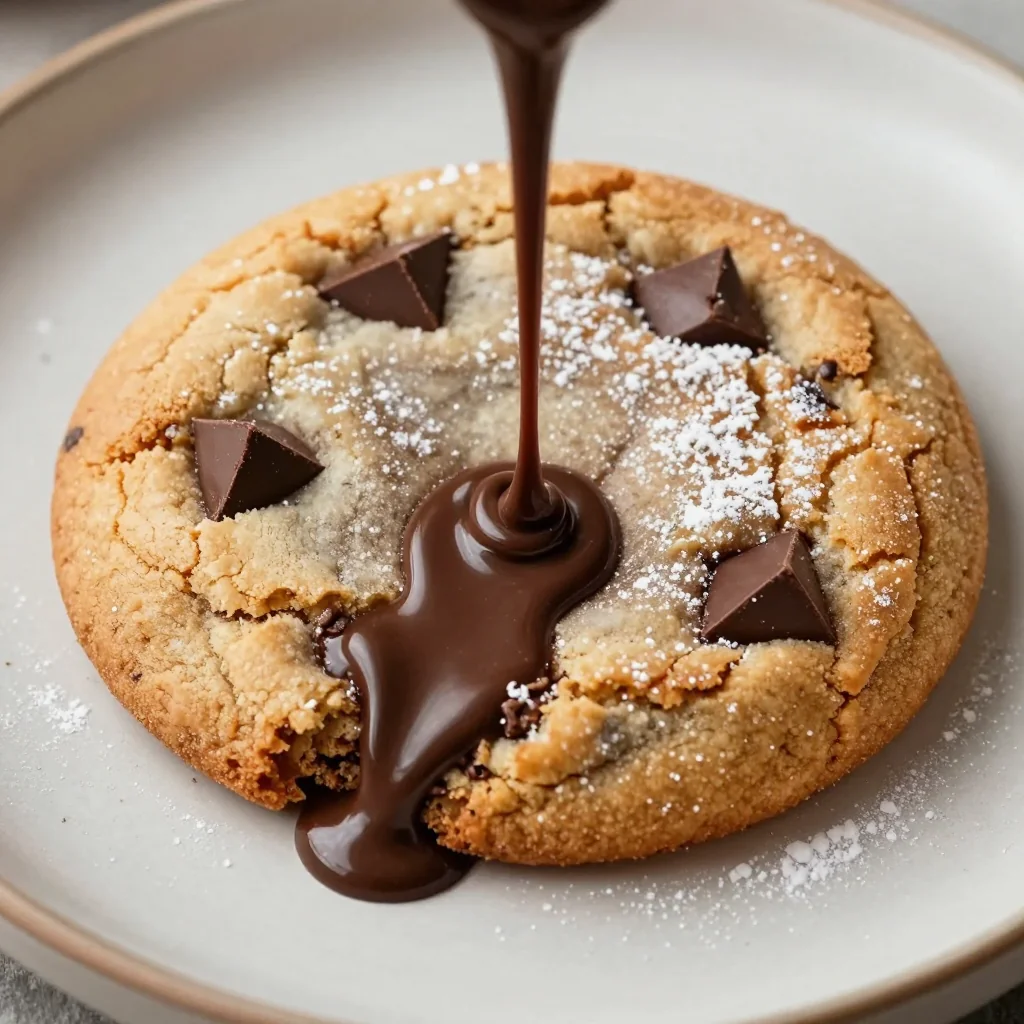
- Chocolate Chunks, Not Chips: Chopping your own chocolate creates irregular pieces that melt into pools and rivers rather than uniform dots.
- Chilling Strategy: A brief 30-minute chill prevents excessive spreading while keeping centers soft and gooey.
- Brown Sugar Dominance: Using more brown than white sugar adds moisture and that caramel flavor that makes these irresistible.
- Underbaking Mastery: Pulling cookies when edges are set but centers still jiggle ensures that molten middle we crave.
- Sea Salt Finish: A light sprinkle of flaky salt on warm cookies balances sweetness and intensifies chocolate flavor.
- Quality Chocolate Matters: Using 60-70% dark chocolate creates the perfect balance of bitter and sweet.
- Room Temperature Eggs: Ensures even mixing and proper emulsification for tender cookies.
Ingredients You'll Need
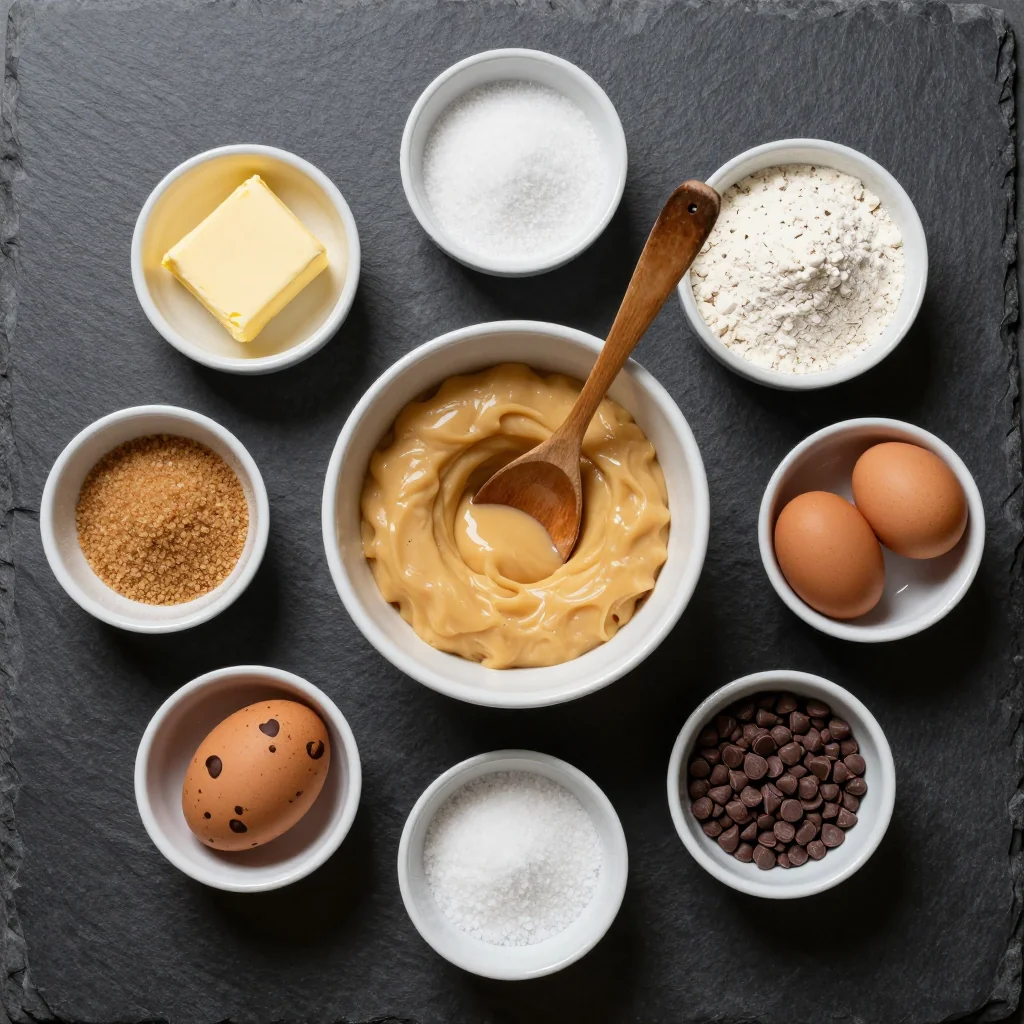
Great cookies start with great ingredients, and this is not the place to skimp. Each component plays a crucial role in creating that molten magic we're after. Let's break down what you'll need and why each ingredient matters more than you might think.
Butter (1 cup total): We're using a revolutionary two-temperature method here—half melted, half softened. The melted butter creates chewy texture and helps cookies spread, while the softened butter incorporates air when creamed with sugar, giving us lift and structure. Use European-style butter if you can find it; the higher fat content (82% vs 80%) creates richer flavor and more tender cookies. Make sure your butter is truly at room temperature for the softened portion—leave it out overnight for best results.
Chocolate (12 ounces): Skip the chips entirely and buy good quality chocolate bars. I use a combination of 60% and 70% dark chocolate, chopping it into irregular pieces ranging from tiny shards to substantial chunks. The varied sizes create that molten river effect—small pieces melt completely while larger ones maintain some structure. My favorite brands are Valrhona, Callebaut, or even Ghirardelli if you're shopping at a regular grocery store. The chocolate should smell fragrant and break with a clean snap.
Sugars (3/4 cup brown + 1/2 cup white): Brown sugar is the secret weapon for molten cookies. The molasses adds moisture and creates that soft, almost gooey center we crave. I prefer dark brown sugar for its deeper flavor, but light works too. The white sugar helps with crisp edges and that beautiful crackly top. Don't be tempted to use all brown sugar—the cookies would be too soft and won't develop those gorgeous caramelized edges.
Flour (2 1/4 cups): Use regular all-purpose flour, but here's the trick—sift it first, then spoon it into your measuring cup and level off. Too much flour creates cakey cookies, and we want tender and gooey. If you live in a humid climate, you might need to add an extra tablespoon or two. The dough should be soft but not sticky, cohesive but not dry.
Eggs (1 whole + 1 yolk): The extra yolk adds richness and helps create that fudgy center. Make sure your eggs are room temperature—cold eggs can cause the butter to seize, creating tough cookies. To quickly bring eggs to room temperature, place them in a bowl of warm water for 10 minutes.
Vanilla (1 tablespoon): Don't use imitation here. Real vanilla extract enhances the chocolate flavor in ways that artificial vanilla simply can't. I also add the seeds from half a vanilla bean when I have it—those little black specks are like vanilla caviar and add incredible depth.
Leavening (3/4 teaspoon each baking soda and powder): The combination creates the perfect lift—baking soda for spread and browning, baking powder for lift. Make sure they're fresh (replace every 6 months) or your cookies won't develop properly.
Sea Salt (1 teaspoon + extra for finishing): Salt is the difference between flat, overly sweet cookies and complex, bakery-worthy ones. I use fine sea salt in the dough and finish with flaky Maldon salt on top. The contrast makes the chocolate taste more chocolatey and prevents the cookies from being cloying.
How to Make Molten Chocolate Chip Cookies That Melt in Your Mouth
Brown the Butter for Depth
Start by melting 1/2 cup (1 stick) of butter in a light-colored saucepan over medium heat. Swirl occasionally as it foams and crackles. After 3-4 minutes, the milk solids will turn golden brown and smell nutty—immediately pour into a heatproof bowl and let cool slightly. This browned butter adds incredible depth and helps create those caramelized edges we're after. Don't walk away during this step; butter goes from perfect to burnt in seconds.
Cream Remaining Butter with Sugars
In your stand mixer (or with hand beaters), cream the remaining 1/2 cup softened butter with both sugars for 3-4 minutes until light and fluffy. This incorporates air and dissolves the sugar properly—crucial for that perfect texture. The mixture should lighten in color and look like wet sand that's been whipped. Don't rush this step; proper creaming is what gives cookies structure despite their molten centers.
Add Eggs and Vanilla
Beat in the whole egg, then the yolk, one at a time, mixing well after each addition. Stir in the vanilla. The mixture should look glossy and emulsified—if it appears curdled, your ingredients were too cold. Let it sit for 5 minutes and beat again. Room temperature eggs are crucial here; cold eggs will cause the butter to seize, creating tough cookies.
Combine Wet Ingredients
Pour in the cooled browned butter (it should be liquid but not hot) and mix until combined. The mixture will look slightly separated at first—keep mixing until it comes together into a smooth, glossy mixture. This combination of butter temperatures is our secret weapon for the perfect texture.
Whisk Dry Ingredients
In a separate bowl, whisk together flour, baking soda, baking powder, and salt. This ensures even distribution—no one wants a cookie that tastes like baking soda. Sift if your flour seems lumpy. Proper measurement is crucial here; too much flour and your cookies will be cakey rather than molten.
Combine Wet and Dry
Add dry ingredients to wet in three additions, mixing just until combined after each. Overmixing develops gluten, making tough cookies. The dough should be soft and slightly sticky but hold its shape. If it seems too wet, add flour a tablespoon at a time. Too dry? Add milk a teaspoon at a time.
Fold in Chocolate
Using a wooden spoon or rubber spatula, fold in the chopped chocolate until evenly distributed. Those irregular pieces are key—some will melt completely, others will maintain structure. Reserve a few larger chunks to press into the tops of each cookie before baking for that bakery-style appearance.
Chill the Dough
Cover and refrigerate for 30 minutes—no longer or the chocolate will harden too much. This brief chill prevents excessive spreading while keeping centers soft. If you're in a hurry, 15 minutes in the freezer works too. The dough can be refrigerated for up to 72 hours at this point; just let it sit at room temperature for 20 minutes before scooping.
Portion and Shape
Using a large cookie scoop or two spoons, portion dough into 3-tablespoon mounds (about the size of a golf ball). Place on parchment-lined baking sheets, leaving 3 inches between cookies—they spread significantly. Press a few chocolate chunks into the tops for that bakery look. Don't flatten them; they'll spread on their own.
Bake to Perfection
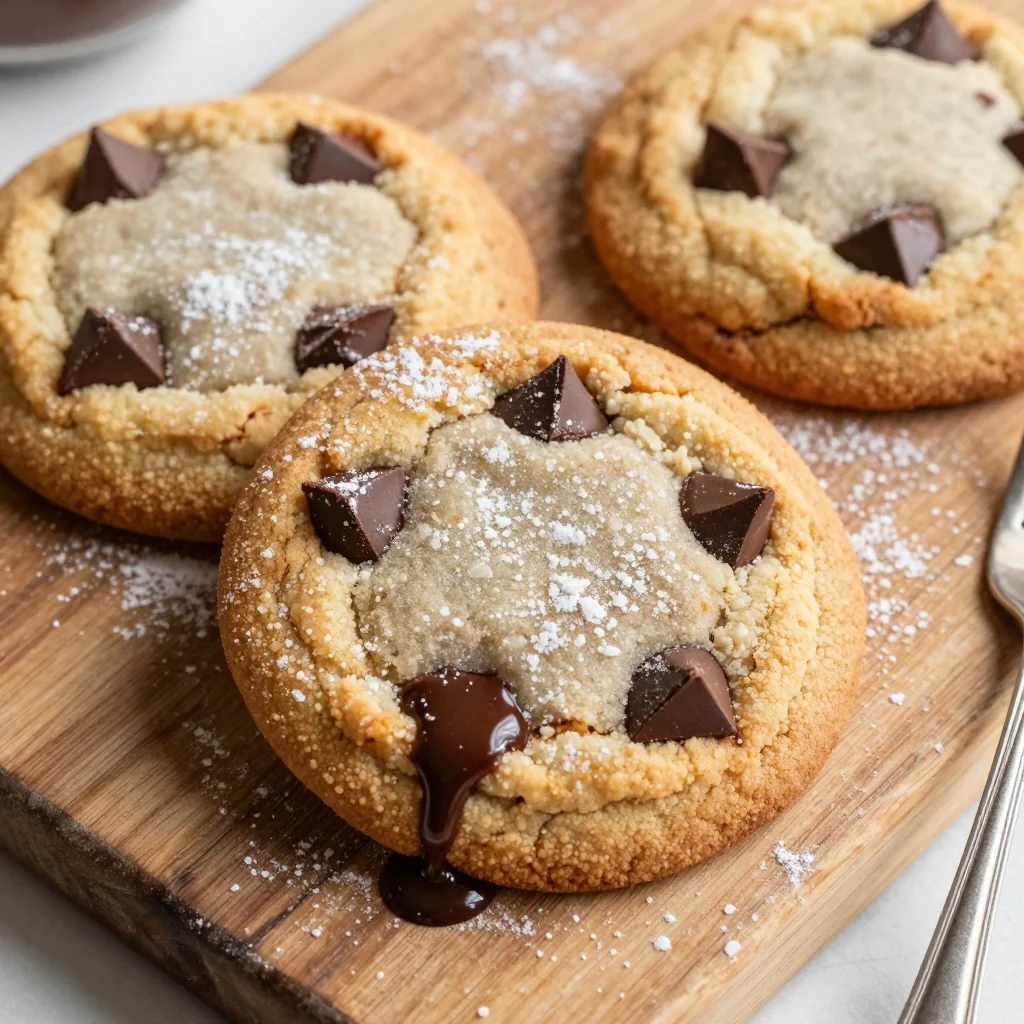
Bake at 350°F (175°C) for 11-13 minutes until edges are golden brown but centers still look slightly underbaked. They'll continue cooking on the hot pan. The key is pulling them when centers still jiggle slightly—that's your molten middle. Rotate pans halfway through for even baking.
The Final Touch
Immediately sprinkle warm cookies with flaky sea salt. Let cool on pan for 10 minutes—they'll be too soft to move initially. Then transfer to a wire rack to cool completely (or enjoy warm while centers are still molten). Store in an airtight container for up to 5 days, though they're best within the first 48 hours.
Expert Tips
Check Your Oven Temperature
Oven thermostats lie. Use an oven thermometer to ensure accurate temperature. Too hot and cookies burn before centers melt; too cool and they spread into puddles. Dark pans also require reducing temperature by 25°F.
Don't Overbake
These cookies should be slightly underbaked when you pull them out. They'll continue cooking on the hot pan. If edges aren't golden, you've got another minute. If they're dark brown, you've gone too far.
Freeze for Later
Portion dough onto a baking sheet, freeze until solid, then transfer to a freezer bag. Bake from frozen, adding 2-3 extra minutes. Perfect for spontaneous cookie emergencies or unexpected guests.
Chocolate Quality Matters
This is not the place for bargain chocolate. The chocolate is the star—use the best you can afford. Mix different percentages for complexity: 60% for sweetness, 70% for depth, even some 80% for serious chocolate lovers.
Room Temperature is Key
All ingredients should be room temperature for proper emulsification. Cold eggs or butter will seize, creating lumpy dough. Plan ahead, or use the warm water trick for eggs and microwave butter in 5-second bursts.
Size Consistency
Use a cookie scoop for uniform size. This ensures even baking—no half-burnt, half-raw cookies. A large scoop (3 tablespoons) gives you that bakery-style size with the perfect ratio of crispy edge to molten center.
Variations to Try
Espresso Chocolate
Dissolve 2 tablespoons instant espresso powder in the vanilla extract. The coffee intensifies the chocolate flavor without making them taste like coffee. Top with espresso sugar for extra crunch.
Christmas Edition
Add 1/2 teaspoon peppermint extract and use candy cane pieces instead of some chocolate. Press a mini candy cane into each cookie right after baking for a festive touch that melts slightly into the warm cookie.
Spicy Mexican Hot Chocolate
Add 1 teaspoon cinnamon, 1/2 teaspoon cayenne, and 1/4 teaspoon chili powder to the dry ingredients. Use Mexican chocolate (like Abuelita) for half the chocolate. The heat builds slowly and pairs beautifully with cold milk.
Salted Caramel
Press a frozen caramel cube (homemade or store-bought) into each cookie before baking. As the cookie bakes, the caramel melts into a molten center. Sprinkle with extra flaky salt immediately after baking.
Nutted Version
Toast 1 cup pecans or walnuts until fragrant, chop coarsely, and fold into the dough with the chocolate. The nuts add texture and their oils enhance the molten chocolate. Try smoked salt on top for sophistication.
White Chocolate Raspberry
Replace half the chocolate with white chocolate chunks and fold in 1/2 cup freeze-dried raspberries. The tart berries cut through the sweetness and create beautiful color. Add 1/2 teaspoon lemon zest to brighten everything.
Storage Tips
Short Term (1-3 Days)
Store completely cooled cookies in an airtight container at room temperature, layered with parchment paper. Add a slice of bread to the container—it helps maintain moisture and keeps cookies soft. They'll stay molten-centered for about 24 hours, then gradually firm up but remain delicious.
Pro tip: Warm day-old cookies in the microwave for 8-10 seconds to restore that molten magic. Not too long or they'll become tough.
Long Term (Up to 3 Months)
Freeze cookies in a single layer on a baking sheet until solid, then transfer to a freezer bag with as much air removed as possible. Freeze for up to 3 months. Thaw at room temperature for 30 minutes, or warm in a 300°F oven for 5-7 minutes to restore that fresh-baked molten center.
For best results, freeze dough instead of baked cookies. Portion and freeze dough balls, then bake from frozen whenever you need fresh cookies. They'll taste like you just made them.
Make-Ahead Magic
The dough can be made up to 72 hours ahead and refrigerated. In fact, it gets better with time as the flour hydrates and flavors meld. Just let it sit at room temperature for 20-30 minutes before scooping, as cold dough won't spread properly.
You can also pre-scoop dough onto a baking sheet, freeze until solid, then transfer to bags. Bake from frozen, adding 2-3 extra minutes. This is perfect for impromptu guests or late-night cravings.
Frequently Asked Questions
Too-hot butter is usually the culprit. Make sure your browned butter has cooled before adding, and your softened butter isn't melted. Also check your oven temperature with a thermometer—too hot and butter melts before structure sets. Finally, don't skip the chilling step; it helps solidify fats so cookies maintain shape.
You can, but you'll lose the perfect texture balance. All melted butter creates very flat, greasy cookies. All softened butter makes cakey cookies that don't have the same depth of flavor. The two-temperature method is worth the extra step for that perfect molten center with crispy edges.
You likely used chocolate chips, which contain stabilizers that prevent melting. Always chop your own chocolate from bars. Also, make sure you're using good quality chocolate with 60-70% cacao. Cheap chocolate has too many additives. Finally, don't overbake—chocolate needs residual heat to create those molten pools.
Absolutely! For smaller cookies, use a tablespoon scoop and bake 8-10 minutes. For giant bakery-style cookies, use 1/4 cup dough and bake 14-16 minutes. Adjust baking time but keep the temperature the same. The large size is particularly dramatic with molten centers that flow like lava when broken open.
Look for golden edges that are set, while centers still appear slightly underbaked and puffy. They'll jiggle slightly when you gently shake the pan. If edges are dark brown, you've gone too far. Remember they continue cooking on the hot pan, so err on the side of underbaking for that molten center.
Yes, but use a 1:1 gluten-free flour blend that contains xanthan gum (like King Arthur or Bob's Red Mill). Add an extra egg yolk for structure. The texture will be slightly different—more sandy than chewy—but still delicious. Don't try with almond or coconut flour; they won't provide the right structure for molten centers.
Molten Chocolate Chip Cookies That Melt in Your Mouth
Ingredients
Instructions
- Brown the butter: Melt 1/2 cup butter in a saucepan over medium heat until it foams and turns golden brown with a nutty aroma. Pour into a heatproof bowl and let cool.
- Cream remaining butter and sugars: Beat softened butter with brown and white sugar for 3-4 minutes until light and fluffy.
- Add eggs and vanilla: Beat in egg, then yolk, then vanilla until glossy and emulsified.
- Combine butters: Mix in cooled browned butter until smooth.
- Whisk dry ingredients: In a separate bowl, whisk together flour, baking soda, baking powder, and salt.
- Combine: Add dry ingredients to wet in three additions, mixing just until combined.
- Add chocolate: Fold in chopped chocolate until evenly distributed.
- Chill: Refrigerate dough for 30 minutes to prevent excessive spreading.
- Portion: Scoop 3-tablespoon mounds onto parchment-lined baking sheets, 3 inches apart.
- Bake: Bake at 350°F for 11-13 minutes until edges are golden but centers still jiggle.
- Finish: Immediately sprinkle with flaky salt. Cool on pan 10 minutes before transferring to rack.
Recipe Notes
For the ultimate molten experience, serve cookies warm when centers are still gooey. Store in an airtight container for up to 5 days, or freeze dough for up to 3 months. Reheat cookies for 8-10 seconds in the microwave to restore molten centers.