I was standing in my kitchen at 11:47 p.m. in my pajamas, hair in a messy bun, staring at a half-eaten tub of cream cheese and a near-empty jar of peanut butter. The cheesecake I had planned to make for tomorrow's potluck had failed spectacularly—my springform pan decided to retire mid-bake, leaving me with a puddle of filling on the oven floor. But here's the thing about desperation: it makes you brilliant. As I scraped the remnants of my dignity (and the cream cheese) into a bowl, inspiration struck. What if I didn't need a pan? What if I didn't need to bake anything at all? What if the best cheesecake I'd ever make would come from the biggest kitchen disaster of my life?
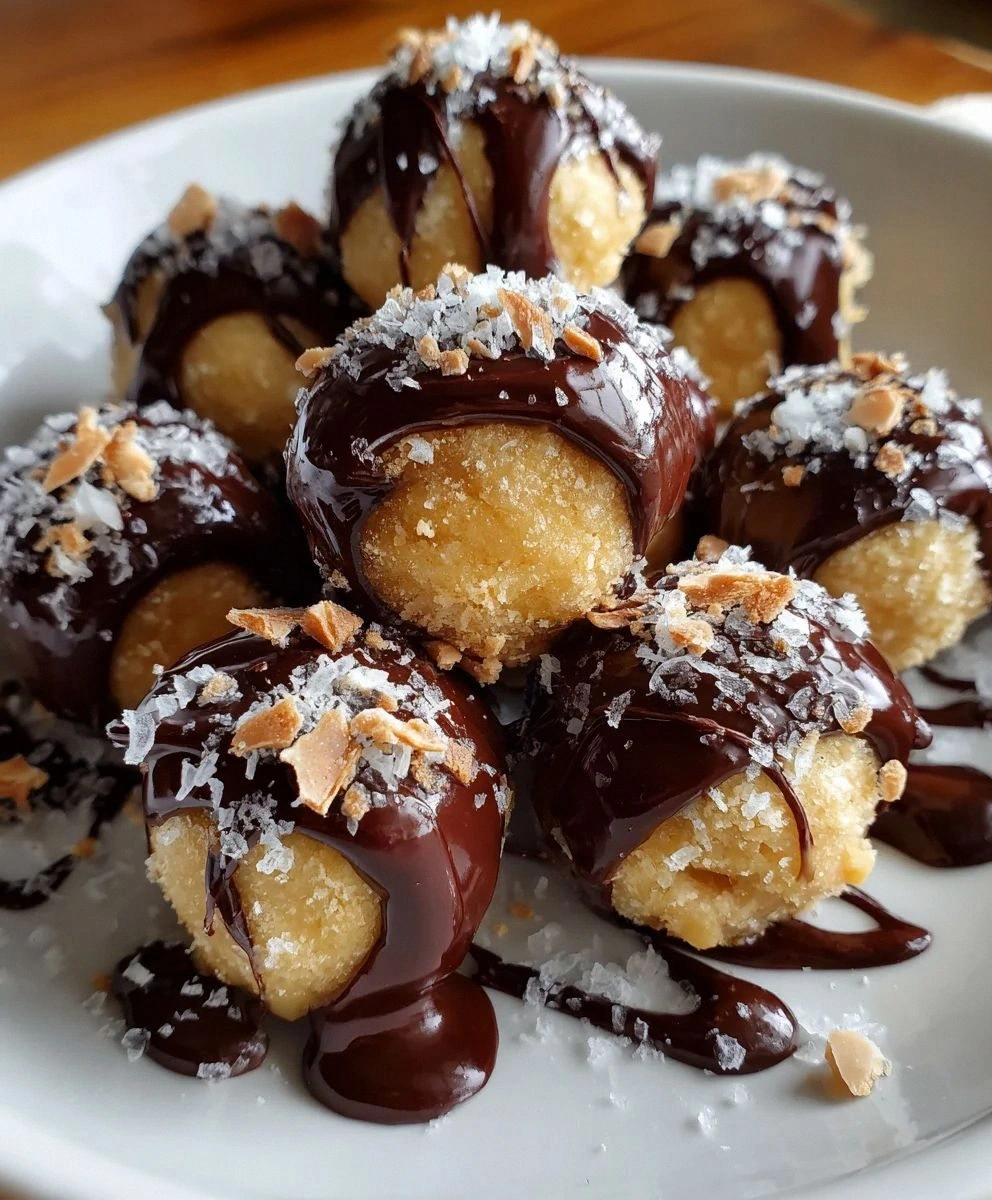
Thirty minutes later, I was rolling what would become the most addictive dessert I've ever created—little spheres of peanut butter cheesecake bliss that didn't require a single minute of baking. The first bite was a revelation: the smooth, tangy cream cheese dancing with rich peanut butter, the subtle crunch of graham cracker crumbs providing just enough texture, all wrapped in a crisp chocolate shell that shattered like thin ice between your teeth. I ate three before I even finished rolling the batch. My roommate wandered in, took one bite, and promptly sat on the kitchen floor to eat them like popcorn. We finished the entire tray that night, and I had to make another batch for the potluck at 2 a.m.—no regrets.
Since that fateful midnight miracle, I've perfected this recipe through what I call "research and development" (read: making them every weekend and forcing them on anyone who visits). I've discovered the exact ratio that makes them hold their shape without being dense, the chocolate coating technique that gives you that professional shine, and the storage method that keeps them perfect for up to a week—though honestly, they've never lasted longer than three days in my house. This isn't just another no-bake dessert; this is the dessert that will make you famous at office parties, the one your friends will request for every gathering, the one you'll find yourself making at midnight because the craving hit.
Let me walk you through every single step—by the end, you'll wonder how you ever made it any other way.
What Makes This Version Stand Out
Zero Oven Required: While everyone else is sweating over their ovens during summer parties, you'll be casually whipping up these beauties in your air-conditioned kitchen. No need to heat up your entire house for dessert—just mix, roll, dip, and chill. I've made these in a hotel room using nothing but a plastic spoon and sheer determination.
Texture Perfection: Most no-bake balls are either too soft and greasy or so hard they could chip a tooth. These hit that sweet spot—firm enough to hold their shape at room temperature for two hours, but soft enough to bite through without effort. The secret? That perfect cream cheese to peanut butter ratio that took me nine batches to nail.
Professional Finish Without the Fuss: That glossy chocolate coating isn't just for looks—it creates a textural contrast that makes these feel like they came from a boutique chocolate shop. The coconut oil trick I'll share later gives you that bakery-case shine without tempering chocolate or any fancy techniques.
Make-Ahead Champion: These actually taste better on day two when the flavors have melded together. I make a double batch on Sunday and have dessert for the entire week. They freeze beautifully for up to three months, which means you're always 30 minutes away from impressive dessert.
Crowd Psychology: There's something about bite-sized food that makes people lose their minds. I've watched grown adults hover over the serving plate like vultures, counting how many are left and calculating if they can snag another without looking greedy. These disappear faster than free pizza at a college dorm.
Ingredient Integrity: Every component serves a purpose here—the graham crackers aren't just filler, they're the backbone that prevents the cream cheese from becoming overwhelming. The vanilla isn't optional background noise; it's the bridge between peanut butter and chocolate that makes the whole thing sing.
Customization Paradise: Once you master the base, you can take these in a hundred directions. I've made them with almond butter and white chocolate for bridal showers, with crunchy peanut butter and sea salt for the salt-obsessed, with Nutella swirls for the chocolate addicts. The base recipe is just the beginning.
Alright, let's break down exactly what goes into this masterpiece...
Inside the Ingredient List
The Flavor Base
Cream cheese is the backbone of this operation, and I don't mess around with the cheap stuff. After testing with everything from store brands to the fancy imported kind, I landed on good old Philadelphia as the gold standard—it has the perfect tang to balance the peanut butter's richness without being overwhelming. The key is temperature: too cold and you'll get lumps that no amount of mixing will fix, too warm and you'll have a greasy mess that refuses to set. You're looking for that sweet spot where it indents when you press it but still holds its shape. Leave it on the counter for 45 minutes, or if you're impatient (guilty), cube it and give it those quick microwave bursts I mentioned earlier.
Peanut butter choice makes or breaks this recipe, and I've got strong opinions here. Creamy peanut butter is non-negotiable—crunchy might seem like a good idea, but it creates weak points in the balls that cause cracking during the chocolate dipping. Go with a mainstream brand like Jif or Skippy; natural peanut butter separates and creates oily balls that never quite firm up. The sugar content in conventional peanut butter actually helps with structure here, so save your health food phase for another recipe. If you must use natural, stir it obsessively and add an extra tablespoon of powdered sugar to compensate.
The Texture Crew
Powdered sugar does more than sweeten—it's the glue that holds everything together. Granulated sugar would give you a gritty texture that feels like you dropped your dessert in sand, while honey or maple syrup would make everything too soft. The cornstarch in powdered sugar absorbs excess moisture from the cream cheese, creating that perfect firm texture. If you're reducing sugar, don't go below half a cup or you'll have peanut butter cream cheese soup. Trust me, I tried to be healthy once—it ended in tears and a trash can full of goo.
Graham cracker crumbs are my secret weapon for that authentic cheesecake flavor. Sure, you could use vanilla wafers or digestive biscuits, but grahams have that honey-sweet note that screams classic cheesecake. Pulse them in a food processor until they're fine crumbs with a few pea-sized pieces for texture. Don't substitute with pre-crushed crumbs—they're too powdery and make the balls dense. One standard sleeve of grahams equals exactly one cup of crumbs when processed, so you don't need to dirty measuring cups.
The Unexpected Star
Vanilla extract might seem like a background player, but it's actually the flavor bridge that makes peanut butter and chocolate taste like they belong together. Use real vanilla extract, not the imitation stuff that tastes like a candle factory. The alcohol in the extract helps cut through the richness of the peanut butter and cream cheese, preventing that heavy, one-note flavor that ruins so many peanut butter desserts. If you're feeling fancy, vanilla bean paste gives you those gorgeous specks that make people think you're a pastry chef.
Semi-sweet chocolate chips are my go-to for coating because they provide the perfect bitter-sweet balance against the sweet filling. Dark chocolate works if you're serving adults with sophisticated palates, but kids tend to find it too bitter. Milk chocolate makes everything cloyingly sweet—you want contrast, not a sugar bomb. The key is using good quality chips like Ghirardelli or Guittard; cheap chocolate seizes easily and tastes waxy when chilled.
The Final Flourish
Coconut oil is technically optional, but it's what separates amateur-looking balls from professional ones. Just a teaspoon melted with your chocolate creates a glossy finish that makes people think you know what you're doing. It also thins the chocolate slightly, making it easier to get an even coating. If coconut isn't your thing, use refined coconut oil that has no flavor, or substitute with an equal amount of butter. Just know that butter will give you a softer set and slightly cloudy finish.
Everything's prepped? Good. Let's get into the real action...
The Method — Step by Step
- Start by beating your cream cheese in a medium bowl until it's completely smooth and fluffy—this should take about two minutes with an electric mixer on medium speed. Don't rush this step; any lumps will haunt you later when you're trying to roll perfect balls. The mixture should look like thick whipped cream and leave soft peaks when you lift the beaters. Scrape down the sides of the bowl twice during mixing to ensure everything gets incorporated. If you see any stubborn lumps, press them against the side of the bowl with a spatula until they disappear.
- Add the peanut butter and beat for another minute until the mixture is homogenous and lighter in color. This is where magic happens—the peanut butter and cream cheese transform into something greater than their parts. The mixture will thicken and become the color of caramel, pulling away from the sides of the bowl in satisfying ribbons. Stop and scrape down the bowl again, making sure no cream cheese streaks remain. The aroma at this point should make you want to eat it with a spoon—resist, or you'll end up with half a batch like I did the first time.
- Pulse in the powdered sugar and vanilla extract on low speed just until combined. Overmixing here will incorporate too much air, making the balls soft and difficult to roll. The mixture should pull together into a soft dough that holds its shape when you pinch some between your fingers. If it seems too soft to roll, add an extra tablespoon of powdered sugar. If it's too crumbly and won't hold together, you've added too much sugar—beat in a teaspoon of cream cheese to fix it.
- Fold in the graham cracker crumbs with a spatula using gentle folding motions. You want to maintain some texture here, so don't overmix. The crumbs should be evenly distributed but still visible as specks throughout the mixture. When done correctly, the dough should feel like soft play-dough that holds together when squeezed but doesn't stick excessively to your fingers. If it's still too sticky, add another tablespoon of crumbs; if it's crumbly and won't hold together, you've added too much.
- Cover the bowl with plastic wrap and refrigerate for 30 minutes—this is non-negotiable. Chilling firms up the fats and makes the mixture rollable. While you're waiting, line a baking sheet with parchment paper and clear space in your refrigerator for it. Resist the urge to skip this step even if your mixture looks firm enough; warm balls will flatten on the bottom and won't hold their shape during chocolate dipping. Use this time to melt your chocolate and set up your dipping station.
- Remove the chilled mixture from the refrigerator and scoop out portions using your cookie scoop or a tablespoon. Roll each portion between your palms until smooth and round, working quickly so the warmth of your hands doesn't soften them too much. Place the rolled balls on the parchment-lined baking sheet as you work. If they start getting soft, pop the whole sheet back in the fridge for 10 minutes. Aim for golf ball-sized portions—any larger and they'll be awkward to eat; smaller and you won't get that satisfying creamy center.
- Return the rolled balls to the refrigerator while you prepare the chocolate coating. Combine chocolate chips and coconut oil in a microwave-safe bowl and microwave in 30-second bursts, stirring between each, until melted and smooth. Don't overheat the chocolate or it will seize and become unusable. You're looking for a glossy, pourable consistency that coats the back of a spoon. Let the chocolate cool for 5 minutes—it should still be liquid but not hot enough to melt the balls.
- Dip each ball using a fork, rolling it gently to coat completely. Lift it out with the fork, tap gently on the side of the bowl to remove excess chocolate, and slide it back onto the parchment paper. Work quickly here—if the chocolate starts to thicken, microwave it for 5 seconds to loosen it up. The chocolate should set within 5 minutes at room temperature, but if you're impatient (or it's hot in your kitchen), pop them in the fridge for 10 minutes.
- Once the chocolate has set, you can drizzle with melted peanut butter, sprinkle with crushed peanuts, or dust with a little sea salt for that gourmet touch. Store in an airtight container in the refrigerator for up to a week, though I guarantee they won't last that long. For the best texture, let them sit at room temperature for 10 minutes before serving—this softens the chocolate slightly and lets the flavors bloom.
That's it—you did it. But hold on, I've got a few more tricks that'll take this to another level...
Insider Tricks for Flawless Results
The Temperature Rule Nobody Follows
Here's the thing that separates amateur balls from professional ones: temperature management. Your cream cheese needs to be room temperature, your peanut butter should be stirrable but not liquid, and your chocolate should be melted but not hot. I keep a kitchen thermometer handy and aim for 68°F cream cheese, 72°F peanut butter, and 90°F chocolate. Sounds obsessive? Maybe. But it guarantees balls that are smooth, glossy, and hold their shape. A friend tried skipping this step once—let's just say she ended up with chocolate-covered pancakes instead of spheres.
Why Your Nose Knows Best
Don't underestimate the power of aroma in these little gems. When you're mixing the filling, stop and smell it. It should smell like the inside of a peanut butter cup—sweet, nutty, with a hint of tang from the cream cheese. If all you smell is peanut butter, add a pinch more vanilla. If it smells flat, you need more sugar. Your nose knows when the balance is right before your taste buds do. This is why my grandmother could bake without measuring—she cooked with her senses, not just her eyes.
The 5-Minute Rest That Changes Everything
After you roll the balls but before you dip them, let them sit at room temperature for exactly 5 minutes. This brief rest allows the surface to warm slightly, which helps the chocolate adhere better and prevents cracking. Too cold and the chocolate contracts as it sets, creating hairline cracks that make your balls look like tiny chocolate globes. Too warm and they start to lose their shape. Five minutes is the sweet spot I discovered after watching too many perfectly good balls develop chocolate stretch marks.
The Double-Dip Secret
For a truly professional finish, dip them twice. The first coat is thin and creates a smooth base; chill for 10 minutes, then dip again for that thick, glossy finish that makes people think you bought them at a chocolatier. The second dip should be slightly cooler than the first—around 85°F—to prevent melting the base layer. Yes, it takes twice as long. Yes, it's worth it. Yes, your friends will ask if you took a chocolate-making class.
The Storage Revelation
Store these in an airtight container, but here's the kicker: add a small piece of bread to the container. The bread absorbs excess moisture that can make the chocolate bloom (get that white, dusty appearance) and keeps the balls fresh longer. Change the bread every two days. I learned this from my neighbor who's been making chocolate truffles for thirty years, and it's revolutionized my dessert storage game. No more sad, bloomed chocolate in my fridge.
Creative Twists and Variations
This recipe is a playground. Here are some of my favorite ways to switch things up:
Salt Caramel Swirl
Replace half the peanut butter with caramel sauce and add a generous pinch of flaky sea salt. The salt enhances the sweetness and creates that addictive salty-sweet combination that makes people physically unable to stop eating them. I brought these to a book club once and had to physically block the plate to save some for the host. The caramel adds a buttery richness that makes them taste like a gourmet candy bar.
White Chocolate Raspberry
Use almond butter instead of peanut butter, fold in freeze-dried raspberry powder, and coat in white chocolate. The result tastes like the inside of a chocolate-covered raspberry truffle but with the creamy texture of cheesecake. The tart berries cut through the richness beautifully. These are my go-to for baby showers and bridal events—pink, pretty, and sophisticated enough for the fanciest occasions.
Crunchy Peanut Butter Cup
Stick with crunchy peanut butter and add crushed honey-roasted peanuts to the coating. These have serious texture appeal—the creamy center contrasts with the crunchy peanuts and crisp chocolate shell. They're like eating a peanut butter cup that went to the gym and came back with muscles. My brother calls them "manly peanut butter balls" and requests them for every poker night.
Mocha Madness
Add espresso powder and cocoa powder to the filling, then coat in dark chocolate with coffee bean garnish. These taste like the best mocha cheesecake you've ever had, condensed into bite-sized form. They're sophisticated enough for dinner parties but easy enough for Tuesday night cravings. Warning: these are addictive to coffee lovers. I once made them for a teacher appreciation event and got three marriage proposals.
Coconut Curry Adventure
Replace half the graham crackers with toasted coconut, add a pinch of curry powder to the filling, and coat in milk chocolate. Sounds weird, tastes incredible—the curry enhances the nuttiness of the peanut butter while the coconut adds tropical flair. These are conversation starters that convert skeptics instantly. My spice-averse mother-in-law asked for the recipe, which is basically the Nobel Prize of cooking compliments.
Holiday Spice
Add cinnamon, nutmeg, and a touch of ginger to the filling, then roll in crushed gingersnap crumbs instead of graham crackers. Coat in white chocolate and dust with gold luster dust for holiday sparkle. These taste like Christmas morning in ball form. I make dozens every December and give them as gifts—people start asking in November if I'm making "those holiday balls" again.
Storing and Bringing It Back to Life
Fridge Storage
Store these beauties in an airtight container in the refrigerator for up to 7 days, though I challenge you to make them last that long. Layer them between sheets of parchment paper to prevent sticking, and keep them away from strong-smelling foods—chocolate absorbs odors like a sponge. The ideal fridge temperature is 35-38°F; any colder and the chocolate can develop bloom, any warmer and they start to soften. If you notice condensation forming when you open the container, add a paper towel to absorb excess moisture.
Freezer Friendly
These freeze magnificently for up to 3 months—perfect for emergency dessert situations. Flash freeze them first by placing the baking sheet in the freezer for 2 hours, then transfer to freezer bags with as much air removed as possible. Thaw overnight in the refrigerator, not at room temperature, to prevent condensation from ruining the chocolate coating. Frozen balls are actually perfect for lunch boxes—they thaw by lunchtime and keep other food cold. I've been known to stash a few in my glove compartment for road trip emergencies.
Best Serving Method
For optimal texture and flavor, let them sit at room temperature for 10-15 minutes before serving. This takes the chill off and allows the flavors to bloom—cold mutes both sweetness and peanut butter flavor. If they've been frozen, give them a full 30 minutes to come to temperature. For parties, I set them out in batches, keeping the rest chilled until needed. Nothing ruins the sophisticated vibe like rock-hard chocolate that shatters when bitten. Pro tip: serve them in mini cupcake liners for easy grabbing and elegant presentation.