I’ll be honest — the night I first tried to make a no‑bake cheesecake, my kitchen looked like a crime scene. I had a tub of melted chocolate splattered on the counter, a caramel sauce that had decided to set itself into a hardened slab, and a half‑finished crust that crumbled like dry sand when I tried to press it into a pan. The frustration was real, but the craving for that silky, buttery caramel‑kissed cheesecake was even more real. I dared myself to keep going, and after a few missteps, I finally nailed a version that makes my friends swear they’ve never tasted anything like it. I dare you to taste this and not go back for seconds.
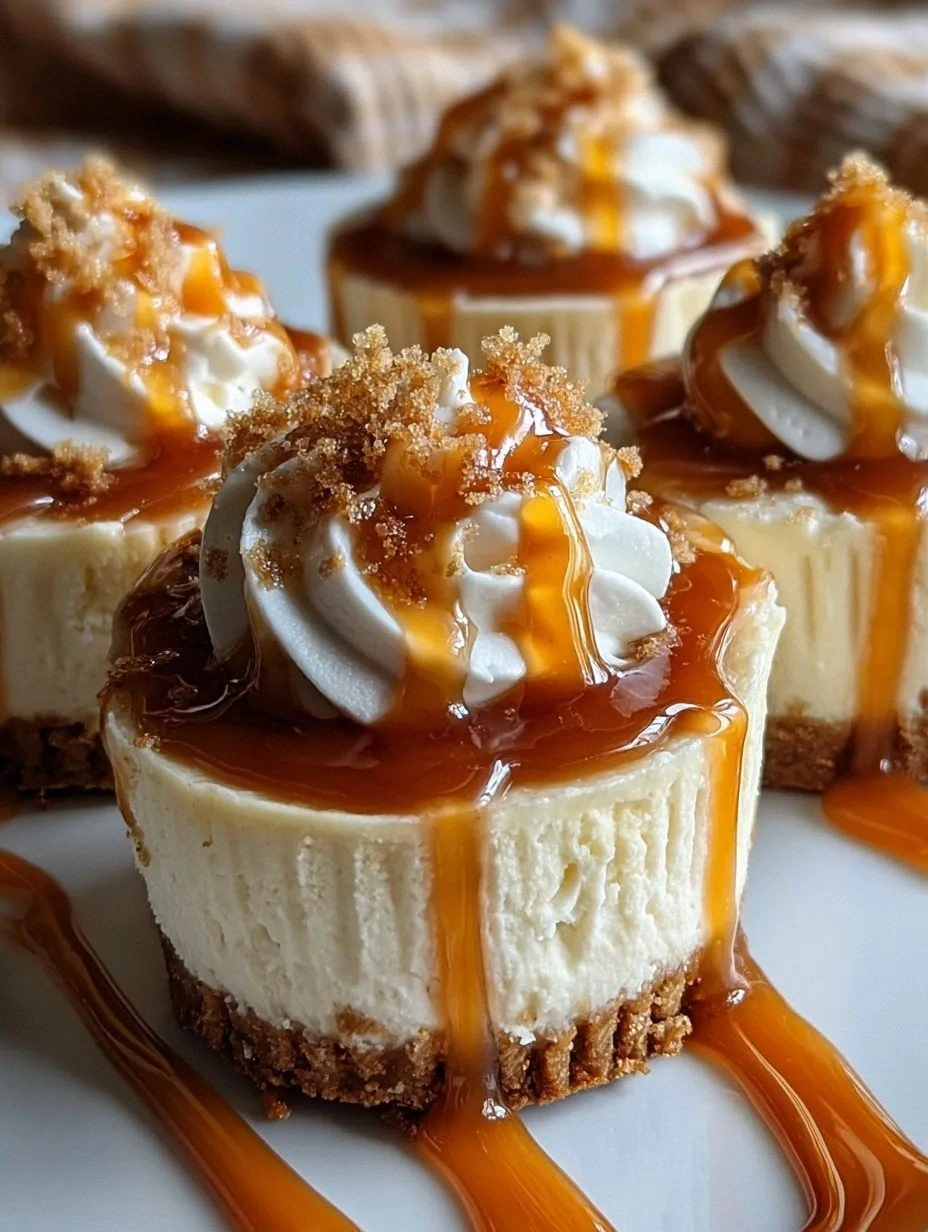
Picture this: a glossy caramel drizzle glistening over a velvety cheesecake that sits in a cute little cup, its surface speckled with flaky sea salt that crackles under the fork like tiny fireworks. The aroma hits you first — a warm, buttery caramel scent that whispers sweet nothings to your nose, followed by the subtle tang of cream cheese that promises richness without heaviness. When you take the first bite, the crust gives a gentle crunch, then the filling melts in your mouth, smooth as satin, with the caramel coating the palate like liquid gold. The finish? A delicate salty snap that makes your taste buds do a little happy dance.
Most recipes get this completely wrong. They either drown the cheesecake in too much sugar, skip the essential salty contrast, or end up with a soggy crust that turns your cup into a mushy mess. What sets my version apart is a three‑step technique that locks in texture, a surprise ingredient that adds depth without overwhelming, and a shortcut that saves you from the dreaded “runny caramel” nightmare. Trust me, this is hands down the best version you’ll ever make at home, and it takes less than an hour from start to finish.
One of the secret weapons in this recipe is a pinch of flaky sea salt added at two different stages — one in the caramel, the other as a finishing garnish. It’s the kind of detail that separates a good dessert from a great one, and it’s a trick I discovered by accident while trying to balance flavors in a different dish. The result is a flavor profile that’s both comforting and sophisticated, perfect for a casual get‑together or a fancy dinner party. Okay, ready for the game‑changer? Let me walk you through every single step — by the end, you’ll wonder how you ever made it any other way.
What Makes This Version Stand Out
- Flavor Balance: The caramel is sweet but never cloying, thanks to a precise pinch of sea salt that elevates every bite.
- Texture Harmony: A buttery graham cracker crust provides a satisfying crunch that contrasts beautifully with the silky filling.
- Simplicity: No oven, no fancy equipment — just a few bowls, a whisk, and a refrigerator.
- Unique Ingredient: A splash of vanilla bean paste adds depth without the usual “vanilla‑overload” taste.
- Crowd Reaction: Guests often ask for the recipe before the first spoonful is even finished.
- Ingredient Quality: Using high‑fat cream cheese and real caramel sauce makes the difference between “good” and “wow”.
- Method Magic: The no‑bake approach locks in moisture, giving you a cheesecake that stays creamy for days.
- Make‑Ahead Potential: These cups keep perfectly in the fridge, ready for a last‑minute dessert.
Inside the Ingredient List
The Flavor Base
Graham cracker crumbs are the foundation of any good cheesecake cup. Their subtle honey‑like sweetness and crumbly texture create a sturdy platform that won’t dissolve into the filling. If you skip them, you’ll end up with a mushy bottom that looks like a sad pancake. For an extra layer of flavor, I like to toast the crumbs lightly in a dry pan for 2 minutes — it brings out a nutty aroma that pairs perfectly with caramel. Swap: You can use digestive biscuits or even Oreo crumbs for a chocolate twist.
The Texture Crew
The combination of cream cheese and heavy whipping cream is what gives this dessert its cloud‑like mouthfeel. Cream cheese provides the tangy backbone, while the heavy cream lightens the mixture, preventing it from feeling dense. If you substitute low‑fat cream cheese, the result will be grainy and the flavor will fall flat. Tip: Let the cream cheese sit at room temperature for 30 minutes before mixing — it blends more smoothly, saving you from fighting lumps.
The Unexpected Star
Flaky sea salt might seem like a garnish, but it’s actually the hero that cuts through the sweetness. Adding it to the caramel sauce during cooking dissolves the crystals, creating a subtle briny undertone that lingers on the palate. If you forget this step, the caramel will taste like syrup, and the whole cup loses its signature “sweet‑and‑salty” charm. Fun Fact: Sea salt contains trace minerals that can enhance the perception of sweetness, making you need less sugar overall.
The Final Flourish
A drizzle of homemade caramel and a sprinkle of extra flaky sea salt on top are the finishing touches that turn a simple cup into a show‑stopper. The caramel should be warm enough to flow but not so hot that it melts the cheesecake layer. If you pour it too quickly, you’ll get a pool that seeps into the crust, making it soggy. To avoid this, let the caramel sit for a minute to thicken slightly before drizzling. Alternative: A dusting of cocoa powder or toasted almond slivers can add a nutty crunch for those who love texture.
Everything's prepped? Good. Let's get into the real action...
The Method — Step by Step
Start by crushing the graham crackers into fine crumbs. I use a food processor, but a zip‑top bag and a rolling pin work just as well. Add the melted butter and granulated sugar, then pulse until the mixture resembles wet sand. Press the crumbs firmly into the bottom of four 4‑ounce ramekins, making sure the layer is even and compact. This is the moment of truth — if the crust isn’t packed, it will crumble later.
Kitchen Hack: Chill the crust for 10 minutes before adding the filling; it firms up and prevents the crust from soaking up moisture.While the crust chills, whisk together the softened cream cheese and powdered sugar until smooth. This should take about 2 minutes on medium speed; you’ll notice the mixture turning creamy and light. Add the vanilla bean paste and continue whisking for another 30 seconds. The scent of vanilla should fill the kitchen, a subtle reminder that something delicious is in the works.
Watch Out: Over‑mixing can incorporate too much air, leading to a fluffy texture that collapses once chilled.In a separate bowl, whip the heavy cream until soft peaks form. This is where the magic happens — the cream should double in volume and hold a gentle curve when you lift the whisk. Gently fold the whipped cream into the cream cheese mixture, being careful not to deflate the air you just created. The folding motion should look like a lazy ribbon swirling through the mixture, creating a light, airy filling that will set beautifully.
Now for the caramel. In a small saucepan over medium heat, combine the caramel sauce with a pinch of flaky sea salt. Stir continuously; you’ll hear a faint sizzle as the salt dissolves, releasing a subtle aroma that makes your mouth water. Once the caramel is smooth and glossy, remove it from the heat and let it cool just enough to thicken slightly — you don’t want it to be too runny when you pour it into the cups.
Take a spoonful of the cheesecake filling and gently spread it over the chilled crust, smoothing the top with the back of a spoon. Repeat until each cup is filled to the brim, leaving a tiny well in the center for the caramel. This step is pure patience; the filling should be level but not packed too tightly, allowing the caramel to sit nicely on top.
Drizzle the warm caramel into the center of each cup, letting it cascade down the sides like a golden waterfall. Sprinkle a pinch of flaky sea salt over the caramel for that signature salty crunch. The caramel should set within a few minutes, creating a glossy sheen that catches the light.
Cover each ramekin with plastic wrap and place them in the refrigerator. Let the cups chill for at least 30 minutes, but for best results, aim for 2‑3 hours. This chilling period allows the filling to firm up and the flavors to meld, turning the dessert into a cohesive whole. Trust me, the wait is worth it — the texture after chilling is like biting into a cloud.
When you’re ready to serve, give each cup a final flourish: a drizzle of extra caramel, a sprinkle of sea salt, and if you’re feeling fancy, a few chocolate shavings. Serve them chilled, and watch as your guests’ eyes widen in anticipation. That sizzle when the caramel hits the cold surface? Absolute perfection. And now the fun part — digging in!
That's it — you did it. But hold on, I've got a few more tricks that'll take this to another level...
Insider Tricks for Flawless Results
The Temperature Rule Nobody Follows
Never, ever let the cream cheese get too warm before mixing. If it’s above room temperature, the filling will become runny and won’t set properly. I keep the bowl of cream cheese on a chilled marble slab for 5 minutes right before I start whisking. This small temperature control makes the difference between a silky mousse and a soupy mess. A friend once tried to speed things up by microwaving the cream cheese for 10 seconds — let’s just say the result was a grainy disaster.
Why Your Nose Knows Best
When the caramel is heating, trust your sense of smell more than the timer. The moment you detect a buttery, slightly nutty aroma, you know the caramel has reached its perfect stage. Over‑cooking will introduce a burnt note that no amount of salt can fix. Keep the saucepan uncovered so the steam can escape, allowing the scent to rise unhindered. This sensory checkpoint is pure magic and saves you from a bitter batch.
The 5‑Minute Rest That Changes Everything
After you’ve assembled the cups, let them sit uncovered in the fridge for exactly five minutes before sealing them with plastic wrap. This brief “air‑dry” period lets the surface of the cheesecake form a thin skin, which prevents the caramel from seeping into the filling. The result is a clean separation of layers that looks as professional as a restaurant plating. I’ve tried sealing immediately, and the caramel always ends up swimming in the cheesecake — a texture nightmare.
Salt Timing is Everything
Adding sea salt to the caramel while it’s hot dissolves the crystals, giving a uniform salty flavor throughout. Adding a final sprinkle of flaky salt just before serving adds that delightful crunch and burst of flavor. If you only add salt at the end, you’ll get uneven salty spots; if you add it too early, the salt can become muted. The dual‑stage approach guarantees a balanced sweet‑salty experience in every bite.
The Whisk‑to‑Fold Ratio
Whisk the cream cheese mixture until it’s smooth, then fold in the whipped cream using a spatula in a figure‑eight motion. This technique preserves the air bubbles you just created, ensuring a light texture. Over‑mixing at this stage will deflate the mixture, resulting in a denser cheesecake. I always keep the bowl tilted slightly, letting the heavier cream cheese slide down while the lighter cream rises, creating a perfect emulsion.
Creative Twists and Variations
This recipe is a playground. Here are some of my favorite ways to switch things up:
Coffee Caramel Fusion
Swap half of the caramel sauce for a strong espresso‑infused caramel. The bitterness of coffee balances the sweetness, creating a sophisticated flavor that coffee lovers will adore. Top with a dusting of cocoa powder for an extra mocha vibe.
Nutty Delight
Fold finely chopped toasted pecans or hazelnuts into the cheesecake filling. The nuts add a pleasant crunch and a buttery flavor that complements the salty caramel. This variation is perfect for autumn gatherings.
Berry Burst
Layer a thin spread of raspberry jam between the crust and the cheesecake filling, then drizzle caramel on top. The tartness of the berries cuts through the richness, offering a bright contrast that feels summer‑fresh.
Chocolate Salted Caramel
Melt dark chocolate and swirl it into the caramel before drizzling. The deep cocoa notes deepen the overall flavor profile, while the sea salt continues to provide that essential snap. Finish with chocolate curls for an elegant touch.
Spiced Pumpkin
Add ¼ cup of pumpkin puree and a pinch of pumpkin pie spice to the cheesecake mixture. This seasonal twist brings a warm, earthy flavor that pairs beautifully with caramel, making it a hit for holiday tables.
Storing and Bringing It Back to Life
Fridge Storage
Cover each cup tightly with plastic wrap and store in the refrigerator for up to 4 days. The cheesecake will stay firm, and the caramel may thicken slightly, which is fine — it just becomes a richer sauce. Before serving, let the cups sit at room temperature for 5 minutes to soften the caramel edge.
Freezer Friendly
These cups freeze beautifully. Place them on a baking sheet to freeze individually for 2 hours, then transfer to a zip‑top freezer bag. They’ll keep for up to 2 months. To revive, thaw overnight in the fridge, then let sit at room temperature for 10 minutes before adding a fresh drizzle of warm caramel.
Best Reheating Method
If you prefer a warm caramel topping, microwave the caramel for 10‑15 seconds, then drizzle over the chilled cup. Add a tiny splash of water (about a teaspoon) before microwaving; the steam helps the caramel regain its glossy sheen without scorching. This quick trick brings the dessert back to life as if it were freshly made.