I still remember the day I accidentally created the most outrageous peanut butter dessert known to mankind. It started as a frantic Tuesday evening when my in-laws announced they were "just dropping by" in twenty minutes and I had nothing but a half-eaten bag of peanut butter sandwich cookies, a tub of cream cheese, and what I can only describe as an unhealthy obsession with peanut butter. The kitchen looked like a tornado had whirled through a peanut factory — jars everywhere, cookie crumbs coating the counter like sweet snow, and that unmistakable aroma of roasted peanuts mingling with vanilla. My hands moved faster than my brain, layering, spreading, whipping, and praying to the dessert gods that something magical would emerge from the chaos.
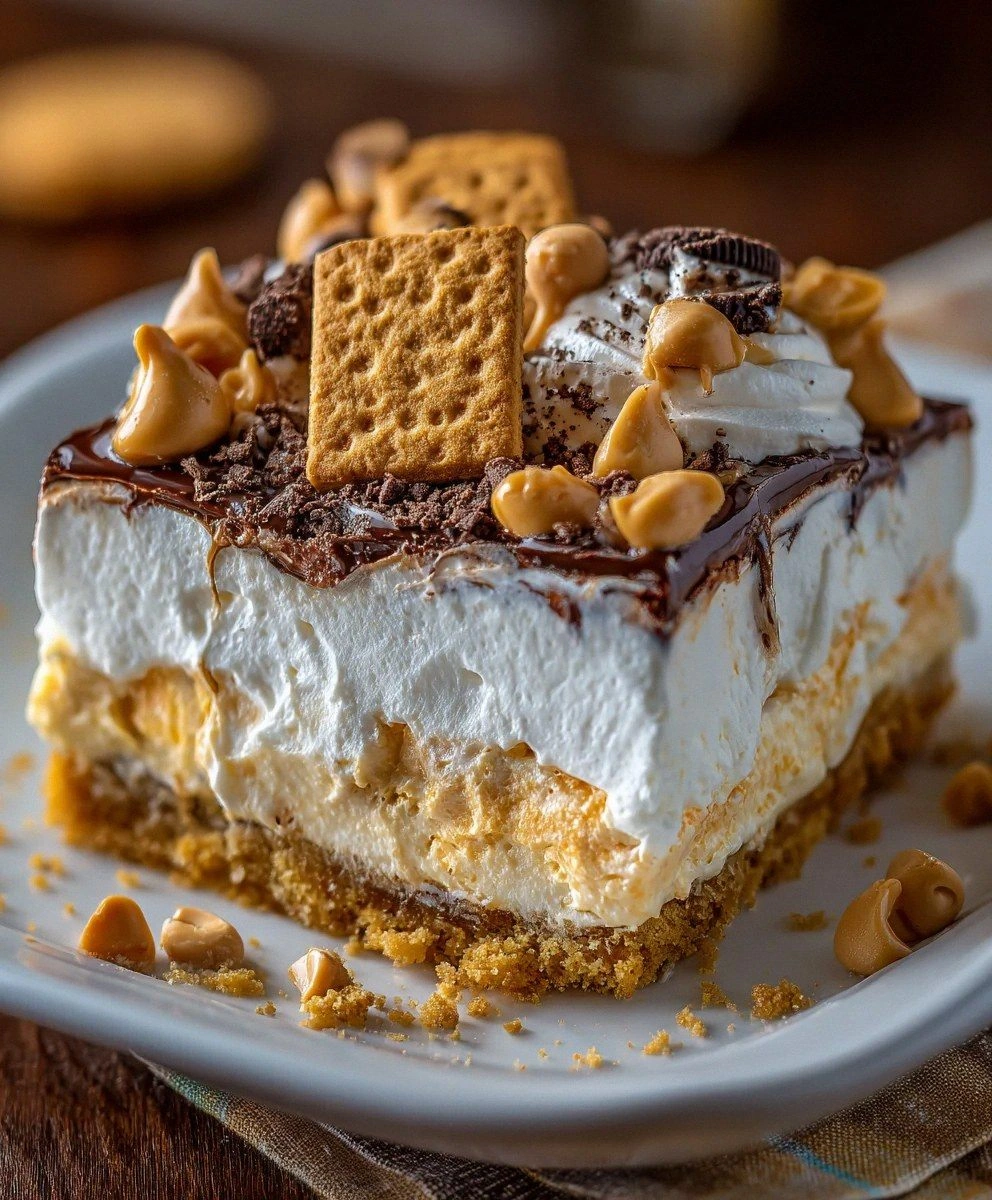
Picture this: the first spoonful hits your tongue and it's like a symphony of textures — the buttery crunch of cookie base giving way to silky cream cheese, followed by clouds of whipped topping that dissolve like sweet air, all while ribbons of peanut butter weave through every layer like edible gold threads. The vanilla pudding whispers comfort, the peanut butter chips pop with concentrated flavor bombs, and that final drizzle of melted peanut butter on top? Pure liquid courage in dessert form. I dare you to taste this and not go back for seconds — actually, I double-dog dare you, because resistance is futile once this hits your taste buds.
This isn't just another no-bake dessert recipe floating around the internet like lost socks in the laundry. No, my friends, this is the peanut butter dessert that made my notoriously picky neighbor cross the street just to beg for the recipe. It's the one that disappeared from the church potluck table faster than gossip spreads in a small town. Most recipes get this completely wrong — they either go too sweet, too heavy, or they commit the cardinal sin of using crunchy peanut butter when creamy is clearly the path to enlightenment. I'll be honest — I ate half the batch before anyone else got to try it, standing at my kitchen counter in my pajamas at midnight, because self-control is overrated when peanut butter perfection is within reach.
What makes this version stand out? We're talking about a dessert that layers like a geological formation of deliciousness, each stratum building on the last until you hit the motherlode of peanut butter nirvana. The secret lies in the temperature play — cold cream cheese against room-temperature peanut butter, creating marbled swirls that look like edible art. This next part? Pure magic. Stay with me here — this is worth it, because by the time we're done, you'll understand why this recipe has replaced birthday cakes in my family and why my kids now request it for every celebration, including "because it's Tuesday" celebrations.
What Makes This Version Stand Out
Flavor Bomb: This dessert doesn't just taste like peanut butter — it tastes like peanut butter went to finishing school and came back with a PhD in deliciousness. The combination of peanut butter cookies in the base, creamy peanut butter in the layers, and peanut butter chips on top creates a triple-threat of nutty perfection that hits every possible peanut butter receptor on your tongue.
Texture Paradise: We're talking about a dessert that crackles, melts, and dissolves in perfect harmony. The cookie base provides that essential crunch that shatters like thin ice under your spoon, while the cream cheese layer spreads like velvet across your palate, and the whipped topping layers dissolve like sweet clouds of peanut butter heaven.
Idiot-Proof Assembly: If you can operate a spoon and open packages without injuring yourself, you can make this dessert. There's no baking, no tempering, no folding techniques that require a culinary degree — just layer, spread, and try not to eat it all while you're making it.
Crowd Psychology: This dessert has a psychological effect on people. I've watched grown adults hover around the serving dish like vultures, strategically positioning themselves for the next spoonful. It's the great equalizer — CEOs and toddlers alike will fight for the corner piece with extra peanut butter drizzle.
Make-Ahead Champion: Picture yourself pulling this out of the fridge after a dinner party, the whole kitchen smelling like a peanut butter factory, while your guests practically lick their plates clean. It actually gets better after a day in the fridge when the flavors have time to mingle and marry into something even more spectacular.
Ingredient Quality Flex: This recipe works whether you're using store-brand cream cheese or the fancy stuff from the artisanal dairy. It's democratic that way — the peanut butter flavor is so dominant that it elevates everything around it like a delicious culinary rising tide.
Inside the Ingredient List
The Flavor Base
The peanut butter sandwich cookies aren't just a lazy shortcut — they're the foundation of this entire operation, providing both structure and that initial peanut butter punch that sets the stage for everything else. When you crush them, don't go too fine — you want some gravel-sized pieces that will provide textural interest and prevent the base from becoming a solid wall of cookie concrete. These cookies have just the right amount of sweetness and salt to balance the richness that's coming, like a good opening act that gets the crowd warmed up without stealing the show. If you absolutely must substitute, you could use regular sandwich cookies with a tablespoon of peanut butter mixed in, but honestly, that's like bringing a knife to a gunfight — technically possible but definitely not optimal.
The Texture Crew
Cream cheese is the unsung hero here, providing body and tang that cuts through the peanut butter's richness like a skilled mediator in a family argument. It needs to be at that perfect room temperature where it spreads like butter on a summer day but doesn't melt into a puddle of dairy sadness. The powdered sugar isn't just for sweetness — it's the magic ingredient that transforms the cream cheese from tangy dairy product into something that plays nicely with peanut butter's assertive personality. Whipped topping is where most recipes go wrong — they either mix it to death or don't fold it enough, ending up with either peanut butter soup or weird rubbery islands floating in their dessert sea.
The Unexpected Star
Here's where things get interesting — the instant vanilla pudding mix is the secret weapon that nobody sees coming. It's like the quiet kid in class who suddenly reveals they're a math genius; it thickens, stabilizes, and adds this subtle vanilla note that makes the peanut butter taste more like peanut butter. The whole milk isn't negotiable — skim milk will give you a sad, thin pudding that weeps like a disappointed grandmother, while cream will make everything too rich and heavy like a winter coat in July. This combination creates the perfect middle ground where the pudding sets up just enough to hold its own against the other layers without becoming a rubbery barrier.
The Final Flourish
Creamy peanut butter is the star that everyone's really here to see, and using the natural kind with the oil separation will give you a more sophisticated, less cloying result than the sugar-loaded conventional varieties. The additional whipped topping for the final layer acts like a fluffy blanket that ties everything together, creating a cloud-like finish that makes you feel like you're eating peanut butter in heaven. Peanut butter chips are the concentrated flavor bombs that provide little bursts of intensity throughout, like finding treasure in every other bite. And that final drizzle of melted peanut butter on top? It's pure theater — it hardens slightly in the fridge, creating ribbons of peanut butter that crack when you spoon through them, adding one last textural element that makes people close their eyes and sigh with satisfaction.
The Method — Step by Step
- Start by channeling your inner food processor — or grab a sturdy zip-top bag and a rolling pin if you're feeling primal. The peanut butter sandwich cookies need to be crushed into a mix of fine crumbs and pea-sized pieces, creating a textured base that will hold together without becoming a solid brick. Think of it as making edible sand art, where some grains are fine and others provide delightful surprises. Don't rush this part — the rhythm of crushing cookies can be weirdly therapeutic, like a delicious form of stress relief that ends with dessert.
- Now we're getting to the good stuff — grab your 9x13 pan and dump those cookie crumbs in, pressing them down with the bottom of a measuring cup like you're creating a delicious archaeological layer. You want firm pressure here, but don't go crazy — we're making a dessert base, not packing gunpowder into a cannon. The crumbs should stick together when pressed but still have some give, like a good mattress that supports without feeling like concrete. If you've done this right, you should be able to turn the pan upside down without everything falling out, though I don't recommend testing this theory over your kitchen floor.
- Time for the cream cheese layer, and this is where patience becomes a virtue — beat the cream cheese until it's smoother than a politician's promises, about two minutes of steady mixing. Add the powdered sugar gradually, like you're feeding a very picky child who will reject anything too sweet too fast. The mixture should become lighter in color and texture, transforming from dense dairy to something that looks like it belongs in a dessert. Scrape down the bowl obsessively — cream cheese is sneaky and will hide unmixed chunks along the sides like little white speed bumps waiting to ruin someone's bite.
- Here's where things get fluffy — fold in half the whipped topping with the grace of a ballerina who also really loves peanut butter. Use a spatula and make figure-eights through the mixture, rotating the bowl as you go like you're conducting a very gentle orchestra. The goal is to maintain the air bubbles that make this layer light and dreamy instead of dense and heavy like peanut butter concrete. When you can no longer see streaks of white, you've achieved the perfect marriage of cream cheese clouds and whipped topping dreams.
- Spread this cream cheese mixture over your cookie base like you're icing a very important cake that happens to be made of peanut butter cookies. Use an offset spatula if you're fancy, or the back of a spoon if you're human, creating an even layer that reaches all the corners like a good game of Tetris. This layer should be about half an inch thick — enough to provide that tangy counterpoint to all the peanut butter sweetness coming your way. Pop this in the fridge while you work on the next layer, because cold layers are happy layers that don't slide around like drunk toddlers.
- The pudding layer is where science meets dessert — whisk together the instant vanilla pudding mix and cold milk for exactly two minutes, timing it like you're defusing a bomb. The mixture will start thin and then suddenly thicken like magic, transforming from liquid to pudding faster than you can say "peanut butter perfection." Let it stand for five minutes to fully set up — this is when the chemical reaction happens that turns powder and milk into creamy dreams. If you try to rush this step, you'll end up with vanilla soup that will seep into your beautiful layers and create a soggy mess that would make any dessert enthusiast weep.
- Now for the peanut butter integration — microwave your creamy peanut butter for 15 seconds until it's pourable but not hot, like liquid gold that happens to smell like childhood. Whisk this into your set pudding until you have a smooth, tan-colored mixture that looks like peanut butter's sophisticated cousin who went to finishing school. The pudding provides structure while the peanut butter adds flavor, creating a layer that will set up firm enough to support the final toppings. Taste this mixture and try not to eat it all with a spoon — I know it's hard, but your future self will thank you for having restraint.
- Spread the peanut butter pudding over your cream cheese layer gently, like you're handling a sleeping baby made of deliciousness. Use the back of a spoon and start from the center, working outward in concentric circles to avoid disturbing the layer below. This layer should be slightly thicker than the cream cheese — about three-quarters of an inch — creating a substantial peanut butter presence that announces itself proudly. If you notice any bare spots, patch them like you're doing dessert spackle work, because every bite deserves the full layer experience.
- The final whipped topping layer is pure theater — spread the remaining topping over the peanut butter pudding like you're creating a cloud blanket that will cradle all the flavors below. Use gentle strokes to avoid mixing layers, treating this like you're applying the world's most delicious sunscreen to a very important dessert. This layer should be about half an inch thick, providing a cool, creamy finish that cleanses your palate between bites of intense peanut butter flavor. Smooth the top like you're icing the world's easiest cake, because this is your canvas for the grand finale.
- Now comes the fun part — sprinkle peanut butter chips across the top like you're seasoning a very sweet pizza, aiming for even distribution that ensures every bite gets its fair share. Chop up some reserved peanut butter cookies into rough chunks — not too fine or they'll disappear, not too big or they'll sink like delicious little islands. Drizzle the melted peanut butter in artistic swirls across the top, creating ribbons that will harden slightly in the fridge and provide textural contrast. Cover and refrigerate for at least four hours, though overnight is better — this gives the layers time to meld into something greater than the sum of their parts.
That's it — you did it. But hold on, I've got a few more tricks that'll take this to another level...
Insider Tricks for Flawless Results
The Temperature Rule Nobody Follows
Here's the thing that separates peanut butter dessert champions from the also-rans — temperature control throughout the entire process. Your cream cheese needs to be at exactly 68 degrees Fahrenheit, which is warmer than straight-from-the-fridge but cooler than room temperature in most kitchens. Too cold and it won't blend smoothly, leaving you with little white lumps that look like cottage cheese gone rogue. Too warm and it becomes runny, refusing to hold its layer and creating a slippery slide that will make your dessert layers separate like awkward teenagers at a school dance.
Why Your Nose Knows Best
Trust your sense of smell throughout this process — when the peanut butter hits the pudding, you should get this warm, nutty aroma that makes your mouth water like Pavlov's dogs at dinner time. If you don't smell peanut butter when you walk into your kitchen, you haven't used enough. A friend tried cutting the peanut butter in half once to save calories, and the result was so bland that even her dog turned up his nose at it. The smell test also tells you when your layers are properly chilled — you should get a faint peanut butter perfume when you open the fridge, not a dairy-heavy scent that suggests your dessert needs more time to develop its flavors.
The 5-Minute Rest That Changes Everything
After you spread each layer, walk away for exactly five minutes. I know it's tempting to keep working, but this brief pause allows each layer to settle and firm up slightly, preventing the dreaded layer slide that can turn your beautiful dessert into a geological disaster. Use this time to wash a dish, check your phone, or just stare into the fridge wondering how you ended up with three half-used containers of whipped topping. When you return, you'll notice the layer has stopped looking like it might ooze over the edges and started looking like it belongs there — confident and settled, like it's paying rent in your pan.
The Peanut Butter Quality Hierarchy
Not all peanut butters are created equal, and this is not the time to cheap out on the store brand that separates into oil and concrete. You want a creamy peanut butter that spreads easily but isn't loaded with so much sugar that your teeth ache just looking at it. Natural peanut butters work beautifully here — they're less sweet and more intensely peanut-flavored, creating a more sophisticated dessert that doesn't taste like it was designed by a five-year-old with a sugar addiction. If you must use conventional peanut butter, reduce the powdered sugar in the cream cheese layer by two tablespoons to compensate for the extra sweetness.
The Layer Thickness Sweet Spot
Each layer should be just thick enough to provide its distinct contribution without overwhelming the others — think of it as a democratic dessert where every layer gets a voice. The cookie base should be about a quarter-inch thick when pressed down firmly, the cream cheese layer should be about half an inch, the peanut butter pudding should dominate at three-quarters of an inch, and the final whipped topping should be about half an inch. Too thin and you lose the impact, too thick and you throw off the balance that makes this dessert so addictive. Use a ruler if you're neurotic, or just eyeball it if you're more relaxed — the dessert police won't arrest you for being a quarter-inch off.
Creative Twists and Variations
This recipe is a playground. Here are some of my favorite ways to switch things up:
The Chocolate Rebellion
Replace the vanilla pudding mix with chocolate and swap half the peanut butter sandwich cookies for chocolate sandwich cookies. The result is a peanut butter cup in dessert form — rich, decadent, and completely over-the-top in the best possible way. Add a handful of mini chocolate chips on top with the peanut butter chips for a double-chocolate situation that will make chocolate lovers weep with joy.
The Banana Cream Dream
Layer thin banana slices between the cream cheese and peanut butter pudding layers — the banana adds a fresh note that cuts through all the richness while playing beautifully with the peanut butter flavor profile. Use slightly underripe bananas so they don't get mushy, and brush them with lemon juice to prevent browning. This version tastes like Elvis's favorite sandwich got a sophisticated makeover and learned some manners.
The Salty Sweet Sophisticate
Add a teaspoon of flaky sea salt to the cookie base and sprinkle more on top with the peanut butter chips. The salt enhances the peanut butter flavor while creating those addictive sweet-salty combinations that make it impossible to stop eating. Use salted peanuts instead of peanut butter chips for extra crunch and salt hits throughout.
The Holiday Extravaganza
Add a teaspoon of cinnamon and a quarter-teaspoon of nutmeg to the cream cheese layer for a warm, holiday flavor that makes this taste like peanut butter's festive cousin. Top with crushed candy canes instead of peanut butter chips for a mint-peanut butter combination that sounds weird but tastes like Christmas morning in peanut butter form.
The Individualist Approach
Make this in individual mason jars or dessert glasses instead of a 9x13 pan — perfect for parties where people want their own portion and it looks incredibly fancy with minimal extra effort. Layer everything in clear glasses so people can see the beautiful strata, and serve with long spoons that can reach all the way to the bottom.
Storing and Bringing It Back to Life
Fridge Storage
This dessert is a fridge superstar — it will keep beautifully for up to five days, though I've never seen it last more than two because people keep sneaking spoonfuls at all hours. Cover it tightly with plastic wrap, pressing the wrap directly onto the surface if you've already cut into it to prevent that weird skin that forms on dairy products. Store it in the back of the fridge where the temperature is most consistent — the door is too warm and will cause the layers to break down faster than a celebrity marriage. If you notice any weeping or separation, just gently blot with a paper towel and continue serving — it's still delicious, just a little less photogenic.
Freezer Friendly
You can absolutely freeze this dessert, but do it in individual portions for best results — wrap each piece tightly in plastic wrap, then foil, and freeze for up to two months. The texture will change slightly upon thawing — the whipped topping becomes a bit denser, but the flavors actually intensify in a way that's pretty spectacular. Thaw overnight in the fridge, and add a fresh drizzle of melted peanut butter on top to revive the presentation. Don't refreeze once thawed, or you'll end up with ice crystal city and a texture that resembles frozen peanut butter sand.
Best Reheating Method
Here's the thing — you don't reheat this dessert, but you can bring it back to optimal eating temperature by letting it sit at room temperature for 15-20 minutes before serving. This takes the chill off and allows the flavors to bloom like they're waking up from a cold nap. If your fridge runs particularly cold and the peanut butter drizzle has become too firm, give it a quick 5-second zap in the microwave to soften it slightly. Add a tiny splash of water to the serving plate before reheating — just kidding, don't reheat this, but do serve it slightly cooler than room temperature for the best texture experience.