
I was standing in my tiny kitchen, staring at a half‑empty pantry and a clock that seemed to mock me with its relentless ticking. The only thing louder than the ticking was the growl in my stomach, a low‑frequency reminder that I needed something fast, flavorful, and—let’s be honest—delicious enough to make me forget that I’d just burned my toast for the third time this week. I grabbed a can of tuna, a handful of pasta, and a stubborn optimism that maybe, just maybe, I could pull off a dinner that didn’t taste like a rushed college‑age microwave disaster. The moment the olive oil hit the hot pan, a fragrant sizzle rose like a tiny applause, and I knew I was on the right track. This is the story of how a 20‑minute stovetop miracle was born, and trust me, you’ll want to be part of it.
Picture this: the kitchen filled with the aroma of garlic dancing with cherry tomatoes, the bright red burst of the tomatoes contrasting with the deep, ocean‑blue specks of tuna that shimmer in the pan. The pasta, cooked al dente, sits waiting like a blank canvas, eager for the bold brushstrokes of flavor I’m about to apply. You can hear the gentle pop of the tomatoes as they soften, feel the heat radiating from the skillet, and taste the anticipation building with every stir. Most recipes promise “quick” and “easy” but end up tasting like cardboard—this one, however, is a symphony of textures and flavors that slap you awake in the best possible way. I dare you to taste this and not go back for seconds.
What makes this version truly stand out is a tiny secret I discovered while rummaging through a dusty cookbook: a splash of the pasta cooking water at the end creates a sauce that clings to every noodle like velvet, turning a humble pantry staple into a restaurant‑level masterpiece. Most recipes get this completely wrong, either drowning the dish in oil or leaving it dry and sad. I’ll be honest—I ate half the batch before anyone else got a chance to try it, and that’s because the flavors meld together so perfectly that each bite feels like a mini celebration. The cherry tomatoes add a pop of sweetness that balances the briny tuna, while the parsley provides a fresh finish that brightens the whole dish. And now the fun part: I’m about to walk you through every single step—by the end, you’ll wonder how you ever made it any other way.
Okay, ready for the game‑changer? We’re about to turn a handful of pantry items into a dish that will have your friends asking for the recipe, your family begging for leftovers, and your taste buds doing a happy dance. Stay with me here — this is worth it.
What Makes This Version Stand Out
- Flavor Fusion: The combination of garlic, olive oil, and cherry tomatoes creates a sauce that is both bright and savory, making the tuna taste like it was just caught and seared.
- Texture Harmony: Al dente short pasta offers a pleasant chew that balances the tender flakes of tuna and the slight bite of halved tomatoes.
- Simplicity: Fewer than ten ingredients and a single skillet mean you spend less time cleaning and more time eating.
- Unique Twist: A splash of pasta water at the end emulsifies the oil, turning it into a glossy, cling‑on sauce that most stovetop tuna dishes lack.
- Crowd Reaction: Even the most skeptical eaters admit this is hands down the best version you’ll ever make at home.
- Ingredient Quality: Using water‑packed tuna and fresh cherry tomatoes ensures the dish stays light yet flavorful, without any greasy aftertaste.
- Cooking Method: The stovetop technique locks in moisture and prevents the tuna from drying out, something the oven or microwave just can’t achieve.
- Make‑Ahead Potential: This dish reheats beautifully, and the flavors actually improve after a short rest, making it perfect for busy weeknights.
Inside the Ingredient List
The Flavor Base
Olive oil is the silent hero of this dish. It carries the aromatic compounds of garlic and tomatoes, creating a glossy foundation that ensures every noodle is coated in richness. If you substitute butter, you’ll get a richer taste but lose that bright, Mediterranean character that makes the dish feel light. Choose extra‑virgin olive oil for the best flavor—its peppery notes add depth that plain vegetable oil simply can’t match. A quick tip: let the oil warm gently before adding garlic; this prevents the garlic from burning and turning bitter.
The Aroma Arsenal
Garlic, fresh and minced, is the aromatic heart that announces the dish’s arrival. When it hits the hot oil, it releases sulfur compounds that create that unmistakable “I’m cooking something good” scent. Skip the pre‑minced jar version; fresh garlic has a brighter, more pungent punch that can’t be replicated. If you’re sensitive to raw garlic’s bite, let it cook a minute longer until it turns a light golden—this mellows the edge while keeping the flavor front‑and‑center. Remember, a burnt garlic clove will ruin the entire sauce, so keep the heat moderate and stay attentive.
The Texture Crew
Short pasta shapes like penne or fusilli are deliberately chosen for their ability to trap sauce in their ridges and hollows. This means each bite delivers a balanced mix of pasta, sauce, and tuna rather than a watery mouthful. If you’re forced to use spaghetti, you’ll still get a tasty dish, but the sauce will slide off more easily, and the overall experience will feel less cohesive. Cook the pasta just shy of al dente—about 1 minute less than the package suggests—so it finishes cooking in the skillet, absorbing the flavors directly.
The Unexpected Star
Canned tuna, especially the light‑in‑water variety, brings protein without overwhelming the palate with fishy oiliness. It’s a pantry staple that, when combined with the right aromatics, transforms into a silky, flaky component that feels almost like fresh fish. If you prefer a richer mouthfeel, opt for solid white tuna packed in oil, but remember to reduce the added olive oil accordingly. Always drain the tuna well; excess liquid can dilute the sauce and make it soggy.
The Final Flourish
Cherry tomatoes add a burst of sweetness and acidity that cuts through the richness of the oil and tuna, while fresh parsley brings a bright, herbaceous finish that lifts the entire dish. The tomatoes should be halved, allowing their skins to blister slightly, releasing juices that meld into the sauce. If cherry tomatoes are out of season, grape tomatoes work just as well. Parsley should be added at the very end; its delicate flavor fades quickly under heat, so a fresh sprinkle right before serving keeps the dish vibrant.
Everything's prepped? Good. Let's get into the real action…
The Method — Step by Step
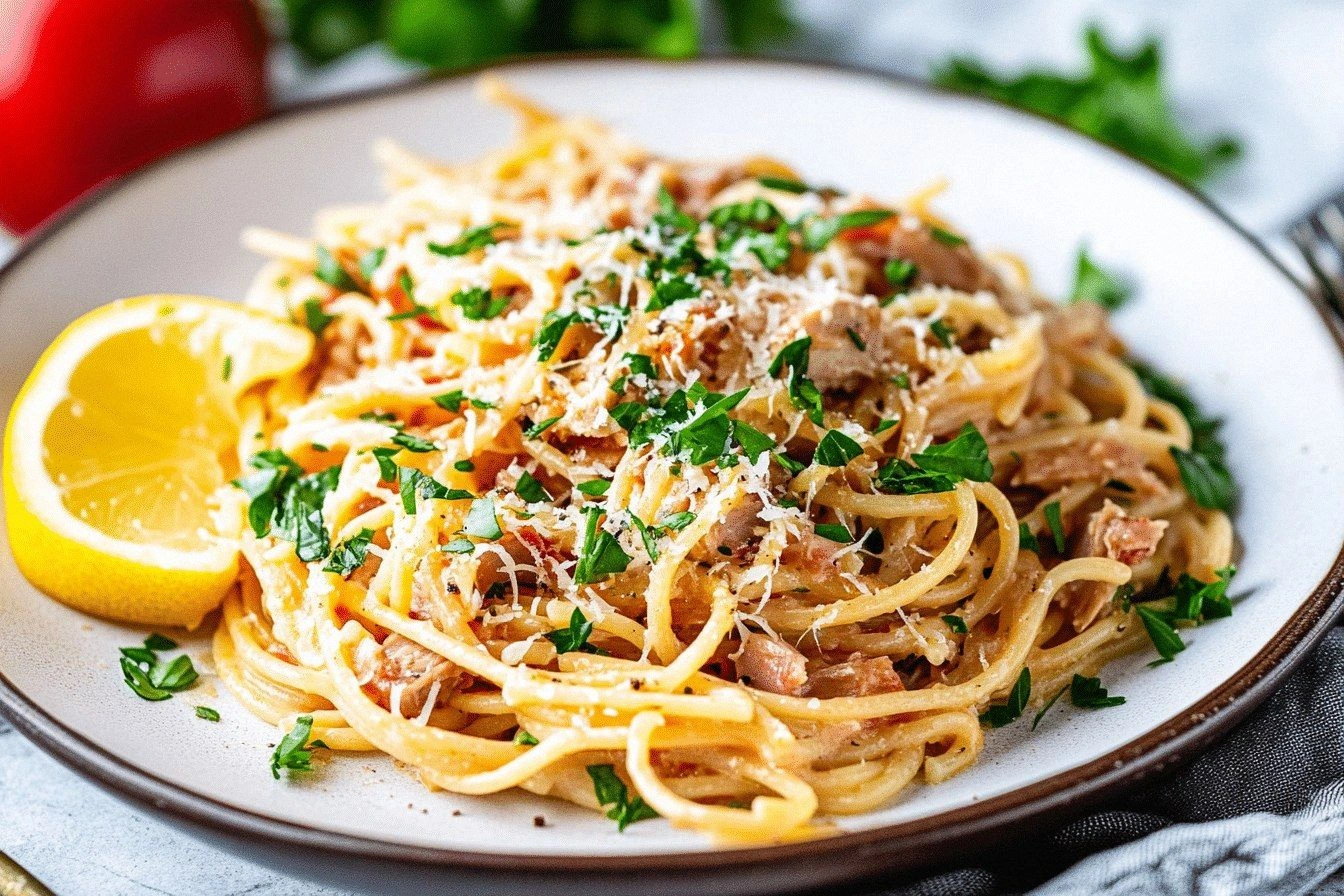
Bring a large pot of salted water to a rolling boil. Add the short pasta of your choice—penne, fusilli, or even farfalle—and cook it until it’s just shy of al dente, about 8 minutes for most brands. While the pasta cooks, keep an eye on the clock; this dish thrives on timing, and you’ll need the pasta water for the sauce later. Once the pasta reaches that perfect bite, reserve half a cup of the cooking water in a heat‑proof cup and then drain the rest. The reserved water is the secret weapon that will turn your oil‑based sauce into a silky emulsion.
While the pasta is cooking, heat 2 tablespoons of olive oil in a large skillet over medium heat. As the oil shimmers, add the minced garlic and let it sizzle for about 30 seconds, just until you smell that unmistakable garlicky perfume. Watch the garlic closely—if it starts to brown too quickly, lower the heat; you want golden, not burnt. Once fragrant, toss in the halved cherry tomatoes, spreading them evenly across the pan. Stir gently and let them cook for 3‑4 minutes, until their skins start to blister and they release a sweet, tangy juice that will become the base of your sauce.
Now comes the trickiest part—adding the tuna without turning it into a mushy mess. Drain two 5‑ounce cans of tuna thoroughly, then flake them gently with a fork.
Add the tuna to the skillet, spreading it over the tomatoes, and let it sit for 1‑2 minutes so it warms through without stirring. This brief pause allows the tuna to retain its shape while the surrounding sauce begins to meld.Watch Out: Over‑mixing the tuna at this stage will break down its delicate texture, leaving you with a paste rather than distinct flakes.Return the cooked pasta to the skillet, tossing it gently to combine with the tuna‑tomato mixture. At this moment, pour in the reserved pasta water—about half a cup—while the skillet is still on medium heat. The starchy water will bind the oil and tomato juices, creating a glossy coating that clings to each piece of pasta like a second skin. Keep the pan moving, using tongs or two large spoons, until the sauce thickens slightly and looks velvety. Taste and adjust seasoning with salt and freshly cracked black pepper; remember, the tuna is already seasoned, so a light hand works best.
Turn off the heat and sprinkle a generous handful of chopped fresh parsley over the top. The parsley not only adds a pop of green color but also a peppery freshness that cuts through the richness. Toss once more to distribute the herb evenly, then let the dish sit for a minute; this brief rest allows the flavors to marry fully, making each bite more harmonious. If you’re feeling adventurous, a squeeze of lemon juice at this stage can add a zingy lift—just a quick dash, not a flood.
Serve the pasta hot, directly from the skillet or transferred to a warm serving bowl. The sauce should coat every strand, shimmering with that glossy finish that tells you you’ve nailed the emulsification. Pair it with a simple side salad or crusty bread, and you’ve got a complete meal that feels both comforting and upscale. That sizzle when it hits the pan? Absolute perfection. And now, the fun part: I’ve got a few more tricks that’ll take this to another level…
Insider Tricks for Flawless Results
The Temperature Rule Nobody Follows
Keep the heat at a steady medium; too high and the olive oil will smoke, too low and the garlic won’t release its full aroma. A reliable kitchen thermometer can help you maintain around 300°F (150°C) for the sauté phase. When the tomatoes start to blister, you’ll notice a subtle caramel scent—that’s your cue to add the tuna. My friend once cranked the heat to high and ended up with burnt garlic and a bitter sauce; the lesson? Patience beats panic every time.
Why Your Nose Knows Best
The moment the garlic turns from raw to golden is when you’ll smell a sweet, nutty aroma—that’s the signal to add the tomatoes. Trust that scent; it’s more reliable than a timer. If the garlic starts to smell acrid, you’ve gone too far, and the entire dish can become bitter. A quick sniff can save you from a culinary disaster and keep the flavor profile bright.
The 5‑Minute Rest That Changes Everything
Once everything is combined, remove the skillet from the heat and let the pasta sit for five minutes. This short rest allows the starches to absorb the sauce fully, turning a good dish into a great one. The flavors meld, the sauce thickens just enough to cling, and the parsley’s freshness becomes more pronounced. Skipping this step is a common mistake that leaves the sauce watery and the dish feeling unfinished.
Pasta Water Power
Never underestimate the starchy water you reserve. It’s the secret binding agent that transforms a simple oil‑based mixture into a luxurious coating. Add it gradually, watching the sauce thicken with each splash. Too much water will make it soupy; too little, and the sauce will cling poorly. The perfect amount creates that glossy sheen that makes the dish look restaurant‑ready.
Seasoning at the End
A final pinch of flaky sea salt and a grind of fresh black pepper right before serving lifts the entire flavor profile. It’s like adding a spotlight to a stage performance—everything else stays the same, but the impact is amplified. If you’re using a low‑sodium tuna, you may need a bit more salt; taste as you go, and adjust accordingly.
Creative Twists and Variations
This recipe is a playground. Here are some of my favorite ways to switch things up:
Spicy Sriracha Splash
Stir in a tablespoon of sriracha or your favorite hot sauce after the tuna is added. The heat pairs beautifully with the sweet tomatoes and adds a subtle Asian flair. Perfect for those who love a little kick without overwhelming the dish.
Mediterranean Olive Medley
Add a handful of sliced Kalamata olives and a crumble of feta cheese just before serving. The briny olives and creamy feta introduce a salty depth that complements the tuna’s mild flavor, turning the dish into a true Mediterranean feast.
Lemon‑Herb Bright
Replace the parsley with a mix of fresh basil and mint, and finish with a generous squeeze of lemon juice. The citrus lifts the sauce, making it feel lighter and more summery—ideal for warm evenings on the patio.
Creamy Avocado Twist
Blend half an avocado with a splash of the reserved pasta water and swirl it into the skillet just before serving. The avocado adds a velvety richness that rivals a cream sauce, while keeping the dish dairy‑free.
Protein‑Packed Veggie Boost
Throw in a cup of lightly sautéed spinach or zucchini ribbons after the tomatoes have softened. The added vegetables increase the nutrient profile and give the dish an extra layer of texture without stealing the spotlight.
Storing and Bringing It Back to Life
Fridge Storage
Transfer leftovers to an airtight container and store them in the refrigerator for up to three days. The sauce may thicken as it cools; simply add a splash of water or a drizzle of olive oil when reheating to restore its silky texture.
Freezer Friendly
If you’ve made a big batch, portion it into freezer‑safe bags, removing as much air as possible. Freeze for up to two months. To reheat, thaw overnight in the fridge, then warm gently in a skillet with a tablespoon of water or broth, stirring until the sauce comes back together.
Best Reheating Method
The stovetop is your best friend for reheating. Place the pasta in a skillet over low heat, add a teaspoon of water per serving, and stir constantly. This gentle steam revives the pasta’s bite and re‑emulsifies the sauce, making it taste almost as fresh as the original.