Ever found yourself staring at a block of ahi tuna on the fridge, thinking, “I could make something epic with this” and then ending up with a bland, over‑cooked fillet? That was me last week, a late‑night craving for something that could turn a simple protein into a showstopper. I pulled the tuna out, sprinkled a pinch of salt, and—spoiler—my kitchen smelled like a failed experiment. The sizzle was muted, the edges didn’t caramelize, and I was left with a sad, mushy center. That night, I vowed to find the ultimate blackened tuna recipe that would make my taste buds do backflips.
Fast forward to today, and I’m sitting in a bright kitchen, the air thick with the aroma of cumin, paprika, and a hint of cayenne that makes your eyes water in the best way. The tuna sits on a stainless‑steel pan, the oil shimmering like liquid gold, ready to meet its destiny. The sound of the first sizzle is a promise of crispy edges that shatter like thin ice, while the inside remains buttery and pink. I can almost taste the smoky spice coating each bite, the heat dancing on my tongue like fireworks. And the best part? It takes less than five minutes to turn this fish into a culinary masterpiece.
I dare you to taste this and not go back for seconds. This is hands down the best version you'll ever make at home. I’ll be honest—I ate half the batch before anyone else got to try it. Most recipes get this completely wrong. Here’s what actually works. Picture yourself pulling this out of the pan, the whole kitchen smelling incredible, and your guests’ jaws dropping. This is the kind of dish that turns an ordinary dinner into a memorable event.
If you've ever struggled with blackening a fish—getting a good crust without burning, or balancing the heat—you're not alone, and I've got the fix. The secret is in the seasoning mix and the heat control. The tuna’s natural oil content keeps it moist, but the right amount of oil on the pan prevents sticking. A quick pre‑heat and a firm press of the steak into the pan seal in flavor. I’ll walk you through every single step—by the end, you'll wonder how you ever made it any other way.
And now, before we dive in, let’s talk about why this version is a game‑changer. I’ve experimented with countless spice blends, but this one hits every note: heat, herb, and a touch of sweetness. The result is a crust that’s both crunchy and flavorful, while the inside stays tender and juicy. It’s simple, it’s fast, and it’s guaranteed to impress. So let’s break down exactly what goes into this masterpiece.
What Makes This Version Stand Out
- Taste: The blend of cayenne, paprika, and oregano creates a smoky, peppery profile that pairs perfectly with the delicate fish. The balance of heat and herbs is precise—enough to excite the palate but not overwhelm the tuna’s natural flavor.
- Texture: The high heat and minimal oil produce a crust that crisps up in seconds, while the interior stays moist. The contrast is a textural delight that makes each bite memorable.
- Simplicity: No fancy marinades or pre‑seasoning steps. Just a single spice mix and a quick sear. This recipe is a no‑fuss, no‑failing approach to gourmet cooking.
- Uniqueness: The use of dried thyme and oregano gives the dish an earthy depth that sets it apart from standard blackened tuna recipes. It’s a flavor profile that feels both familiar and adventurous.
- Quick Turnaround: From prep to plate, it takes less than 15 minutes. Perfect for weeknight dinners or impressing guests on short notice.
- Ingredient Quality: Fresh ahi tuna is the star. Pair it with high‑quality olive oil and fresh spices to elevate the dish to restaurant‑level.
- Make‑ahead Potential: The seasoning mix can be prepared ahead and stored, making it a convenient option for busy schedules.
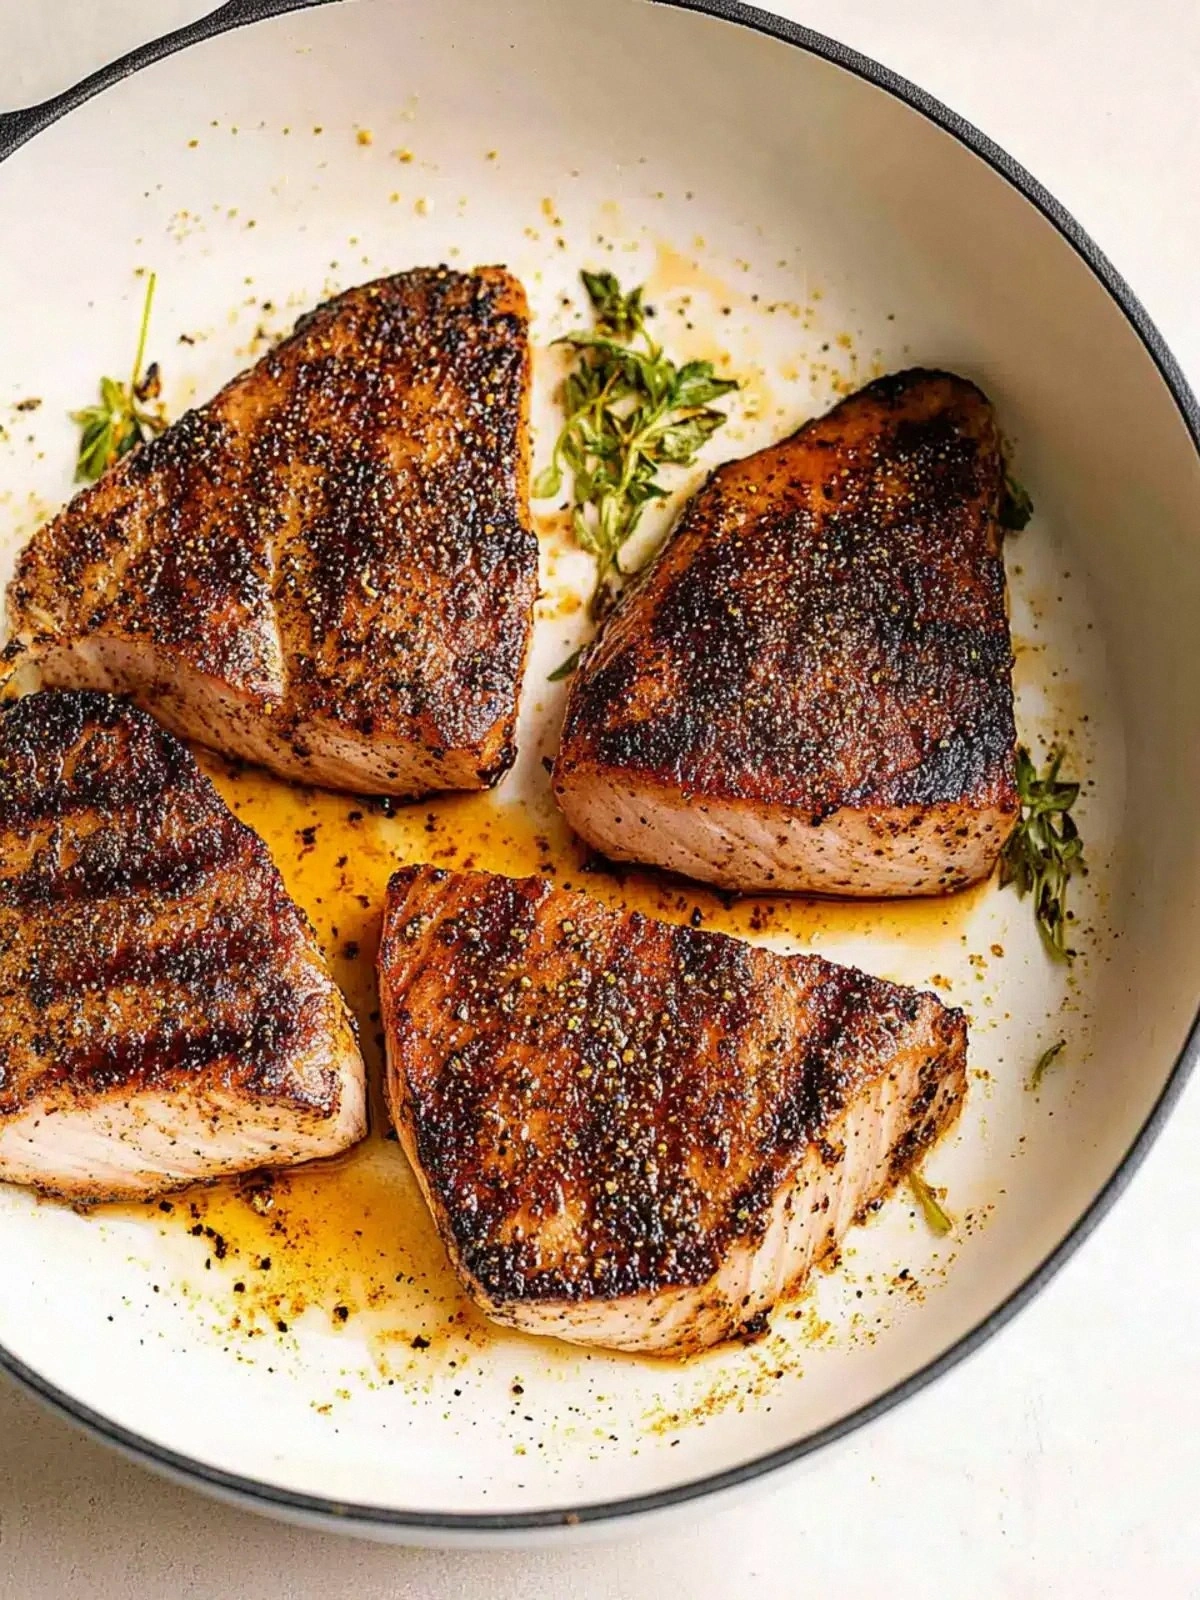
- Visual Appeal: The golden‑brown crust and the pink, buttery center are a feast for the eyes, turning a simple fish into a showpiece.
Inside the Ingredient List
The Flavor Base
Cayenne pepper is the star of the show, injecting a punch of heat that wakes up the senses. It’s the first thing that lands on your tongue, creating an instant spark. If you skip it, the dish loses its signature kick and feels flat. Swap it for smoked paprika if you prefer a milder heat, but the smoky undertone will shift.
The Herb Crew
Dried thyme and oregano bring an earthy, slightly bitter note that balances the spice. They’re subtle but essential, grounding the fiery cayenne with a Mediterranean flair. Without them, the flavor profile becomes one‑dimensional. For a fresher twist, use fresh thyme leaves, but keep the quantity the same.
The Garlic Element
Garlic powder delivers a savory depth that lingers after each bite. It’s a silent hero that amplifies the other spices without overpowering. If you’re allergic, a pinch of garlic salt can substitute, though the flavor will be slightly different.
The Pepper Perfection
Freshly ground black pepper adds a bright, peppery bite that cuts through the richness of the tuna. It’s the final touch that ties everything together. Skipping it will leave the dish feeling a bit dull. If you prefer a more aromatic pepper, try a dash of white pepper.
The Paprika Punch
Paprika gives the crust a deep, smoky color and a subtle sweetness. It’s what turns the seasoning into a vibrant, eye‑catching coating. Without paprika, the crust would look pale and less appetizing. Use smoked paprika for an extra layer of smokiness.
The Oil Layer
Olive oil (or avocado oil) is the medium that transfers heat and helps the spices adhere to the tuna. It also prevents sticking and ensures an even sear. If you’re watching calories, a light spray can suffice, but the texture will differ slightly. The oil’s flavor should be neutral enough not to compete with the spices.
The Star of the Show
The ahi tuna steaks themselves are the canvas. Fresh, high‑grade tuna with a bright pink interior is ideal. The steaks should be at room temperature before cooking to promote even cooking. If you’re using frozen tuna, thaw it in the refrigerator overnight and pat dry before seasoning.
The Final Flourish
Kosher salt is the finishing touch that elevates every bite. It enhances the natural flavors and balances the heat. Too much salt will drown the delicate tuna, while too little will leave it bland. A pinch is all you need; the rest of the seasoning does the heavy lifting.
Everything’s prepped? Good. Let’s get into the real action.
The Method — Step by Step
- Begin by patting the tuna steaks dry with paper towels; moisture is the enemy of a good sear. A dry surface ensures the spices stick and the crust forms properly. If the tuna feels slick, give it a second pat. This step is often overlooked but crucial for texture.
- In a small bowl, combine the cayenne, paprika, dried thyme, oregano, garlic powder, and black pepper. Stir until the mixture is uniform, like a fine dust. This blend will coat the tuna evenly and create a consistent crust.
- Season both sides of each tuna steak with kosher salt, then dredge them in the spice mix, pressing gently to adhere. The salt draws out moisture, helping the spices cling. Be generous, but remember that the spices carry the flavor.
- Heat a cast‑iron or stainless‑steel skillet over medium‑high heat until it shimmers. Add the olive oil, swirling to coat the bottom. The oil should not smoke; if it does, lower the heat slightly.
- Place the tuna steaks in the pan, skin side down if present. Listen for the immediate sizzle—this is the sound of flavor. Don’t move them; let the crust form for 30–45 seconds.
- Flip the steaks using tongs, pressing down gently to keep contact with the pan. Cook for an additional 30–45 seconds on the other side. The goal is a golden crust while the center remains pink.
- If you prefer medium‑rare, remove the tuna from the pan at 45 seconds per side. For medium, cook an extra 15 seconds per side. The tuna will continue to cook slightly from residual heat.
- Transfer the steaks to a cutting board and let them rest for 2–3 minutes. Resting allows juices to redistribute, keeping the tuna moist. A quick rest also lets the spices settle into the meat.
- Slice the tuna against the grain into bite‑sized pieces, or serve whole if you’re feeling dramatic. The knife should glide through the tender flesh without resistance. Plate immediately to preserve the crust’s crispness.
That’s it — you did it. But hold on, I've got a few more tricks that'll take this to another level.
Insider Tricks for Flawless Results
The Temperature Rule Nobody Follows
The pan’s temperature is the secret to a perfect crust. If it’s too low, the tuna will steam instead of sear; if too high, the spices will burn before the fish cooks. Aim for a pan that’s hot enough that a splash of water instantly sizzles. A quick test: sprinkle a pinch of the spice mix on the pan; if it sizzles, you’re ready.
Why Your Nose Knows Best
Your nose is the first judge of doneness. The scent of toasted spices and a hint of fish should fill the kitchen. If the aroma is overwhelmingly smoky, the tuna is overcooked. Trust your senses; cooking is as much about intuition as it is about timing.
The 5‑Minute Rest That Changes Everything
Resting the tuna after searing is often overlooked, but it’s essential. During this brief pause, the juices redistribute, preventing a dry center. A 5‑minute rest also allows the crust to set, maintaining crispness when you cut into it. Think of it as a quick chill before the main event.
How to Keep the Crust Crispy After Cutting
Once sliced, the tuna can lose its crunch. To counter this, serve immediately or place the slices on a warm plate. A quick heat source, like a preheated oven at 200°F for 5 minutes, will revive the crust without overcooking the meat.
Balancing Heat for Different Palates
If you’re cooking for a crowd with varying spice tolerance, keep a small bowl of plain yogurt or a squeeze of lime on the side. These can neutralize heat without diluting flavor. This simple addition can turn a spicy dish into a crowd‑pleaser.
Storing the Seasoning Mix
The spice blend is a versatile pantry staple. Store it in an airtight container in a cool, dark place. It will keep its potency for up to three months, ready for your next quick tuna adventure.
Creative Twists and Variations
This recipe is a playground. Here are some of my favorite ways to switch things up:
Asian Fusion
Replace the paprika with sesame seeds and add a splash of soy sauce after searing. The result is a nutty, umami‑rich tuna that pairs beautifully with a cucumber salad. It’s a quick way to bring an Asian twist to the classic blackened flavor.
Herb‑Infused Citrus
After searing, drizzle the tuna with a mixture of fresh lemon juice and chopped dill. The citrus brightens the dish while the dill adds a fresh herbal note. Serve with a side of roasted asparagus for a complete meal.
Smoky Chipotle
Swap the cayenne for chipotle powder and add a dash of maple syrup before cooking. The smoky sweetness complements the tuna’s natural richness. Pair with a corn‑and‑black‑bean salad for a Tex‑Mex vibe.
Spicy Coconut
After the crust forms, add a tablespoon of coconut milk and a pinch of curry powder to the pan. The creamy coconut balances the heat and adds a tropical flair. This version works great with a side of jasmine rice.
Italian Herb Boost
Incorporate fresh basil and a drizzle of balsamic glaze after searing. The basil adds a sweet, aromatic layer, while the balsamic introduces a tangy glaze. Serve with a simple caprese salad for an Italian twist.
Breakfast‑Style
Slice the tuna thin and serve it atop toasted English muffins with a fried egg. The blackened crust adds a smoky punch to a classic breakfast sandwich. This is a quick, protein‑packed way to start the day.
Storing and Bringing It Back to Life
Fridge Storage
Store leftover tuna in an airtight container for up to two days. Place a paper towel on top to absorb excess moisture. When ready to reheat, use a skillet over medium heat and add a splash of water to create steam. This helps maintain juiciness while re‑crisping the crust. Serve with a quick salad to balance the richness.
Freezer Friendly
Freeze the tuna steaks individually on a parchment‑lined tray before transferring to a freezer bag. This prevents sticking and allows you to thaw one steak at a time. Thaw overnight in the refrigerator, then reheat in a hot pan for 2 minutes per side. The texture remains tender, though the crust may soften.
Best Reheating Method
The ideal reheating method is a quick sear in a hot skillet. Add a tablespoon of olive oil, place the tuna in, and cook for 30 seconds per side. If the tuna feels dry, sprinkle a tiny splash of water before flipping; the steam will restore moisture. Avoid microwaving, as it can make the fish rubbery.