I remember the night I was trying to salvage a frozen beef shoulder that had been in my fridge for a week. I tossed it in a pot with a splash of apple cider and a few spices, and the kitchen filled with a sweet, tangy aroma that made my neighbor’s window open. That accidental simmer turned into a revelation: the meat fell apart like a memory, and the sauce clung to it like velvet. I laughed, then cried, because I had just created a dish that could replace any restaurant entrée. This is not just another braised beef recipe; it’s a culinary confession that will change how you think about slow cooking.
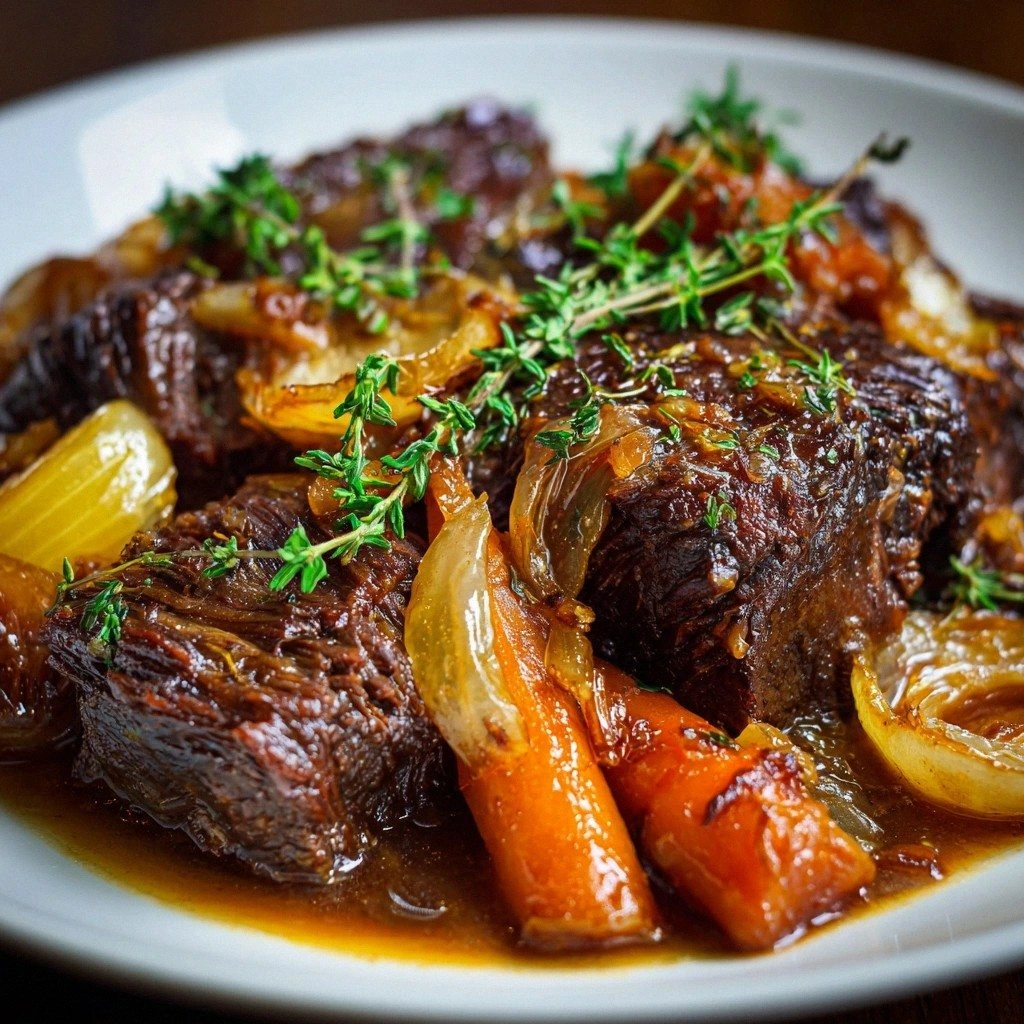
Picture yourself pulling this pot from the oven, the steam curling up like a fragrant cloud that makes every corner of your house taste like home. The beef is so tender that a fork slides in with a satisfying sigh, the apple cider reduction has a caramelized glaze that catches the light, and the vegetables are caramelized to a depth of flavor that feels like a secret. I dare you to taste this and not go back for seconds because the first bite will leave you craving more. Most recipes get this completely wrong by overcooking the beef or under-seasoning the liquid; here, the balance is meticulous. If you've ever struggled with a braised dish that ends up mushy or flavorless, you're not alone — and I've got the fix.
What sets this version apart is a simple twist: the apple cider is reduced to a syrupy glaze before the beef is added, creating a flavor foundation that is both sweet and savory. The technique of searing the beef in olive oil before adding the aromatics locks in juices and gives the meat a beautiful crust. I’ve experimented with different cuts, but the shoulder’s marbling is the secret sauce that keeps the meat moist during the long simmer. The use of fresh thyme and a single bay leaf elevates the dish with herbal complexity. And the final touch? A splash of apple cider vinegar at the end to brighten the sauce and balance the sweetness.
Let me walk you through every single step — by the end, you'll wonder how you ever made it any other way. I’ve spent weeks refining this recipe, testing different reductions, and fine-tuning the seasoning. The result is a dish that feels like a hug in a bowl, a comforting yet sophisticated meal that will impress friends and family alike. The best part is that the cooking process is straightforward enough for beginners but offers depth for seasoned cooks. This is hands down the best version you'll ever make at home, and I’m thrilled to share every detail with you.
What Makes This Version Stand Out
- Taste: The apple cider reduction creates a sweet, caramelized glaze that coats the beef and vegetables, delivering a complex flavor profile that is both comforting and sophisticated. The subtle acidity from a splash of cider vinegar at the end cuts through the richness, adding brightness. This balance ensures each bite is layered with depth.
- Texture: The beef shoulder is seared until golden, then simmered low and slow until it falls apart in the sauce. The vegetables retain a slight bite, preventing the dish from becoming mushy. The sauce’s thickness is achieved through reduction, giving it a silky coat that clings to every morsel.
- Simplicity: With just ten ingredients, this recipe keeps your pantry stocked and your prep time manageable. No need for exotic spices or hard-to-find cuts; everything is accessible. The method is straightforward, making it a reliable go-to for busy weeknights.
- Uniqueness: The use of apple cider as the primary liquid is a game-changer, infusing the dish with a natural sweetness that pairs perfectly with the savory beef. The subtle herbal notes from thyme and bay leaf add an aromatic layer that sets it apart from traditional braises.
- Crowd Reaction: Friends who have tried this version rave about how the sauce is thick enough to coat the plate yet light enough to keep the dish from feeling heavy. The flavor is bold yet balanced, making it a crowd-pleaser at dinner parties.
- Ingredient Quality: Using a high-quality beef shoulder with good marbling is key to achieving that melt-in-your-mouth tenderness. Fresh apples or cider from a local orchard can elevate the flavor even further.
- Cooking Method: The low and slow braising technique ensures the connective tissue breaks down into gelatin, creating a silky sauce that enriches the beef. The initial sear adds a Maillard reaction that deepens flavor.
- Make-Ahead Potential: This dish tastes even better the next day because the flavors have had time to meld. It’s perfect for meal prep, leftovers, or a make-ahead dinner for a busy week.
Inside the Ingredient List
The Flavor Base
Apple cider is the heart of this braise, providing sweetness and acidity that cut through the richness of the beef. It also acts as a natural preservative, helping the dish stay fresh when stored. If you prefer a less sweet option, substitute half the cider with beef broth for a more savory base. The key is to let the cider reduce before adding the meat to concentrate its flavors.
The Texture Crew
Carrots and celery bring a subtle crunch and earthiness that balances the dish’s sweetness. They also add color, making the plate visually appealing. If you’re looking for a lower-carb option, replace the carrots with sliced zucchini or mushrooms. The vegetables should be cut into uniform pieces so they cook evenly.
The Unexpected Star
Fresh thyme infuses the braise with a fragrant, slightly floral note that complements the apple. The bay leaf adds a quiet depth that’s almost imperceptible but essential. If you can’t find fresh thyme, dried thyme will work, but use half the amount to avoid overpowering the dish. A single bay leaf is enough; too many can make the sauce taste bitter.
The Final Flourish
Olive oil is used for searing the beef and sautéing the aromatics, adding a subtle fruity note. Salt and pepper are essential for seasoning, but the key is to season in stages—first after searing, then after simmering—to build layers of flavor. A pinch of salt at the end ensures the sauce isn’t flat. The final garnish of fresh parsley or thyme leaves adds a pop of color and freshness.
Everything's prepped? Good. Let's get into the real action.
The Method — Step by Step
- Begin by patting the beef shoulder dry with paper towels; this step is crucial for a good sear. Season both sides generously with salt and pepper, letting the seasoning penetrate the meat. Heat a large Dutch oven or heavy skillet over medium-high heat and add 2 tablespoons of olive oil. When the oil shimmers, place the beef in the pan and let it sear for 3–4 minutes per side until a deep brown crust forms. The goal is a caramelized surface that locks in juices.
- Remove the beef and set it aside. In the same pan, reduce the heat to medium and add the diced onion and minced garlic. Sauté for 2–3 minutes until the onion becomes translucent and fragrant; the garlic should release its aroma without browning. This step builds the flavor foundation for the braise. The sizzling sound is a good indicator that the aromatics are cooking properly.
- Now it's time to introduce the apple cider. Pour 2 cups of cider into the pan, scraping the bottom with a wooden spoon to loosen any browned bits. Those bits are full of flavor, so make sure to stir them in. Allow the cider to reduce by about a third; this concentrates the sweetness and creates a thickening base. Keep an eye on the liquid so it doesn’t evaporate too quickly—adjust the heat as needed.
- Return the beef to the pot, nestling it into the cider mixture. Add the sliced carrots, celery, thyme sprigs, and bay leaves. The vegetables should be partially submerged in the liquid; if not, top up with a little more cider or water. Seal the pot with a lid and bring the mixture to a gentle simmer. Once simmering, reduce the heat to low to maintain a steady, low boil.
- Cover the pot tightly and let the beef braise for 2 hours, turning it once or twice to ensure even cooking. After 1 hour, check the liquid level; if it’s too low, add a splash of beef broth or water to keep the meat partially submerged. The long, slow cook breaks down collagen into gelatin, creating a silky, luscious sauce. The aroma during this phase will have you drooling.
- After 2 hours, remove the lid and let the sauce reduce for an additional 15–20 minutes, stirring occasionally. The sauce should thicken to a glaze that coats the back of a spoon. If it’s too thin, add a tablespoon of flour or cornstarch mixed with water to thicken. Taste and adjust the seasoning, adding a pinch of salt or pepper if needed.
- Once the sauce has thickened to your liking, remove the bay leaf and thyme sprigs. Slice the beef against the grain into thin strips or shred it for a different texture. Return the beef to the pot and stir to coat it evenly with the sauce. Let the mixture simmer for another 5 minutes to meld the flavors.
- Serve the braised beef hot, ladling the rich sauce over a bed of mashed potatoes, creamy polenta, or a simple risotto. Garnish with fresh parsley or thyme for a pop of color. Pair it with a glass of full-bodied red wine or a crisp apple cider to complement the sweetness. The dish is perfect for a cozy dinner or a special occasion.
That's it — you did it. But hold on, I've got a few more tricks that'll take this to another level.
Insider Tricks for Flawless Results
The Temperature Rule Nobody Follows
Cooking at a steady low temperature (around 300°F or 150°C) is essential for breaking down collagen without drying out the meat. Many chefs raise the heat too early, causing the juices to escape. Keep the pot covered and maintain a gentle simmer; if you notice the liquid bubbling too vigorously, lower the heat. This small adjustment preserves tenderness.
Why Your Nose Knows Best
Smell the sauce as it reduces; a sweet, caramelized aroma indicates the sugars are browning just right. If you catch a hint of bitterness, the liquid is overcooked. The nose can detect subtle changes that the eyes miss, so trust your sense of smell throughout the process.
The 5-Minute Rest That Changes Everything
Let the braised beef rest for 5 minutes after removing it from the heat. This allows the juices to redistribute, making the meat juicier. Cover loosely with foil to keep it warm. A short rest prevents the meat from drying out when sliced.
The Quick Deglaze Trick
If you notice browned bits stuck to the bottom of the pan, deglaze with a splash of wine or broth before adding the cider. This lifts the flavors into the sauce, enriching the overall taste. Stir vigorously to dissolve the bits completely. This simple step can make a noticeable difference.
The Final Touch of Acid
A splash of apple cider vinegar or a squeeze of fresh lemon at the end brightens the sauce. It cuts through the richness and adds a subtle tang that balances sweetness. Add it just before serving to preserve its fresh flavor. The acidity also helps the sauce cling to the beef.
The Resting Meat Hack
If you’re preparing the dish ahead of time, slice the beef and store it in a sealed container with a drizzle of sauce. When reheating, gently warm the meat in the sauce to keep it moist. This method also allows the flavors to deepen over time.
Creative Twists and Variations
This recipe is a playground. Here are some of my favorite ways to switch things up:
Smoky Maple Glaze
Swap half the apple cider for maple syrup and add a pinch of smoked paprika. The maple adds a deep sweetness while the paprika introduces a gentle smoke. This variation works well with pork or turkey.
Spicy Apple Cider
Add a diced jalapeño or a dash of cayenne pepper during the sauté. The heat balances the sweetness of the cider and adds a kick. Serve with a cooling cucumber yogurt dip.
Herb-Infused Gravy
After braising, remove the meat and reduce the remaining liquid with fresh rosemary, sage, and a bay leaf. The result is a robust gravy that pairs beautifully with mashed potatoes. Toss the cooked vegetables back in for extra flavor.
Citrus Brightened
Finish the sauce with a splash of orange juice and zest. The citrus adds a bright, fresh note that lifts the dish. This version is perfect for spring or summer gatherings.
Vegetarian Swap
Replace the beef with seared portobello mushrooms or a hearty vegetable like butternut squash. Follow the same cooking steps, but reduce the simmer time to 45 minutes. The mushrooms absorb the cider glaze for a rich, umami experience.
Asian-Inspired Twist
Add soy sauce, ginger, and a splash of sesame oil to the cider reduction. This gives the dish an umami kick and a subtle nutty flavor. Serve over jasmine rice and garnish with sliced green onions.
Storing and Bringing It Back to Life
Fridge Storage
Cool the braised beef completely before transferring it to an airtight container. Store in the refrigerator for up to 3 days. The sauce will thicken slightly as it cools, so reheat gently to restore its silky texture.
Freezer Friendly
Divide the beef and sauce into portion-sized containers. Freeze for up to 2 months. Thaw overnight in the refrigerator before reheating. The flavors meld beautifully during freezing.
Best Reheating Method
Reheat the dish in a saucepan over low heat, adding a splash of water or broth to loosen the sauce. Stir frequently to prevent scorching. A quick 5-minute rest after reheating allows the juices to redistribute.