I still remember the Sunday morning I destroyed my kitchen in pursuit of the perfect apple cinnamon roll. Picture this: flour clouds hanging in the air like early-morning fog, butter splattered across the counter like abstract art, and me—hair frizzed, apron askew—standing in the middle of it all with a rolling pin in one hand and half-eaten apple in the other. My roommate walked in, took one look at the disaster zone, and asked if I'd been cooking or if the kitchen had exploded. Fair question. But then the scent hit her: warm cinnamon, caramelized apples, and yeasty dough rising like a promise. Her eyes went wide, she grabbed a warm roll straight from the pan, and the only thing she said after devouring it in three bites was, "I need the recipe. Now."
That chaotic morning led to months of obsessive testing, tweaking, and tasting (so much tasting that my jeans staged a protest). I tried every technique I could find: overnight ferments, potato-enriched doughs, fillings that ranged from jammy to chunky to practically apple pie levels. Some batches emerged pale and doughy, others so overloaded with fruit they collapsed into sad, soggy spirals. One memorable disaster involved a bourbon glaze that tasted like I'd lit a Christmas candle in a college dorm room—overwhelming and slightly artificial. But each failure taught me something crucial about balance, about respecting both the apple and the cinnamon, about understanding that a cinnamon roll isn't just breakfast—it's edible nostalgia wrapped around itself like a cozy blanket.
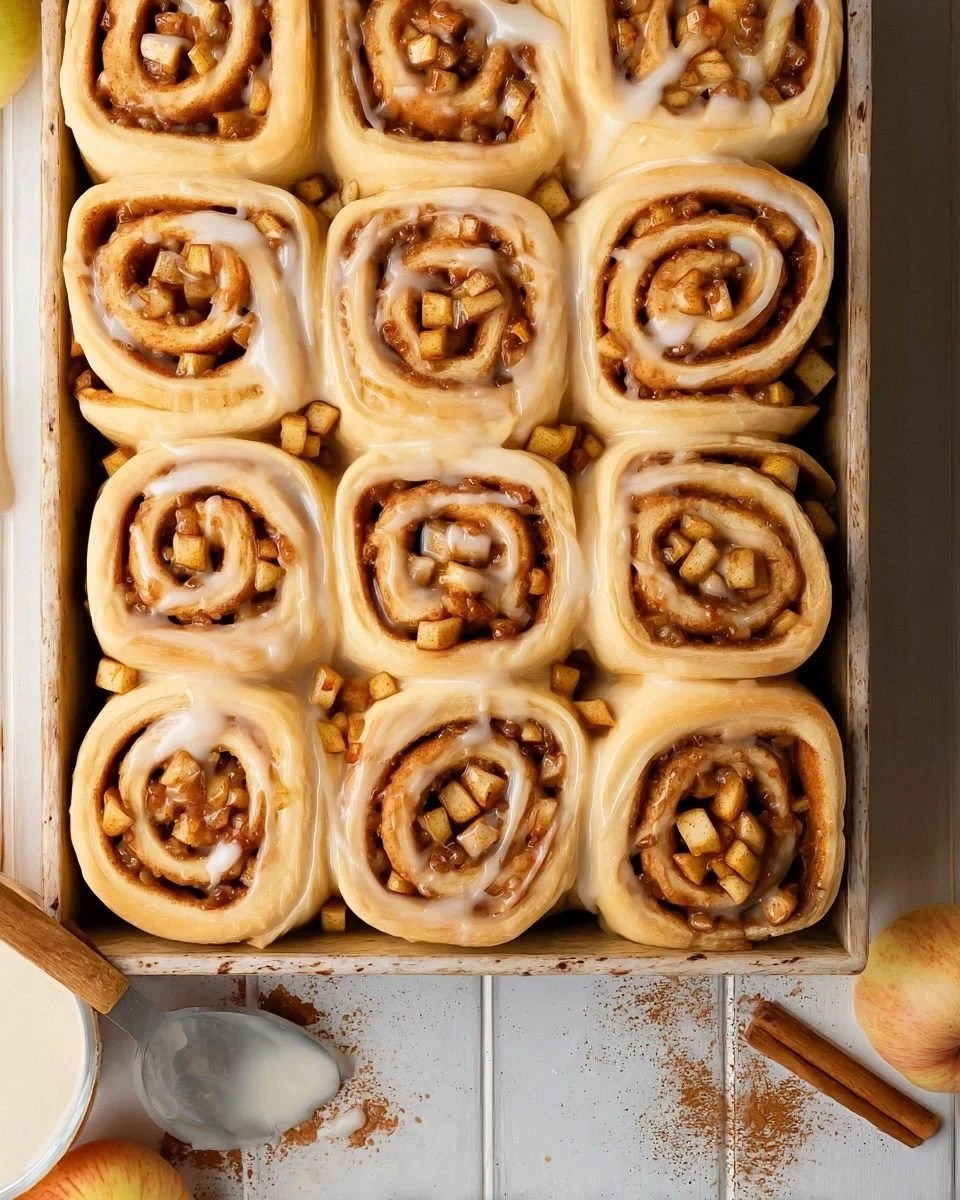
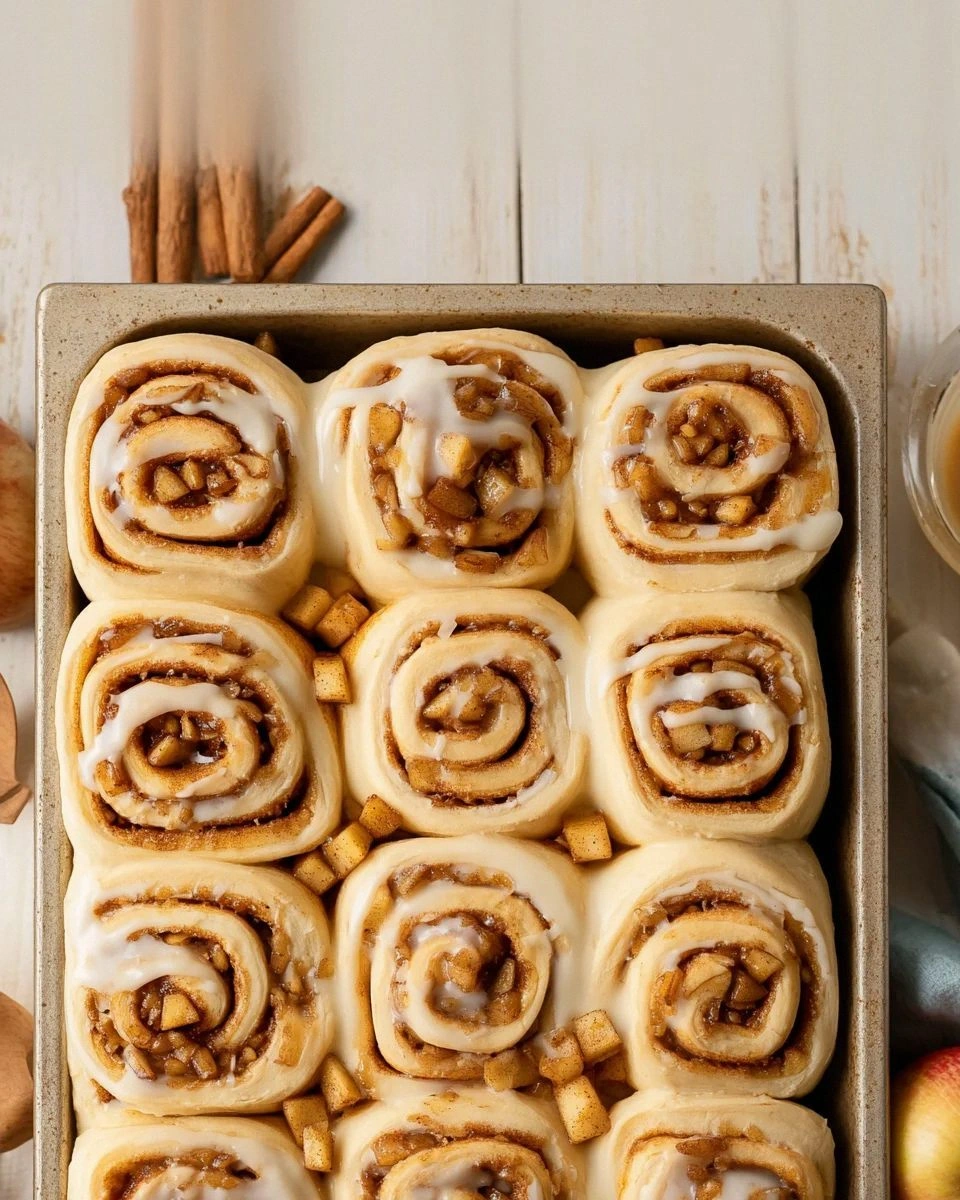
This version I'm sharing today is the culmination of all those experiments. It's the one that made my neighbor knock on my door at 7 a.m. asking if I was baking again. The rolls emerge from the oven with mahogany swirls, their edges caramelized and crisp, their centers soft and custardy where the apple filling meets the tender dough. The cinnamon doesn't just whisper—it sings in warm, earthy notes that complement the sweet-tart apples rather than masking them. And the glaze, oh the glaze, it's a simple affair that melts into every crevice, creating a glossy finish that shatters slightly when you pull apart a roll.
What sets these apart from every other apple cinnamon roll recipe cluttering the internet? It's not just one thing—it's a symphony of small but crucial choices. The dough gets a touch of honey for depth and a whisper of cardamom that makes people ask, "What's that amazing flavor I can't quite place?" The filling uses three types of apples for complexity: tart Granny Smiths that hold their shape, sweet Honeycrisps that melt into jammy pockets, and a handful of dried apples soaked in cider for concentrated flavor bombs. And here's the twist that'll make you the legend of your next brunch: we cook the apples twice—once to drive off moisture and intensify flavor, then again inside the rolls where they caramelize against the dough. The result? Layers of apple flavor that range from bright and fresh to deep and toffee-like, all wrapped in spirals of buttery, cinnamon-scented dough.
Let me walk you through every single step—by the end, you'll wonder how you ever made it any other way.
What Makes This Version Stand Out
Triple-Threat Apple Action: Most recipes throw in raw apples that steam and turn mushy. We use fresh, dried, and cider-soaked apples for layers of flavor that range from bright to deeply caramelized. Each bite delivers different apple experiences—some soft and jammy, others with pleasant chew, all bursting with concentrated fruit flavor.
The Overnight Ferment Secret: The dough rests in your fridge for 8-24 hours, developing complex, slightly tangy flavors that make bakery-style rolls possible at home. This slow fermentation also means you can prep everything the night before and just pop them in the oven for fresh morning rolls. Your future self will thank you when you're sipping coffee while these bake.
Cinnamon That Actually Tastes Like Cinnamon: We use two types—Ceylon for warmth and warmth-only Korintje for that classic cinnamon roll punch. Most recipes rely on stale supermarket cinnamon that tastes like red-hot candies. We bloom the spices in butter first, awakening their essential oils and eliminating any raw, dusty flavors.
Brown Butter Everything: From the dough to the filling to the glaze, we use nutty, caramel-scented brown butter instead of plain melted butter. This adds depth that makes people close their eyes and sigh happily. It's the difference between a good roll and a transcendental experience.
The Temperature Rule That Changes Everything: We bake at two temperatures—high heat first for lift and color, then lower to finish cooking without drying. Most recipes either burn the edges or leave the centers doughy. This technique ensures every spiral is perfectly baked.
Make-Ahead Magic: These rolls can be frozen at three different stages: after shaping, after the final proof, or after baking. Detailed instructions for each scenario mean you can have fresh rolls whenever the craving strikes. No more 4 a.m. baking sessions unless you want them.
Alright, let's break down exactly what goes into this masterpiece...
Inside the Ingredient List
The Flavor Base
Our dough starts with bread flour for chew and all-purpose for tenderness—a combination that creates rolls sturdy enough to hold their filling but soft enough to pull apart in fluffy clouds. The honey here isn't just for sweetness; its hygroscopic properties keep these rolls moist for days (though they rarely last that long). Whole milk provides richness and helps activate the yeast, while the eggs add structure and that beautiful golden color. Don't even think about skimping on the butter—we need the full 8 tablespoons for proper lamination between layers.
Brown sugar in the filling isn't negotiable. White sugar melts into syrup that runs out and burns, while brown sugar's molasses content creates that gooey, caramel-like filling that stays put. The apples need to be firm enough to hold shape but not so crisp they never cook through. Granny Smith provides necessary acid to balance the sweetness, while a sweeter apple like Honeycrisp or Pink Lady adds complexity. Dried apples might seem fussy, but they rehydrate during baking into concentrated flavor bombs that make people ask for your secret.
The Texture Crew
Instant yeast saves you from proofing anxiety—these tiny granules wake up the moment they hit liquid, eliminating the "is my yeast dead?" panic that kills baking confidence. Salt seems obvious, but its placement matters. We add it after the flour and yeast are partially mixed, preventing direct contact that could slow fermentation. The egg wash isn't just for looks; it creates that shiny, professional bakery finish that makes people think you trained in Paris instead of watching YouTube videos in pajamas.
Heavy cream in the glaze might feel excessive, but it creates a luxurious pour that sets into a delicate shell. Powdered sugar dissolves completely, avoiding the gritty texture that ruins so many homemade glazes. A touch of vanilla bean paste (or scrape a real bean if you're feeling fancy) adds those beautiful flecks that signal serious baking credentials.
The Unexpected Star
Here's where we get weird: apple cider vinegar in the dough. Just a teaspoon tightens the gluten structure and adds subtle brightness that makes the other flavors pop. It's like adding a squeeze of lemon to a rich dish—nobody can identify it, but everyone notices when it's missing. The cornstarch in the filling might seem out of place, but it binds the apple juices, preventing that dreaded soggy bottom that turns rolls into mush.
Cardamom is my secret weapon—just enough to add intrigue without turning these into Scandinavian pastries. It's the difference between a good singer and one who makes you cry. Most people can't identify it, but they know something magical is happening. If you can't find cardamom, skip it rather than substituting with more cinnamon—too much cinnamon tastes like red hots, not breakfast.
The Final Flourish
Coarse sugar on top provides crunch that shatters like thin ice when you bite in. Regular sugar melts into the glaze, but coarse sugar stays crystalline, adding textural interest that makes people reach for another piece "just to confirm what they're tasting." The heavy cream we pour over just before baking? That's the game-changer that creates custardy bottoms and ensures every bite stays moist.
Don't skip the apple cider reduction for the glaze. Boiling down a cup of cider into two tablespoons concentrates apple flavor into a syrup that tastes like autumn in liquid form. It's the difference between apple-flavored and actually tasting like apples. This step takes five minutes but elevates these from great to legendary status.
Everything's prepped? Good. Let's get into the real action...
The Method — Step by Step
Start by browning your butter because it needs time to cool. Place 8 tablespoons in a light-colored pan over medium heat. Swirl constantly as it foams, watching for golden flecks to appear—those are milk solids toasting into nutty perfection. When it smells like caramel and hazelnuts had a beautiful baby, remove from heat immediately. Pour into a bowl and refrigerate while you prep everything else. That nutty aroma filling your kitchen? That's the smell of victory.
While the butter cools, warm your milk to exactly 110°F—too hot kills yeast, too cold makes it sluggish. Whisk in honey until dissolved, then sprinkle yeast on top. Let it bloom for 5 minutes until it looks like a science experiment gone right. If your yeast doesn't foam, toss it and start fresh—there's no rescuing dead yeast. This step determines whether your rolls rise to glory or stay dense as hockey pucks.
In your stand mixer bowl, combine flour, salt, and cardamom. Mix briefly to distribute, then add the bloomed yeast mixture, eggs, and cooled brown butter. Knead with the dough hook for 8 minutes on medium speed. The dough should start shaggy and rough, then transform into a smooth, elastic ball that pulls away from the sides. If it seems too sticky after 5 minutes, resist adding flour—keep kneading and watch the magic happen.
Perform the windowpane test: stretch a small piece until it's thin enough to see light through without tearing. If it rips immediately, keep kneading. This gluten development creates the stretchy network that traps gas and creates fluffy rolls. Your arms might get tired if kneading by hand, but think of it as your workout for the day—baker's gym membership.
Shape the dough into a ball and place in an oiled bowl, turning to coat. Cover with plastic wrap and refrigerate for at least 8 hours, up to 24. This cold fermentation develops flavor complexity that makes bakery-quality rolls possible at home. The dough will rise slowly in the cold, creating a more extensible dough that's easier to roll out. Plus, you can prep this the night before and just roll and bake in the morning.
While the dough chills, make your apple filling. Peel, core, and dice your fresh apples into 1/2-inch pieces. Toss with lemon juice to prevent browning. In a skillet, melt 2 tablespoons of the brown butter over medium heat. Add apples, brown sugar, cinnamon, and a pinch of salt. Cook for 8-10 minutes until apples soften and caramelize. The kitchen should smell like fall exploded in the best way possible.
Soak your dried apples in hot apple cider for 20 minutes until plump and rehydrated. Drain well and pat dry—they should feel like soft raisins. These concentrated apple gems will distribute throughout the filling, ensuring apple flavor in every bite. Chop them roughly so they integrate with the fresh apples rather than staying in distinct chunks. This might seem like extra work, but it's what makes people ask for your secret ingredient.
Combine the cooked fresh apples with the rehydrated dried apples, cornstarch, and vanilla. Let this mixture cool completely—warm filling will melt the dough and create a mess when rolling. The filling should be jammy but not wet, holding together when you scoop it. If it's too juicy, drain off some liquid or add another teaspoon of cornstarch. You want it thick enough to stay put, not run out and burn on the pan.
Roll out your chilled dough on a floured surface into a 12x18-inch rectangle. The cold dough will be firm but pliable, making it easy to achieve the perfect shape. Don't fight the dough—if it springs back, let it rest for 5 minutes to relax the gluten. Your rectangle should be even in thickness, about 1/4 inch thick. Uneven dough means uneven baking, and we can't have that.
Spread the remaining brown butter over the dough, leaving a 1/2-inch border on all sides. Sprinkle the apple filling evenly over the butter, pressing gently so it adheres. Starting from the long edge, roll the dough into a tight log. Use a bench scraper to help lift and roll if needed. The log should be firm and even, like a delicious edible sleeping bag.
Cut the log into 12 even pieces using the dental floss method. Place them in a greased 9x13-inch pan, leaving space between for rising. Cover with plastic wrap and let rise in a warm spot for 45-60 minutes until doubled in size. They should look puffy and touch each other slightly. This final proof is crucial—under-proofed rolls will be dense, over-proofed ones will collapse.
While the rolls rise, preheat your oven to 400°F. Yes, this seems hot, but we want initial high heat for oven spring and color. After 15 minutes, we'll reduce to 350°F to finish baking without burning. This two-temperature method ensures golden tops and cooked centers. Don't skip this step—it's what separates amateur rolls from professional ones.
Just before baking, pour 1/4 cup heavy cream around the base of the rolls. This creates steam for a tender crumb and pools into custardy bottoms that will make you weep with joy. Brush the tops with egg wash for that bakery shine. Slide into the oven and bake for 15 minutes at 400°F, then reduce to 350°F for another 15-20 minutes.
Your kitchen will start smelling like you've been transported to a Vermont autumn. Resist opening the oven door—every peek drops the temperature and can cause collapse. When done, the rolls should be deep golden brown and sound hollow when tapped. An instant-read thermometer inserted into the center should register 190°F.
While the rolls cool, make the glaze by whisking together powdered sugar, cream, vanilla, and reduced apple cider until smooth. The consistency should be thick but pourable—add more cream if needed. Drizzle over warm rolls so it melts into every spiral and creates glossy pools in the crevices. Wait about 10 minutes before glazing so the rolls set but are still warm enough to melt the glaze slightly.
Sprinkle with coarse sugar for crunch that provides textural contrast to the soft rolls. Serve warm, pulling apart the spirals to reveal the apple-cinnamon swirls within. These are best fresh but will keep for 3 days at room temperature or a week refrigerated. Reheat for 10 seconds in the microwave to restore that fresh-baked experience.
That's it—you did it. But hold on, I've got a few more tricks that'll take this to another level...
Insider Tricks for Flawless Results
The Temperature Rule Nobody Follows
Your ingredients should all be at room temperature except the milk, which needs to be warm for yeast activation. Cold eggs or butter will seize up the dough, creating lumps that never incorporate properly. Take everything out 30 minutes before starting—yes, even the eggs. If you forgot (we all do), place eggs in warm water for 5 minutes. The dough will come together smoothly and rise more predictably.
But here's the counterintuitive part: after the first rise, you want the dough cold. Chilled dough is easier to roll, less sticky, and holds its shape better. If your kitchen is warm, pop the rolled-out dough in the freezer for 10 minutes before adding filling. This prevents the butter from melting and creating a greasy mess that leaks out during baking.
Why Your Nose Knows Best
Don't trust the timer alone—your nose is the most reliable indicator. When the rolls are perfectly baked, your kitchen will smell like a autumn bakery with notes of caramel, spice, and toasted bread. If you smell sharp or acrid notes, they're getting too dark. That scent shift happens about 2 minutes before visual browning, giving you time to adjust.
Train your nose by smelling the rolls at different stages. Raw dough smells yeasty and floury. Half-baked rolls smell like sweet bread. Perfect rolls smell like cinnamon toast and caramel apples had a perfect baby. Overbaked ones smell like burnt sugar and regret. Trust this instinct—it develops with practice and will serve you better than any timer.
The 5-Minute Rest That Changes Everything
After mixing but before refrigerating, let the dough rest for 5 minutes. This autolyse period allows flour to fully hydrate and gluten to start developing without mechanical kneading. The result? More extensible dough that rolls out without springing back like a rubber band. You'll notice the difference immediately—the dough becomes smoother and more cooperative.
This rest also prevents over-kneading, which creates tough rolls. By letting the flour absorb liquid naturally, you develop gluten more gently. Think of it as letting the ingredients get to know each other before forcing them into a relationship. Your rolls will be tender yet structured, not dense or tough.
The Pan Makes a Difference
Use a metal pan, not glass or ceramic. Metal conducts heat faster and more evenly, ensuring the bottoms cook through without over-browning the tops. Glass pans retain heat too long, continuing to cook the rolls even after removal from the oven. If glass is all you have, reduce baking time by 5 minutes and remove rolls immediately after baking.
Dark metal pans create crispier bottoms, light metal gives more even browning. I prefer light-colored aluminum for these rolls because we want golden edges, not dark and bitter. Whatever you use, don't forget to grease it well—caramelized sugar will weld rolls to the pan like delicious edible superglue.
Apple Selection Secrets
Mix at least two apple varieties for best results. Tart apples like Granny Smith provide acid to balance sweetness and hold their shape for texture. Sweet apples like Honeycrisp or Pink Lady break down slightly, creating jammy pockets. Avoid Red Delicious—they turn mealy and flavorless when baked. Fuji works in a pinch but can be too sweet.
The key is balancing flavor, texture, and moisture. Tart apples are firmer and less juicy, preventing soggy bottoms. Sweet apples contribute more flavor and natural sweetness, allowing you to reduce added sugar. This combination creates rolls with complex apple flavor without becoming apple pie filling in bread form.
Creative Twists and Variations
This recipe is a playground. Here are some of my favorite ways to switch things up:
Maple Pecan Apple Rolls
Replace the brown sugar with maple sugar and add 1/2 cup toasted pecans to the filling. The maple adds smoky complexity that plays beautifully with apples. Toast pecans at 350°F for 8 minutes until fragrant, then chop roughly. The nuts provide crunch and their natural oils enhance the overall richness. These taste like autumn in New England distilled into breakfast form.
Caramel Apple Cheesecake Rolls
Beat 4 oz cream cheese with 2 tablespoons sugar and spread thinly over the dough before adding apples. The cream cheese creates tangy pockets that balance the sweet filling. Drizzle with caramel sauce instead of glaze for extra indulgence. These are over-the-top rich, perfect for special occasions when you want to impress brunch guests.
Spiced Apple Chai Rolls
Add 1 teaspoon each of cardamom, ginger, and allspice to the filling. Replace the milk in the dough with strong chai tea for layers of spice flavor. The result tastes like your favorite coffee shop drink in breakfast form. These pair perfectly with actual chai tea for a meta-flavor experience that spice lovers will obsess over.
Savory Apple and Cheddar Rolls
Reduce sugar to 2 tablespoons in the dough and omit from filling. Add 1 cup shredded sharp cheddar to the apple mixture with black pepper and fresh thyme. These bridge sweet and savory, perfect for serving alongside roasted pork or as part of a brunch spread. The cheddar melts into the apples creating a sophisticated flavor that surprises everyone.
Apple Butter Rolls
Replace fresh apples with 1 cup apple butter mixed with 1/2 cup diced dried apples. This creates intense apple flavor without the moisture issues of fresh fruit. The rolls stay fresh longer and have a more concentrated taste. It's like apple pie filling but better because it doesn't make the dough soggy.
Ginger Apple Crunch Rolls
Add 2 tablespoons minced crystallized ginger to the filling and replace half the cinnamon with ground ginger. Top with a streusel of flour, butter, brown sugar, and chopped candied ginger before baking. These have heat and texture that make them unforgettable. The ginger provides warming spice that builds with each bite.
Storing and Bringing It Back to Life
Fridge Storage
Store cooled rolls in an airtight container at room temperature for up to 3 days. Line the container with paper towels to absorb excess moisture and prevent the bottoms from getting soggy. Replace the paper towels daily if they become damp. The rolls will stay soft but lose some of that fresh-baked magic after day two.
For longer storage, refrigerate for up to a week. Cold rolls firm up, so bring them to room temperature before serving or reheat briefly. The glaze may absorb into the rolls in the fridge, making them less glossy but more flavorful. Some people actually prefer day-old rolls for this reason—the flavors meld and deepen.
Freezer Friendly
Freeze rolls after baking and cooling completely. Wrap individually in plastic wrap, then place in freezer bags. They'll keep for 2 months without quality loss. Thaw overnight in the refrigerator or at room temperature for 2 hours. Refresh in a 300°F oven for 5-7 minutes to restore the fresh-baked experience.
You can also freeze unbaked rolls after shaping. Place them in the pan, cover tightly, and freeze. When ready to bake, thaw overnight in the refrigerator, then let rise at room temperature until doubled. They'll take longer to rise from cold, but the flavor development is even better. This method gives you fresh rolls with minimal morning effort.
Best Reheating Method
Microwave individual rolls for 10-12 seconds with a small cup of water alongside. The water creates steam that prevents the rolls from drying out. Don't overdo it—10 seconds too long and you'll have rubbery disappointment. For multiple rolls, use the oven: wrap in foil and heat at 300°F for 10 minutes.
For the ultimate revival, split rolls and toast cut-side down in a dry skillet for 2-3 minutes. This creates crispy edges while keeping the centers soft. Drizzle with fresh glaze or a pat of butter and you'll have rolls that might be better than the original fresh batch. The toasting brings out caramel notes that make them irresistible.