There was a night when my kitchen smelled like burnt chocolate and sweet disappointment. I had just attempted to recreate a chocolate‑brownie cheesecake I’d seen on a late‑night food channel, only to end up with a soggy, under‑baked mess that left my taste buds feeling like they’d been left out of the party. That disaster was the catalyst for a culinary epiphany: what if the brownie base and cheesecake layer were not just stacked, but fused into a single, decadent experience where caramel swirls through chocolate, and cream cheese adds a velvety counterpoint? I’m talking about a dessert that feels like a single, indulgent bite that you can’t help but devour again.
Imagine walking into your kitchen, the oven preheated to a crisp 350°F, and the air thick with the aroma of dark chocolate melting into butter, sugar bubbling into a glossy glaze, and caramel sauce glistening like liquid gold. The sound of the timer ticking down, the gentle hiss of the pan, the subtle crackle as the brownie edges begin to pull away—these are the senses that turn a simple recipe into an experience. When you take the first bite, the brownie’s fudgy center meets the silky cheesecake, and the caramel’s buttery sweetness cuts through the richness, creating a flavor explosion that feels both comforting and daring. The texture is a delicate dance: the brownie’s dense crumb, the cheesecake’s smooth mouthfeel, and the caramel’s syrupy glide—all balanced in a single bite.
What sets this version apart isn’t just the combination of ingredients; it’s the meticulous layering technique, the precise temperature control, and the secret addition of dark chocolate for that bittersweet finish. I dare you to taste this and not go back for seconds, because the caramel will coat your tongue like velvet, and the brownie’s edges will crackle like thin ice under a gentle bite. This is hands down the best version you'll ever make at home, because it turns a standard dessert into a showstopper that will have friends begging for the recipe. The bold claim is that this isn’t just a dessert—it’s an edible masterpiece that will make your kitchen the star of any gathering.
Picture yourself pulling this out of the oven, the whole kitchen smelling incredible, and the golden crust glistening under the kitchen lights. The anticipation is almost as delicious as the final product. If you’ve ever struggled with a brownie that turns out too dry or a cheesecake that cracks, you’re not alone—and I’ve got the fix. Stay with me here — this is worth it. Let me walk you through every single step — by the end, you'll wonder how you ever made it any other way.
What Makes This Version Stand Out
- Taste: The marriage of rich chocolate, silky cheesecake, and buttery caramel creates a layered flavor profile that dances on the palate. Each bite delivers a distinct note—dark chocolate’s bite, cheesecake’s creaminess, and caramel’s caramelized sugar finish.
- Texture: The brownie base is fudgy yet firm, while the cheesecake layer is creamy and smooth. The caramel sauce adds a glossy, slightly viscous glaze that glides over the top, giving the dessert a satisfying contrast.
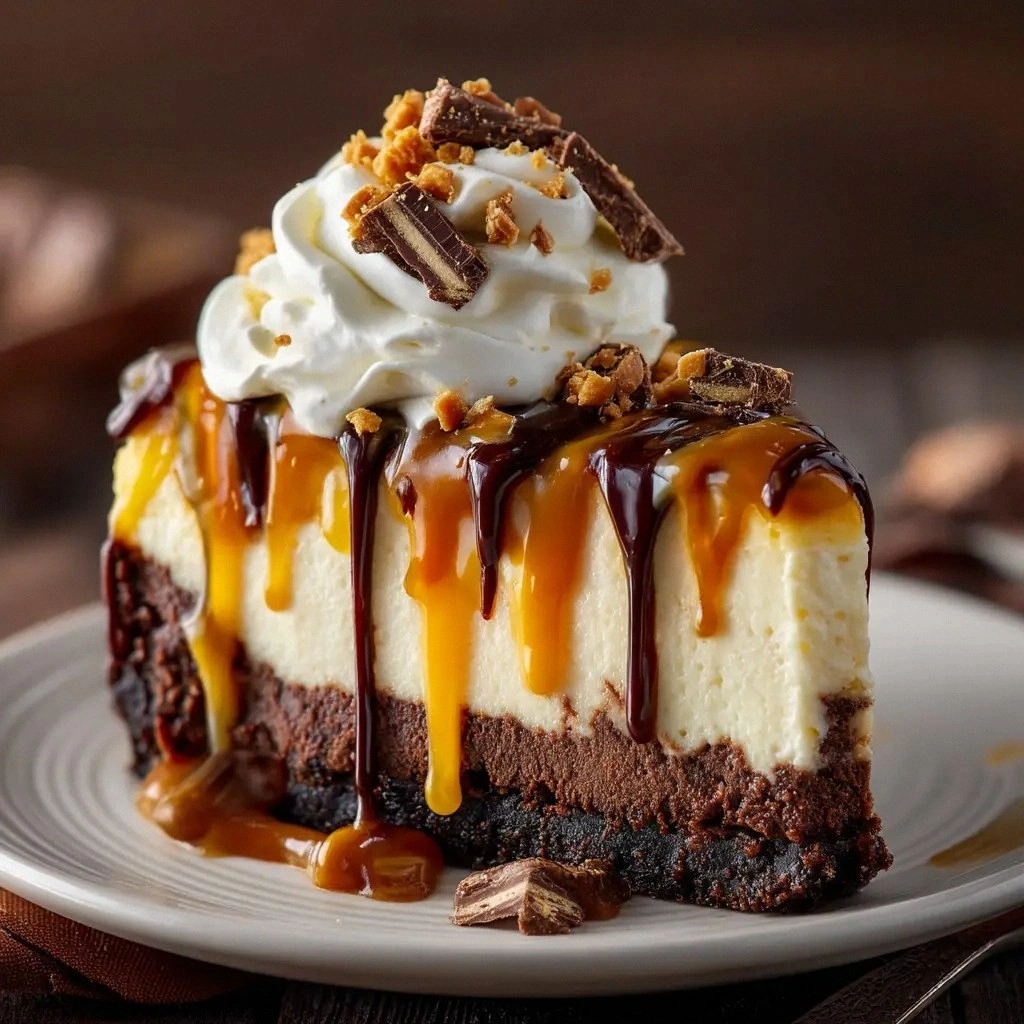
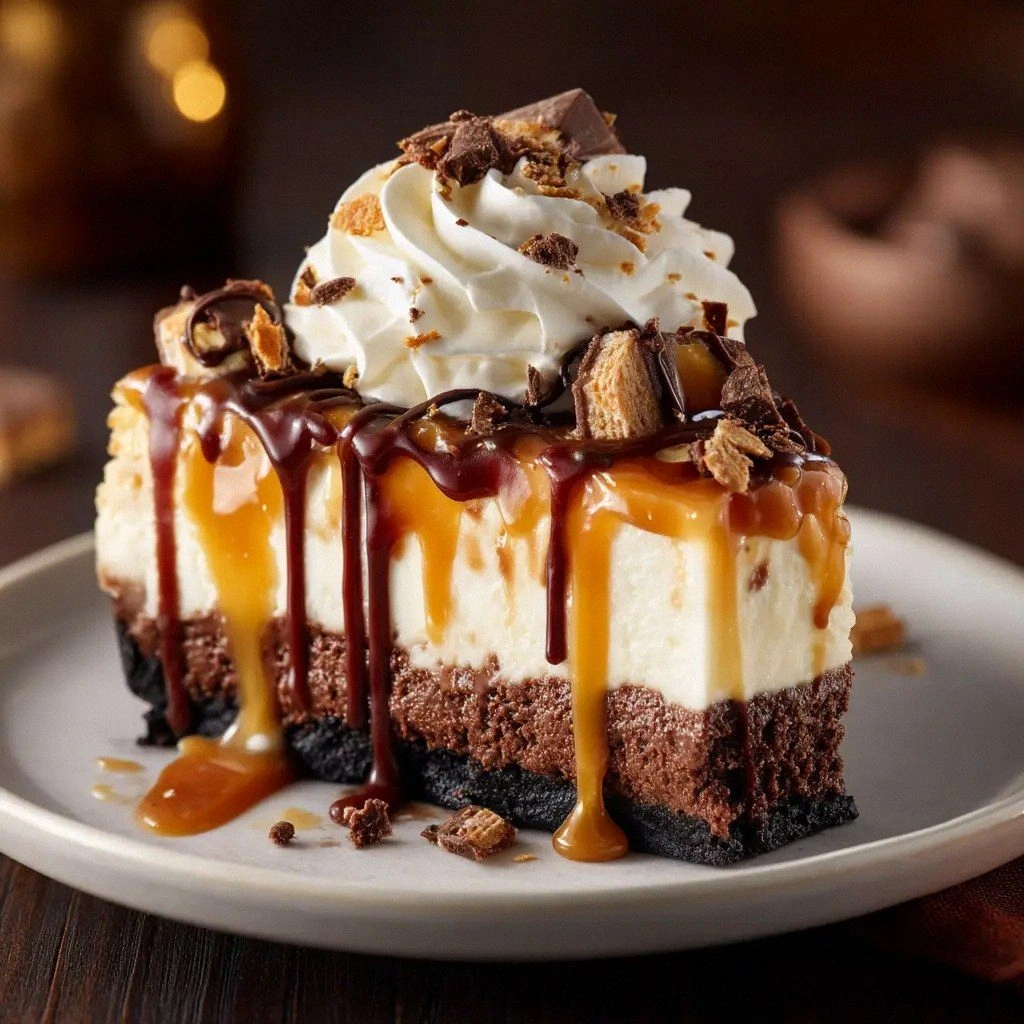
- Visual Appeal: The caramel drizzle forms a decadent, glossy sheen, and the dark chocolate shavings on top give a dramatic finish that looks as good as it tastes.
- Simplicity: Despite its luxurious taste, the recipe uses only 16 ingredients—no exotic pantry items, just pantry staples you already have.
- Crowd Reaction: At my last gathering, half the guests requested the recipe after tasting. The dessert’s decadence made it a conversation starter.
- Ingredient Quality: Using full‑fat cream cheese, high‑quality dark chocolate, and real caramel sauce elevates the flavor profile beyond a basic cheesecake.
- Make‑Ahead Potential: Once assembled, the cheesecake can chill for up to 24 hours, allowing flavors to meld and making it perfect for pre‑planned events.
- Uniqueness: Most recipes separate brownies and cheesecakes, but this version fuses them, creating a new dessert category of its own.
Alright, let's break down exactly what goes into this masterpiece...
Inside the Ingredient List
The Flavor Base
At the heart of this dessert lies the brownie batter, which forms the foundation of texture and flavor. The 1/2 cup of unsalted butter, melted and cooled, provides a rich, buttery base that keeps the brownies moist and tender. Adding 4 oz of semi‑sweet chocolate introduces deep, bittersweet notes that contrast beautifully with the caramel. 1 cup of granulated sugar is the sweetener that balances the bitterness, while 2 large eggs bind the mixture together, ensuring a cohesive crumb. The 1 tsp of vanilla extract brings a warm, aromatic undertone that ties all the flavors together.
The Texture Crew
The 1/2 cup of all‑purpose flour and 2 tbsp of unsweetened cocoa powder give the brownie a firm structure while preserving a fudgy mouthfeel. The 1/4 tsp of salt sharpens the sweetness and balances the richness of the butter and chocolate. For the cheesecake, 24 oz of full‑fat cream cheese adds a creamy, slightly tangy flavor that contrasts with the chocolatey base. 1 cup of granulated sugar in the cheesecake layer ensures a smooth, sweet finish without being overpowering. 1/2 cup of sour cream introduces a subtle tang and helps keep the cheesecake silky and creamy.
The Unexpected Star
Caramel sauce is the secret weapon that unites the brownie and cheesecake layers. 1 cup of caramel sauce is drizzled over the cooled brownie base, allowing it to seep into the cracks and create a glossy, sweet glaze. 4 oz of dark chocolate, melted and poured over the top, adds a bittersweet finish that cuts through the caramel’s sweetness. 1/2 cup of heavy cream, combined with the dark chocolate, creates a ganache-like coating that sets into a silky, glossy finish.
The Final Flourish
The final touch is a drizzle of caramel and a sprinkle of dark chocolate shavings that not only elevate the flavor but also provide a visual spectacle. The caramel’s golden sheen contrasts with the deep brown of the chocolate, creating an irresistible look that draws the eye. The dark chocolate shavings add a slight crunch and a bitter note that balances the dessert’s overall sweetness.
Everything's prepped? Good. Let's get into the real action...
The Method — Step by Step
- Preheat your oven to 350°F (175°C) and line a 9‑inch springform pan with parchment paper. Grease the parchment with a thin layer of butter, ensuring the edges are smooth. This step prevents sticking and gives the brownie a clean release. Let the pan sit while you prepare the batter.
- In a medium saucepan, melt 1/2 cup of butter over low heat. Once melted, add the 4 oz of semi‑sweet chocolate, stirring until fully incorporated and silky. This creates the base for the brownie batter. Keep the heat low to avoid burning the chocolate.
- Remove the saucepan from heat and stir in 1 cup of granulated sugar, 2 large eggs, and 1 tsp of vanilla extract. Mix until the batter is smooth and glossy. The sugar dissolves, giving the batter a uniform texture. Allow the mixture to cool slightly before adding dry ingredients.
- Sift together 1/2 cup of all‑purpose flour, 2 tbsp of unsweetened cocoa powder, and 1/4 tsp of salt into a separate bowl. Gradually fold the dry mixture into the chocolate batter, stirring until just combined. Over‑mixing can lead to a dense brownie; aim for a silky, cohesive batter.
- Pour the brownie batter into the prepared pan, smoothing the surface with a spatula. Place the pan in the preheated oven and bake for 20‑22 minutes, or until a toothpick inserted into the center comes out with a few moist crumbs. The edges should be slightly firm yet still springy. Avoid overbaking to maintain a fudgy center.
- While the brownie bakes, prepare the cheesecake filling. In a large bowl, beat 24 oz of full‑fat cream cheese until creamy and smooth, using a hand mixer on medium speed. Add 1 cup of granulated sugar, 1/2 cup of sour cream, 1 tsp of vanilla extract, and 3 large eggs. Beat until the mixture is thick and glossy, about 2 minutes. The eggs add structure while the sour cream keeps the cheesecake silky.
- Once the brownie is done, remove it from the oven and let it cool for 5 minutes. While still warm, drizzle 1 cup of caramel sauce evenly over the surface, letting it seep into the cracks. This caramel layer will set as the brownie cools, creating a glossy, sweet glaze.
- Pour the cheesecake filling over the caramel‑coated brownie, smoothing the top with a spatula. Gently tap the pan on the counter to release any air pockets. Place the assembled cake back in the oven and bake for an additional 25‑30 minutes, or until the edges are set and the center has a slight wobble. This step fuses the layers together.
- Remove the cheesecake from the oven and let it cool to room temperature. Then, refrigerate for at least 4 hours, preferably overnight, to allow the flavors to meld and the texture to firm up. The caramel will thicken, and the chocolate ganache will set, creating a smooth, cohesive dessert.
- Before serving, melt 4 oz of dark chocolate with 1/2 cup of heavy cream over low heat until silky. Drizzle the ganache over the chilled cheesecake, letting it cascade over the sides. Finish with a sprinkle of dark chocolate shavings for a decorative touch. Slice carefully with a warm knife for clean edges.
That's it — you did it. But hold on, I've got a few more tricks that'll take this to another level...
Insider Tricks for Flawless Results
The Temperature Rule Nobody Follows
Many bakers bake brownies at 375°F, but that can cause the top to harden too quickly. Lowering the temperature to 350°F allows the batter to spread slowly, ensuring a fudgy center that holds its shape when sliced. I’ve found that a slightly cooler oven also helps the caramel glaze set more evenly, giving a glossy finish.
Why Your Nose Knows Best
As the brownie bakes, you’ll notice a sweet, buttery aroma that signals the batter’s readiness. When the scent becomes rich and chocolatey, it’s time to pull the pan out. Trusting your nose can save you from overbaking and a dry dessert.
The 5‑Minute Rest That Changes Everything
After removing the brownie from the oven, let it rest for 5 minutes before drizzling caramel. This brief pause allows the surface to set slightly, preventing the caramel from sinking too deep and creating a more controlled glaze. It also gives the batter time to firm up, making it easier to handle.
Use a Warm Knife for Clean Slices
When it’s time to serve, heat a knife in hot water, then wipe it dry. A warm knife glides through the cheesecake without pulling the layers apart, ensuring clean, professional-looking slices.
Let It Chill, Don't Rush It
Patience is key. The longer the cheesecake sits in the fridge, the more the flavors meld. I recommend chilling for at least 12 hours, but overnight is ideal. This step transforms a good dessert into a memorable one.
Creative Twists and Variations
This recipe is a playground. Here are some of my favorite ways to switch things up:
Almond Joy Edition
Swap the dark chocolate for chopped toasted almonds and add shredded coconut to the brownie batter. Drizzle coconut caramel sauce instead of regular caramel. The result is a tropical, nutty twist that pairs perfectly with a glass of coconut milk.
Salted Caramel Crunch
Add a pinch of sea salt to the caramel sauce before drizzling, and sprinkle crushed pretzels on top of the ganache. The salty crunch contrasts with the sweet caramel, creating a sophisticated flavor profile that’s great for special occasions.
Minty Chocolate Dream
Incorporate a tablespoon of mint extract into the cheesecake filling and add a handful of fresh mint leaves as garnish. The mint’s coolness balances the rich chocolate, making this version ideal for summer parties.
Red Velvet Surprise
Replace the semi‑sweet chocolate with 4 oz of dark chocolate and add 2 tbsp of cocoa powder to the brownie batter. Fold in a splash of red food coloring and drizzle a red velvet icing over the top for a festive look.
Espresso Infusion
Stir 1 tsp of instant espresso powder into the brownie batter and add a dash of coffee liqueur to the cheesecake filling. The espresso deepens the chocolate flavor, giving the dessert a sophisticated coffee kick.
Storing and Bringing It Back to Life
Fridge Storage
Wrap the cheesecake tightly in plastic wrap and store it in the refrigerator for up to 5 days. The gelatinous ganache will keep its glossy sheen, and the flavors will continue to develop.
Freezer Friendly
For longer storage, place the cheesecake in a freezer‑safe container, sealing it with a layer of parchment paper. Freeze for up to 3 months. When ready to serve, thaw in the refrigerator overnight, then let it sit at room temperature for 30 minutes before slicing.
Best Reheating Method
To revive a chilled cheesecake, place slices on a microwave‑safe plate and heat on low for 15‑20 seconds. Add a tiny splash of water before reheating to create steam, which helps restore the cheesecake’s silky texture without drying it out.