I was standing in the middle of my kitchen, staring at a mound of flour that had somehow turned into a sticky, unrecognizable mess, when my roommate shouted, “You’re going to make a mess, and you’re going to taste it!” That night, after a disastrous attempt at making fried dough, I decided I was going to create a version of sesame balls that would make even my most skeptical friends beg for seconds. The heat of the stove, the smell of hot oil, the clatter of utensils – all of it felt like an orchestra of chaos that I was about to conduct into culinary brilliance.
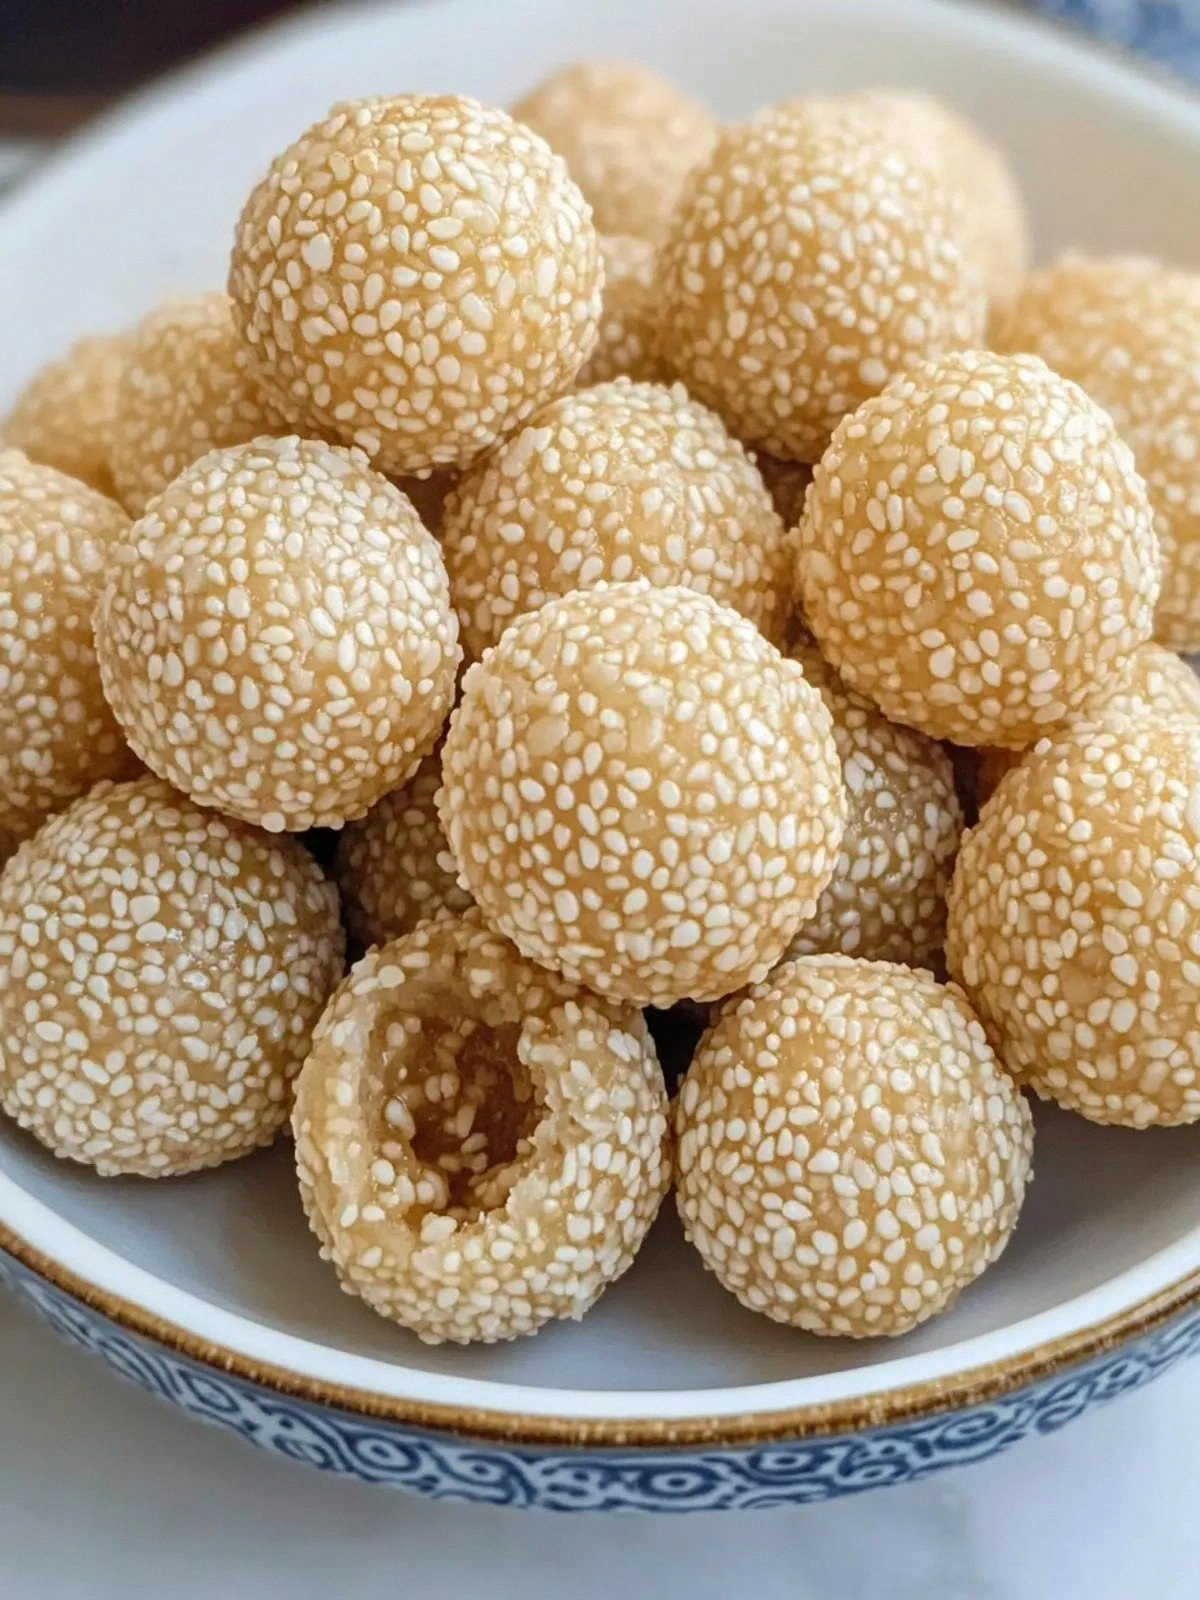
Picture this: the golden crust of each ball glistening like a sunrise on a quiet morning, the aroma of toasted sesame seeds drifting through the air, and the sound of a gentle sizzle as the dough meets the oil. When you take a bite, the first thing that hits you is the crackle of the crisp exterior, followed by the soft, chewy interior that oozes sweet red bean paste. The contrast between the crunchy shell and the silky center is like a dance between two worlds – a duet that sings with every crunch.
What sets this recipe apart is the meticulous balance between the lightness of glutinous rice flour and the richness of sesame. I’ve spent countless evenings tweaking the ratios, and the result is a dough that folds easily yet holds its shape, a filling that is sweet but not cloying, and a coating that sticks without being greasy. It’s the kind of dish that feels like a secret treasure, something you keep in your pantry for those moments when you want to surprise yourself or someone else.
And here’s the kicker: the secret ingredient that gives these balls their signature snap isn’t a fancy spice or a proprietary oil – it’s simply the right temperature and the right amount of sesame. I dare you to taste this and not go back for seconds. Let me walk you through every single step – by the end, you’ll wonder how you ever made it any other way.
What Makes This Version Stand Out
- Texture: The dough is airy and slightly chewy, thanks to the glutinous rice flour that creates a springy bite that’s hard to resist. It’s not gummy or dense; it feels like a cloud that bursts with flavor.
- Flavor: The red bean paste is sweet but balanced, with a hint of vanilla that elevates the whole experience. The sesame coating adds a nutty, toasty note that pairs perfectly.
- Ease: No fancy equipment needed – a simple bowl, a spoon, and a deep fryer or a heavy pan will do. The process is straightforward, making it ideal for beginners and seasoned cooks alike.
- Authenticity: This recipe stays true to the traditional Chinese sesame ball while adding a modern twist of extra crunch and a smoother filling.
- Versatility: You can serve them hot or at room temperature, pair them with tea, or toss them into a dessert platter. They’re a crowd‑pleaser at parties, potlucks, or family gatherings.
- Make‑ahead: The dough can be prepared a day ahead, refrigerated, and fried fresh when you’re ready. The filling can also be made in advance and stored in the fridge.
- Ingredient Quality: Using high‑grade glutinous rice flour and freshly toasted sesame seeds makes all the difference in flavor and texture.
Inside the Ingredient List
The Flour Factor
Glutinous rice flour is the backbone of this dish. It gives the dough its unique chewiness and the ability to hold the sweet filling without falling apart. If you skip it, the balls will be dry and crumbly, losing that signature mouthfeel. For the best results, sift the flour before use to eliminate lumps.
The Leavening Ally
Baking powder is the secret to a lighter texture. It creates tiny pockets of air that keep the dough from becoming too dense. If you prefer a denser ball, reduce the baking powder to half, but you’ll lose a bit of that airy quality.
The Sweet Layer
The sugar is not just for sweetness; it balances the savory sesame and the slightly tart red bean paste. A pinch of salt can also enhance the overall flavor profile. If you’re watching sugar intake, you can substitute honey or maple syrup, but the texture may shift slightly.
The Liquid Connection
Hot water is essential for dissolving the flour and activating the baking powder. It also helps the dough become pliable. If you use cold water, the dough will be stiff and hard to shape.
The Filling Power
Red bean paste is the heart of the sesame ball. It’s sweet, smooth, and slightly grainy, offering a contrast to the dough’s chewiness. If you can’t find red bean paste, you can use sweetened lotus seed paste or a simple jam.
The Final Flourish
Roasted white sesame seeds provide crunch, aroma, and a nutty flavor that elevates the entire dish. Toast them lightly in a dry pan until fragrant before coating the balls. If you prefer a darker flavor, use black sesame seeds instead.
Everything's prepped? Good. Let's get into the real action...
The Method — Step by Step
In a large mixing bowl, combine the glutinous rice flour, baking powder, and sugar. Whisk them together until the mixture is uniform. This dry blend forms the foundation of your dough. If you notice any lumps, sift the flour again.
Gradually pour the hot water into the dry mixture while stirring with a wooden spoon. The heat of the water helps the flour absorb moisture quickly, preventing clumps. Stir until the dough starts to come together and forms a cohesive mass. Let it sit for a few minutes to hydrate fully.
Turn the dough onto a lightly floured surface and knead for 2–3 minutes until it’s smooth and elastic. You’ll feel a slight tackiness; this is normal. The dough should not be sticky. If it is, sprinkle a bit more flour and knead again.
Divide the dough into 12 equal portions. Roll each portion into a ball, then flatten it into a disc. Place a teaspoon of red bean paste in the center and seal the edges by pinching the dough around the filling. The seam should be tight to prevent leakage during frying.
Roll each sealed ball in roasted sesame seeds until fully coated. The seeds should adhere firmly, creating a crisp shell once fried. This step is where the aroma begins to build – a scent that’s both nutty and sweet.
Heat oil in a deep pan or fryer to 350°F (175°C). Use a thermometer to maintain the temperature. If the oil is too hot, the balls will brown too quickly on the outside while remaining raw inside. If it’s too cool, they’ll absorb oil and become soggy.
Gently slide the sesame balls into the hot oil, a few at a time, to avoid overcrowding. Fry for 3–4 minutes per side, or until the surface turns a golden brown. The sizzle is the soundtrack of success. Remove them with a slotted spoon and drain on paper towels.
Serve the balls warm for maximum chewiness. If you prefer them at room temperature, let them cool completely before serving. The texture remains delightful either way.
That's it — you did it. But hold on, I've got a few more tricks that'll take this to another level...
Insider Tricks for Flawless Results
The Temperature Rule Nobody Follows
Oil temperature is the single most critical factor. A quick way to test is to drop a small piece of dough into the oil; if it rises to the surface within 30 seconds, the oil is ready. If it sinks, increase the heat slightly. This simple trick ensures a crisp exterior every time.
Why Your Nose Knows Best
Before you start frying, inhale the aroma of the toasted sesame seeds. A strong, nutty scent is a good indicator that the seeds are freshly toasted. If the scent is muted, toast them again for a few minutes until they’re fragrant.
The 5-Minute Rest That Changes Everything
After shaping the balls, let them rest in a lightly oiled bowl for 5 minutes. This allows the dough to relax, making it easier to handle during frying. A short rest also helps the filling set slightly, reducing the chance of leakage.
The Secret of Even Coating
When rolling the sesame seeds, tap the dough lightly on the counter to remove excess seeds. A thick coat is great, but a heavy layer can cause uneven cooking. Aim for a fine, even dusting that clings to the surface.
The Quick Cooling Trick
After draining, place the balls on a rack over a sheet of parchment. This prevents condensation from forming on the surface, which can make the crust soggy. Let them cool for a minute or two before serving.
Creative Twists and Variations
This recipe is a playground. Here are some of my favorite ways to switch things up:
Crunchy Coconut Surprise
Replace the sesame seeds with toasted shredded coconut for a tropical twist. The coconut adds a chewy texture and a hint of sweetness that pairs beautifully with the red bean paste.
Chocolate Covered Bliss
After frying, dip the balls in melted dark chocolate. Let them set on parchment paper. The chocolate coating creates a rich, indulgent experience that’s perfect for dessert.
Spiced Red Bean Fusion
Add a pinch of ground ginger or cinnamon to the red bean paste. The warm spices elevate the flavor profile, giving the balls a comforting, aromatic quality.
Lemon Zest Twist
Grate a small amount of lemon zest into the dough before kneading. The citrus brightens the flavor and balances the sweetness of the filling.
Savory Sesame Balls
Swap the sweet red bean paste for a savory mixture of minced garlic, scallions, and a touch of soy sauce. These savory balls are a great accompaniment to tea or as a snack during a game night.
Gluten-Free Option
Use a 1:1 blend of rice flour and tapioca flour to replace the glutinous rice flour. The texture remains chewy, and the balls stay gluten-free without sacrificing flavor.
Storing and Bringing It Back to Life
Fridge Storage
Store cooked balls in an airtight container in the refrigerator for up to 3 days. The dough will firm up slightly, but the texture remains enjoyable. If you notice the balls have dried out, sprinkle a few drops of water on them before reheating.
Freezer Friendly
Freeze the balls in a single layer on a parchment-lined tray before transferring them to a freezer bag. They can be stored for up to 2 months. When ready to eat, reheat them directly from frozen.
Best Reheating Method
Reheat frozen or refrigerated balls in a 350°F oven for 8–10 minutes, or in a skillet with a small amount of oil for 2–3 minutes per side. Adding a splash of water before reheating creates steam that restores the chewy interior.