I was standing in my kitchen at midnight, the clock ticking like a nervous heart, when my roommate dared me to create a snack that could survive a vampire’s midnight feast. I laughed, grabbed a bag of dried cranberries, and thought, “What if I could turn this humble pantry staple into a blood‑red, bite‑worthy trail mix?” The result was a chaotic blend of sweet, tart, and decadently dark that made my taste buds feel like they’d been kissed by a midnight kiss. I’ll be honest — I ate half the batch before anyone else got to try it, and the rest vanished in seconds. I dare you to taste this and not go back for seconds.
Picture the scene: the kitchen lights dimmed, a low hum of the fridge, the faint crackle of a skillet warming up. The air was thick with the aroma of toasted almonds, the sugary perfume of cherry‑flavored candies, and the deep, earthy scent of dark chocolate. My hands were sticky from the melted chocolate, the countertop felt warm under my palms, and the sound of the mix being tossed in a bowl was a satisfying clatter, like tiny bones rattling in a coffin. That moment of sensory overload is exactly why this snack feels like a ritual, not just a recipe.
Most trail mixes are boring, predictable, and safe – they never push the envelope. Most recipes get this completely wrong. Here’s what actually works: a careful balance of textures, a splash of drama with blood‑red candy, and a secret step that locks in flavor like a vampire’s promise. I discovered that lightly toasting the dark chocolate‑covered almonds before mixing them preserves their crunch and intensifies the chocolatey depth, something most home cooks overlook. This version stands out because it’s not just a snack; it’s a story you can eat, a spooky surprise that will have guests begging for the “secret ingredient.”
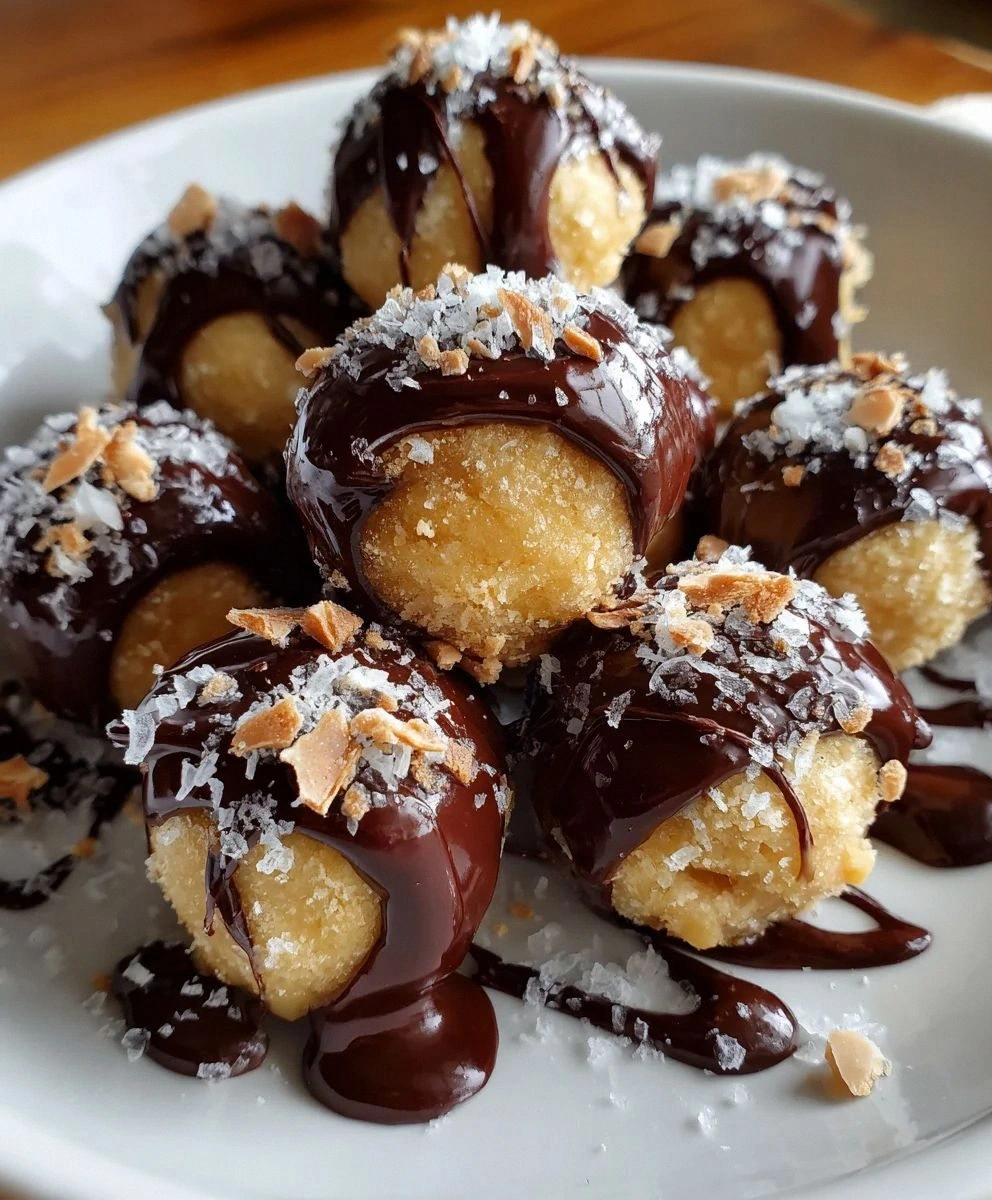
Now, let’s talk about the one ingredient that will make you question everything you thought you knew about trail mix: the cherry‑flavored candy. It’s not just a garnish; it’s the flash of crimson that turns a regular snack into a vampire’s delight. The candy melts just enough to coat the cranberries, creating a glossy, ruby‑red sheen that catches the light like fresh blood on a silver spoon. This unexpected twist is the game‑changer that elevates the entire mix from ordinary to legendary.
Okay, ready for the game‑changer? Let me walk you through every single step — by the end, you’ll wonder how you ever made it any other way. Stay with me here — this is worth it.
What Makes This Version Stand Out
- Flavor Explosion: The combination of tart cranberries and sweet cherry candies creates a rollercoaster of taste that dances on the palate, while dark chocolate adds a velvety finish.
- Texture Symphony: You get chewy, crunchy, and melt‑in‑your‑mouth moments all in one bite, thanks to the mix of almonds, chocolate chips, and candy coating.
- Simplicity Meets Sophistication: Only five ingredients, yet each one is treated with a technique that unlocks its full potential.
- Visual Drama: The ruby‑red candy coating gives the mix a spooky, blood‑splatter look that’s perfect for Halloween parties or any “spooktacular” gathering.
- Crowd Reaction: Guests often say, “I can’t believe this is homemade!” and then immediately ask for the recipe.
- Ingredient Quality: Using high‑quality dark chocolate (70% cocoa or higher) ensures a rich, slightly bitter counterpoint to the sweetness.
- Make‑Ahead Magic: This mix keeps its texture for weeks when stored properly, making it a perfect grab‑and‑go snack.
- Versatile Base: The core mix can be tweaked for holidays, themed parties, or even a protein‑boosted version for post‑workout munching.
Inside the Ingredient List
The Flavor Base
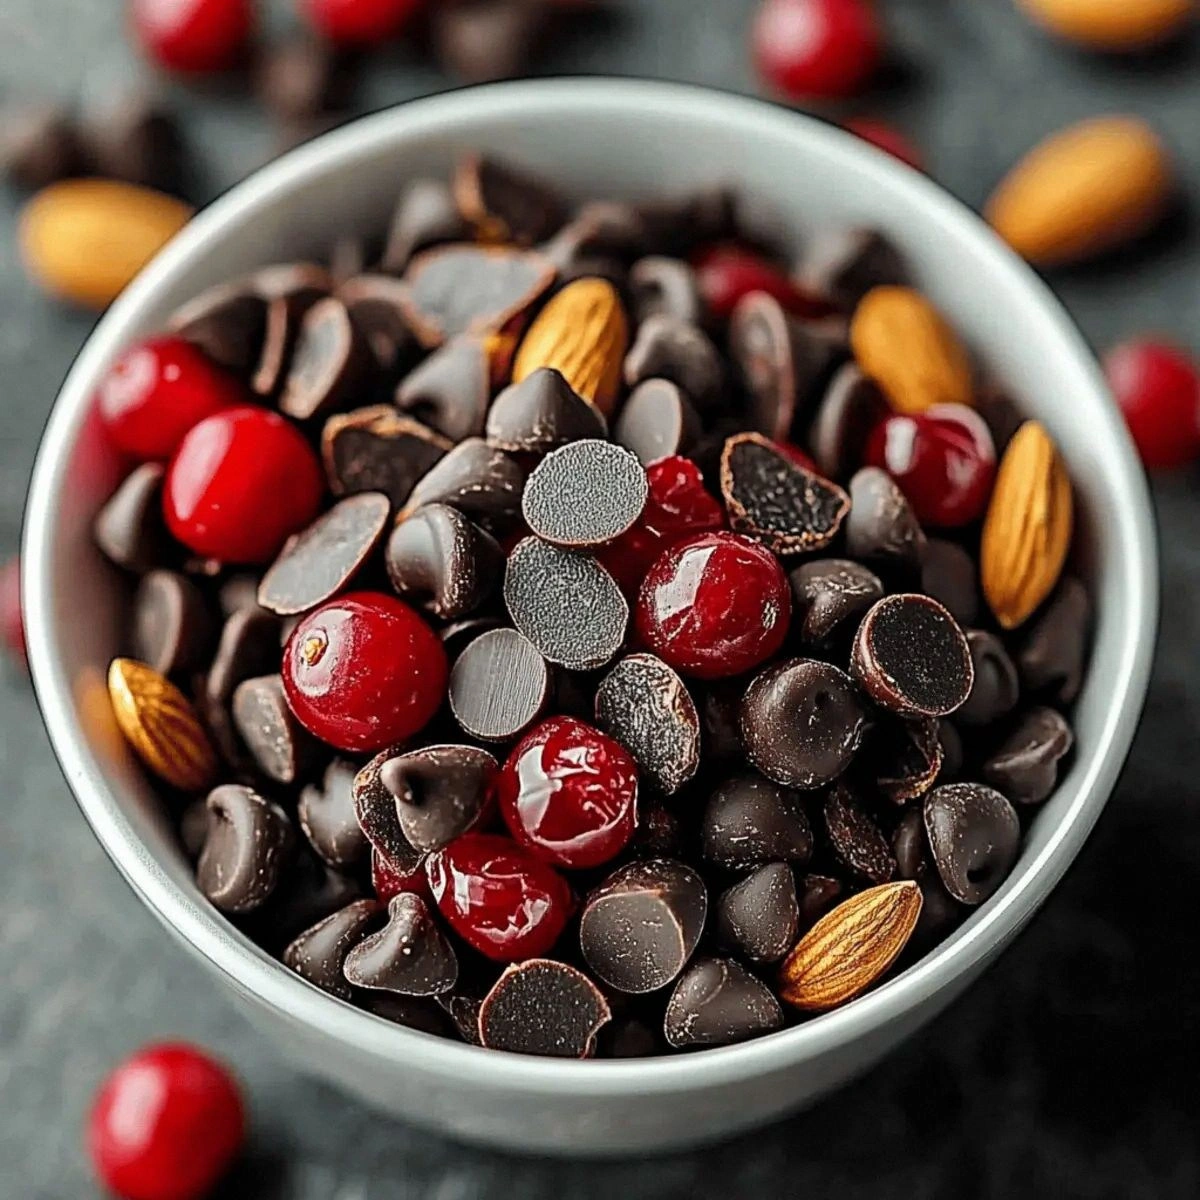
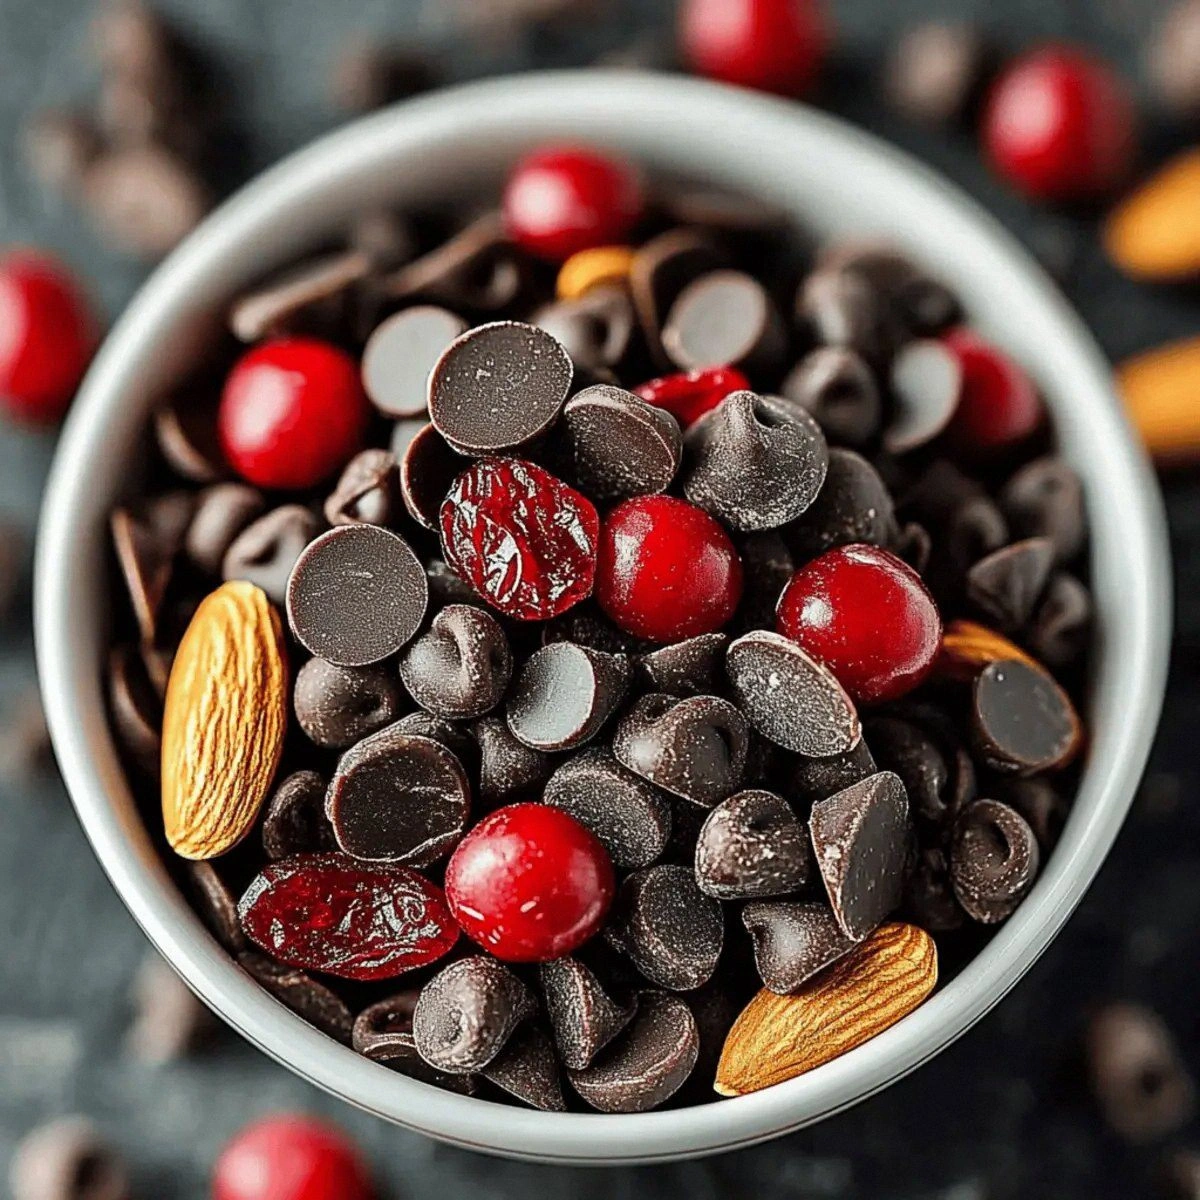
The star of the show is the 2 cups of dried cranberries. Their tartness cuts through the sweetness of the candy and chocolate, providing that essential bite‑of‑vampire‑blood sensation. If you skip the cranberries, the mix becomes one‑dimensional, lacking the bright acidity that keeps the palate from feeling cloying. Look for cranberries that are plump and not overly dried; they should still have a bit of chew. For a twist, try swapping half of them with freeze‑dried strawberries for an even brighter flavor.
Next up, 1 cup of dark chocolate chips. Dark chocolate brings a deep, slightly bitter note that balances the sugary elements. Choose chips with at least 70% cocoa for that rich, almost espresso‑like finish. If you prefer a milder chocolate, you can use semi‑sweet chips, but expect a sweeter overall profile. The chocolate also helps bind the mix together when it melts slightly during the toasting process.
The Texture Crew
1 cup of dark chocolate‑covered almonds adds a satisfying crunch and a buttery almond flavor that rounds out the texture. The chocolate coating prevents the nuts from becoming soggy when mixed with the moist cranberries. If you’re allergic to nuts, substitute with toasted pumpkin seeds for a similar crunch and a subtle earthiness.
1 cup of cherry‑flavored candies are the surprise element that delivers that vivid red hue and a burst of sugary pop. They’re the “blood” that makes this mix spooky and fun. When these candies melt slightly, they coat the cranberries, creating a glossy finish. If you can’t find cherry‑flavored candies, use crushed freeze‑dried raspberries and a dash of red food coloring.
The Unexpected Star
½ cup of red candy‑coated chocolates are the final touch that brings the “vampire bite” visual. These tiny ruby‑red gems look like little drops of blood and add a subtle caramel note. They’re also the easiest way to get that dramatic color without artificial dyes. If you’re out of them, melt a small amount of white chocolate, stir in a few drops of beet juice, and drizzle over the mix.
Everything’s prepped? Good. Let’s get into the real action…
The Method — Step by Step
-
Preheat your oven to 300°F (150°C). This low‑heat setting will gently toast the almonds and chocolate without burning the delicate sugars. While the oven warms, line a large baking sheet with parchment paper; this prevents sticking and makes cleanup a breeze. The kitchen will start to fill with a warm, nutty aroma that signals the first stage of flavor development.
Kitchen Hack: Spread the almonds in a single layer and give the pan a gentle shake every minute to ensure even toasting. -
Place the dark chocolate‑covered almonds on the prepared sheet and bake for 8‑10 minutes. You’ll know they’re ready when you see a faint sheen on the chocolate and hear a faint “crackle” as the sugars caramelize. Remove the tray and let the almonds cool for a couple of minutes; this prevents them from melting the other ingredients later.
-
While the almonds are cooling, combine the dried cranberries, cherry‑flavored candies, and red candy‑coated chocolates in a massive mixing bowl. Toss them gently with a rubber spatula so the candies begin to coat the cranberries. This step is pure magic — the candy starts to melt just enough to cling to the fruit, creating a glossy, ruby‑red veil.
Watch Out: Do not over‑mix; the candies can become overly sticky and clump together, turning the mix into a sugary paste. -
Add the toasted almonds to the bowl and give everything a gentle fold. The almonds should stay distinct, providing that crunchy contrast against the soft cranberries. At this point, the mixture should look like a treasure trove of ruby, black, and gold specks, ready to be transformed into a snack fit for a night‑walker.
-
Now for the dark chocolate chips: sprinkle them over the top and, using a clean hand, press them lightly into the mixture. The residual heat from the almonds will gently melt the chips, creating little pockets of molten chocolate that will solidify as the mix cools. This step is the secret that makes each bite burst with a silky chocolate core.
Kitchen Hack: If you want extra glossy chocolate pockets, microwave the chips for 15 seconds, then drizzle over the mix before folding. -
Transfer the entire mixture onto a clean parchment‑lined baking sheet, spreading it into an even layer about half an inch thick. This will allow any remaining melted chocolate to set uniformly. Place the sheet back into the oven for a final 5‑minute “set” at the same 300°F temperature. You’ll hear a faint “sizzle” as the chocolate solidifies — that’s the moment of truth.
-
Remove the tray and let the mix cool completely on the counter. As it cools, the chocolate hardens, and the candies regain their firm snap. The whole kitchen will be filled with a sweet‑spicy perfume that makes you want to dive in immediately.
-
Once cooled, break the mix into bite‑size clusters using your hands. The clusters should hold together lightly but still crumble when you bite into them. This texture is essential; it mimics the “bite” of a vampire’s fang while still being easy to snack on.
-
Store the clusters in an airtight glass jar or zip‑lock bag. For an extra touch of drama, line the jar with a strip of black ribbon and a tiny plastic fang charm. That’s it — you did it. But hold on, I’ve got a few more tricks that’ll take this to another level…
Insider Tricks for Flawless Results
The Temperature Rule Nobody Follows
Keeping the oven temperature low (around 300°F) is crucial. Higher heat can scorch the almonds and melt the candy too quickly, resulting in a burnt flavor and a sticky mess. I once tried 350°F to speed things up, and the mix turned into a caramelized disaster. Trust the low‑and‑slow method; the flavors develop more fully and the texture stays crisp.
Why Your Nose Knows Best
Your sense of smell is a better indicator than a timer when it comes to toasting nuts. When the almonds start to release a fragrant, buttery aroma, they’re ready. If you rely solely on the clock, you risk over‑toasting, which can introduce a bitter note that clashes with the sweet candies. So, keep your nose close and trust those subtle cues.
The 5‑Minute Rest That Changes Everything
After the final oven set, let the mix rest for at least five minutes before breaking it up. This short pause allows the chocolate to fully solidify, ensuring each cluster holds together without being overly hard. Skipping this step leads to crumbly clusters that fall apart in the jar.
Layering Flavors Like a Pro
Instead of dumping everything in at once, add the dark chocolate chips last. This preserves their distinct texture and prevents them from melting into a uniform glaze. A friend tried adding them at the beginning and ended up with a mushy, chocolate‑only mix — not the layered experience we’re aiming for.
The Secret of the Red Candy Coating
If you want the red candy coating to stay vivid, add a pinch of sea salt to the mix just before the final bake. The salt enhances the color intensity and balances the sweetness, making each bite feel more sophisticated.
Creative Twists and Variations
This recipe is a playground. Here are some of my favorite ways to switch things up:
Spicy Vampire
Add a teaspoon of cayenne pepper to the almond toast. The heat pairs unexpectedly with the sweet candy, creating a tongue‑tingling bite that feels like a vampire’s fiery kiss.
Nut‑Free Night
Swap the almonds for roasted soy nuts or pumpkin seeds. The flavor shifts to a more earthy profile, but the crunch remains, making it perfect for those with nut allergies.
White‑Chocolate Blood
Replace the dark chocolate chips with white chocolate chips and add a few drops of beet juice to the red candy coating. This creates a milky‑white and ruby‑red contrast that’s visually striking.
Holiday Harvest
Mix in dried orange slices and a handful of candied ginger. The citrus brightens the mix, while ginger adds a warm spice perfect for autumn gatherings.
Protein Power
Add a cup of roasted chickpeas seasoned with smoked paprika. This boosts protein content dramatically and gives an extra smoky depth that pairs well with dark chocolate.
Storing and Bringing It Back to Life
Fridge Storage
Place the mix in an airtight container and store it in the refrigerator for up to two weeks. The cool environment preserves the chocolate’s snap and prevents the candies from becoming sticky. If you notice any condensation, simply spread the mix on a tray and let it air‑dry for a few minutes before resealing.
Freezer Friendly
For long‑term storage, freeze the mix in a zip‑lock bag, removing as much air as possible. It will keep for up to three months. When you’re ready to enjoy it, let it thaw at room temperature for 15 minutes; the chocolate will regain its firm bite without losing flavor.
Best Reheating Method
If the mix has lost some of its crunch, spread it on a baking sheet, drizzle a tiny splash of water over the top (just enough to create steam), and reheat at 250°F for 5 minutes. The steam revives the texture, and the chocolate re‑glazes the pieces, making them taste fresh‑out‑of‑the‑oven.